Overview
NOTE: All users must belong to at least one group.
This topic describes how administrators can do the following:
Create a group
Assign users to groups
Assign a role to a group which will be applied to all the group’s users.
Creating a New Group
To create a new group, do as follows:
From the home page, click Admin. The Organization Administration screen is displayed.
In the System area, click Groups. The Org Groups screen is displayed showing a table of all the current groups in the organization.
In the Add Group dialog box alongside the table, provide a name and description of the new group and click Add. The new group will be displayed in the Groups table.
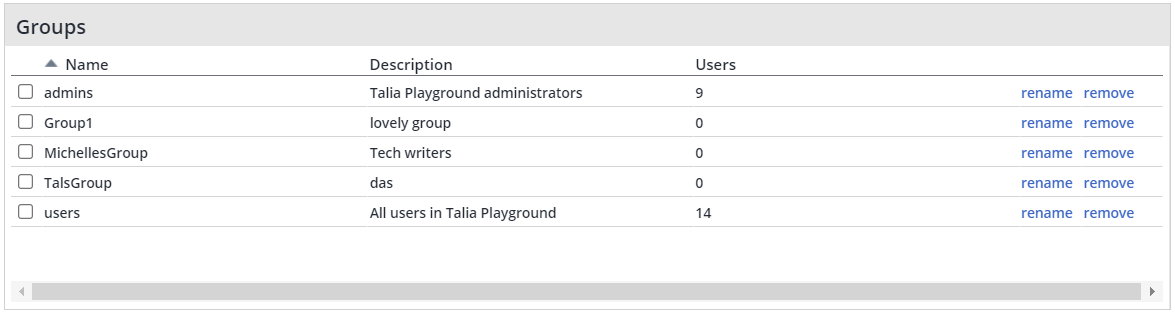
The Groups Table
The Groups table displays the following information on each group:
Name: The name of the group.
Description: The email address of the user
Users: The number of users in the group.
rename link: Click to provide a new name for a selected group.
remove link: Click to remove a selected group from the table.
Assigning Users to Groups
To assign a user(s) to a group, do as follows:
Select the relevant group in the Groups table, and click Add Users.
The Add Users to Group screen opens, displaying a list of all the users in the organization with their email addresses.Select the user(s) that you want to add to the group and click OK.
The group and its members will be displayed under the Groups table.
To add more users, click Add Users.
To remove a user from the group, select the user and click Leave Group.
Assigning a Role to a Group
After assigning all relevant users to a particular group, you can assign a role to the group which will apply the required permissions to all its users. For details of the different assignment roles, see /wiki/spaces/MEND/pages/2524156888.
To assign a role to a group, do as follows:
In the System area of the Organization Administration screen, click Assignments.
The Assignments screen opens listing all the current assignments.Click the expand link next to the role you want to assign to your group.
In the Group area, click the Assign button.
In the Edit Groups dialog that opens, select the group to which you are assigning the role and click OK.
The Group Roles area will display the newly assigned group role.