
Overview
Note for Dedicated Instance customers
This integration is not supported for customers on a WhiteSource Dedicated Instance. Customers on a dedicated instance should use the WhiteSource for GitHub Enterprise integration.
WhiteSource for GitHub.com is a GitHub app which is part of WhiteSource Developer Integrations, that continuously scans your repositories and alerts on security vulnerabilities. It also includes continuous automated security remediation with WhiteSource Remediate, using fix Pull Requests. The app can be installed from here.
WhiteSource for GitHub.com detects all open source components in your software, without ever scanning your code.
Prerequisites
Access to a working WhiteSource Application and a user with Admin privileges (either Organization or Product Admin).
The Issues tab must be enabled for each repository. Do as follows for each repository requiring a scan:
Go to the relevant GitHub repository, and click Settings.
Verify that the Issues checkbox is enabled.
Check that the Issues tab appears next to the Code tab.
You must have administrator permissions to your GitHub account and to the relevant repositories (owner credentials) in order to install the WhiteSource for GitHub.com app.
Python support: The default Python version supported is 3.7.12. If you have a python project with a version that is not compatible with the default one you can choose one of the following: 2.7.18, 3.6.15, 3.9.9. For this you will need to perform the following procedure:
Add a .whitesource configuration file to your repository. Alternatively, you can apply this globally across your repositories by using the Global Repo Configuration.
Use the configMode parameter and set it to either LOCAL or EXTERNAL.
In the whitesource.config file, add the following:
python.invokePipAsModule=true
python.path=python3.9
python.installVirtualenv=true
NOTE: for
python.pathuse one of the following values:2.7,3.6,3.7,3.8,3.9.
R support: The default CRAN Mirror URL used by the integration is https://cloud.r-project.org/. If you need to change the CRAN Mirror URL, do as follows:
Add a .whitesource configuration file to your repository. Alternatively, you can apply this globally across your repositories by using the Global Repo Configuration.
Use the configMode parameter and set it to either LOCAL or EXTERNAL.
In the whitesource.config file, add the following parameter: r.cranMirrorUrl=<INSERT_URL_HERE>.
If your organization has a limited IP addresses list, please whitelist the following IPs (depending on your WhiteSource environment):
Environment | IPs |
|---|---|
SaaS | 52.45.235.219 52.45.235.219 20.185.237.90 |
SaaS-EU | 52.45.235.219 34.242.146.212 20.185.237.90 |
App | 52.45.235.219 20.185.237.90 20.185.237.90 |
App-EU | 52.45.235.219 137.117.195.137 20.185.237.90 |
Installing WhiteSource for GitHub.com
Installation is done via the following link Click the Install button on the page that opens.
If you have more than one GitHub account then you should initially confirm your installation location by selecting the GitHub account(s) for which you would like to install the WhiteSource for GitHub.com app. Click the Configure link for the relevant account.
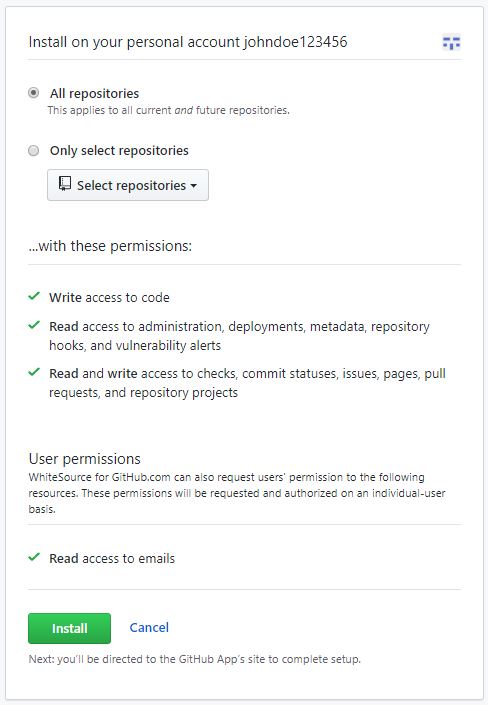
The following screen is displayed for the selected account or in cases where you have only one GitHub account:
If you are integrating multiple repositories and want to apply global configurations, refer here before continuing in this procedure.
Select one of the following options:
All Repositories (Default): An option to scan all the repositories of the account.
Only select repositories: Select specific repositories that you would like to scan.
The app does not scan archived GitHub repositories, since their 'read only' status blocks various actions that are required during the scan.
Read the permissions that must be provided for the WhiteSource for GitHub.com app to work, then click Install.
Registering WhiteSource for GitHub.com
After the installation, the following registration form appears:
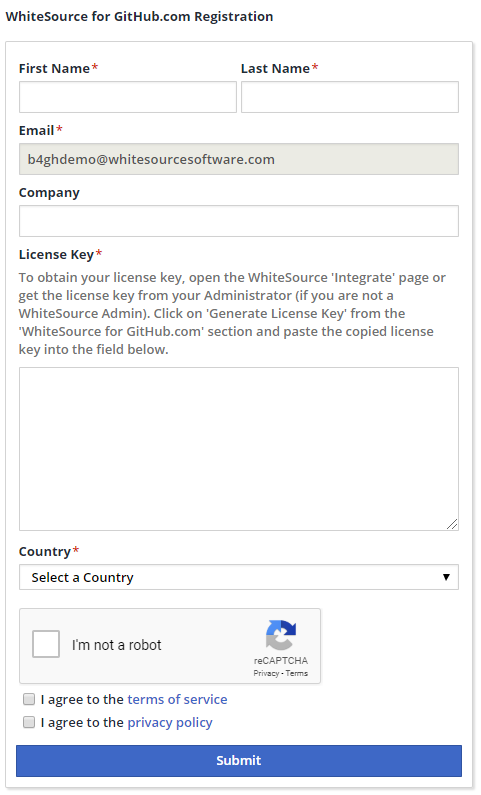
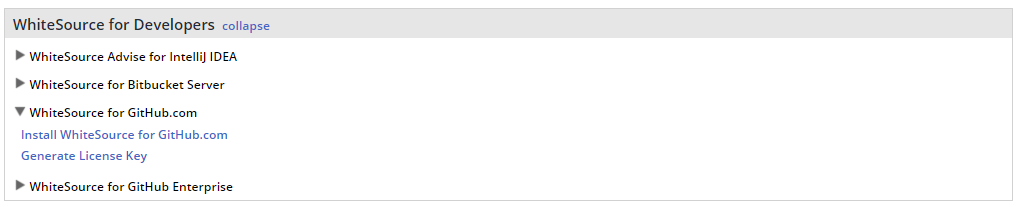
Fill in all the fields of the form. In order to obtain your WhiteSource license key, make sure you are an administrator in WhiteSource and go to the Integrate page of the WhiteSource application, then scroll down until you can view the 'WhiteSource for Developers' heading. Open the WhiteSource for GitHub.com section and click the Generate License Key link below it.
A license key is then displayed and a new Service user is created for this integration inside the WhiteSource Application with a WS prefix. NOTE: Do not remove this Service user and ensure this user remains part of the Admin group.
Copy the license key by clicking the Click to copy link and paste it into the License Key field of the form. Fill in all other fields and click the Submit button.
The license key is valid for 24 hours. You must generate a new license key if you have not submitted the registration form within 24 hours.
After selecting your repositories, an onboarding pull request is created. This pull request contains a WhiteSource configuration file (.whitesource) that can be customized before merging the pull request. The initial PR must be merged to the base branch first. This will then initiate the installation and start the first scan. You can then define further settings (like selected branches) in the .whitesource file.
At this stage, the WhiteSource for GitHub.com app has started scanning your selected repositories. If a vulnerability is detected, then you will receive an email, and an issue will be created in your GitHub's project 'Issues' tab. The scanning process may take a number of minutes.
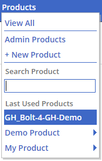
A new product is also created for each repository that was selected for scanning and has the name 'GH_<GitHub repository name>'. For example, if the repository name is 'Bolt-4-GH_Demo' then the following product is created:
The .whitesource File
A WhiteSource configuration file (.whitesource) is added to each repository that is enabled for a scan. It provides configurable parameter(s) for the WhiteSource scan. The .whitesource file is only added in the default branch of the repository (unless modified, it is the master branch). Any configuration change that is done to this file must be in the default branch of the repository.
NOTE: A .whitesource file placed outside the default branch will be ignored
.whitesource file
{
  "scanSettings": {
    "configMode": "AUTO",
	"configExternalURL": "",
	"projectToken": "",
	"baseBranches": []
  },
  "checkRunSettings": {
    "displayMode": "diff",
    "vulnerableCheckRunConclusionLevel": "failure"
  },
  "issueSettings": {
    "minSeverityLevel": "LOW"
  }
}
Parameters
Global Settings
Parameter | Type | Description | Required | Default |
|---|---|---|---|---|
settingsInheritedFrom | String | When the global configuration is enabled, this parameter will specify the location of the whitesource-config repository from which it will inherit its configuration. It must contain the GitHub user name, repository name and branch (optional) of the repo-config.json file location. The default branch is 'master', but can be modified according to the location of the repo-config.json file in the whitesource-config repo. NOTE: You can override specific parameters that are relevant only in the specific repository by adding these after this parameter. Parameters with type of array do not override the value from global configuration, but only add new values. Examples: Using only values defined in the global configuration: "settingsInheritedFrom": "whitesource-config/whitesource-config@master"
"settingsInheritedFrom": "whitesource-config/whitesource-config@master",
"scanSettings": {
  "projectToken": "12345",
  "baseBranches": ["master","integration"]
}
| No | N/A |
overrideConfigAllowList | Array | When the global configuration is enabled, this parameter will regulate the ability of repositories that inherit their configuration from the whitesource-config repository to override the parameters locally. There are three options:
NOTE: This parameter must be used in the repo-config.json file of the whitesource-config repository. | No | null |
Scan Settings (scanSettings)
Parameter | Type | Description | Required | Default |
|---|---|---|---|---|
configMode | String | The configuration mode to be used for each scan. There are three options:
| No | AUTO |
configExternalURL | String | The URL of the external configuration file (you can choose any filename). The configuration file content should be in the same format as the Unified Agent configuration file. The following protocols are supported: 'ftp://', 'http://', 'https://'. For example: 'https://mydomain.com/whitesource-settings/wss-unified-agent.config' NOTES:
| No | Empty |
projectToken | String | Adds the ability to map a GitHub repository to an existing WhiteSource project. The parameter used needs to be the WhiteSource project token. NOTE: Not supported in the Global Configuration. | No | Empty |
baseBranches | Array | Adds the ability to specify one or more base branches for which scanning results will be sent to a new WhiteSource project. Example usage: ["master", “integration"] This will set both master and integration branches as base branches. Note the following:
| No | Empty In this case, the base branch only consists of the default branch. |
enableLicenseViolations | Boolean | When enabled, a new WhiteSource License Check will be generated for each valid push. NOTES:
| No | false |
enableIaC | Boolean | When enabled, a new WhiteSource IaC Check will be generated for each valid push. This will scan cloud infrastructure configurations to find misconfigurations before they are deployed, and alert on these via the creation of issues. NOTES:
| No | false |
enableSAST | Boolean | Enables a SAST scanning if | No | Empty |
Check Run Settings (checkRunSettings)
Parameter | Type | Description | Required | Default |
|---|---|---|---|---|
displayMode | String | How to display WhiteSource security information for a scan performed on a non-base branch:
| No | diff |
vulnerableCheckRunConclusionLevel | String | The app utilizes the GitHub Checks API that provides checks in commits and pull requests on any repository branch. This parameter defines the conclusion status for when a WhiteSource Security Check is completed. When the parameter is set to When the parameter is set to See also Initiating a Merge Policy. | No | failure |
licenseCheckRunConclusionLevel | String | The app utilizes the GitHub Checks API that provides checks in commits and pull requests on any repository branch. This parameter defines the conclusion status for when a WhiteSource License Check is completed. When the parameter is set to 'success', the conclusion status of a WhiteSource License Check will always be 'Success', even if the check fails. This way, any repository member is able to merge a pull request, even if a WhiteSource License Check found license policy violations. When the parameter is set to 'failure' (default), the conclusion status of a WhiteSource License Check will be 'Failure' in cases where WhiteSource License Check found license policy violations or an error occurred during the scan. When this configuration is defined, and a branch protection rule has been added, a policy for approving a pull request is enforced. In this setting, only the administrator of the repository can approve the merging of a pull request that contains one or more checks with a 'Failure' status. See also Initiating a Merge Policy. | No | failure |
iacCheckRunConclusionLevel | String | Customizable commit status settings:
| No | failure |
showWsInfo | Boolean | Whether to show additional WhiteSource information such as the project token inside the WhiteSource Check Run (after the scan token). WhiteSource information is only displayed if the commit originated from a base branch. The following hidden JSON object will also be added inside the Check Run when this parameter is enabled: <!-- <INFO>{"projectToken":"8cd2d2a8651145c087609e0a43f783e95f7008cb908541498348fed529572e01"}</INFO> -->
NOTE: Additional WhiteSource data may be added inside the JSON object in the future. | No | false |
Issue Settings (issueSettings)
Parameter | Type | Description | Required | Default |
|---|---|---|---|---|
minSeverityLevel | String | Enables users to decide whether to open a new GitHub Issue only if a certain severity level is available on a detected vulnerability. Available values for minSeverityLevel:
NOTE: The WhiteSource Security Check summary is also affected by this parameter. | No | LOW |
displayLicenseViolations | Boolean | Whether to generate an Issue for every detected license policy violation. NOTE: This parameter is relevant only if enableLicenseViolations (scanSettings) is set to true. | No | true (only if enableLicenseViolations (scanSettings) is set to true) |
issueType | String | Defines the type of issues that will be created in the repository; VULNERABILITY (one for each vulnerability) or DEPENDENCY (one for each direct dependency). | No | DEPENDENCY |
customLabels | Array | Setting that will define labels that will be added to the issues created after the scan. Usage example: {
"issueSettings": {
"customLabels": ["label1","label2"]
}
}
Following labels are not available for the use:
| No | Empty |
assignees | Array | Setting that will define users that will be assigned to the issues created after the scan. Usage example: {
"issueSettings": {
"assignees": ["user1", "user2"]
}
}
Note: Only users that are Collaborators with access to the repository and push permission can be added | No | Empty |
Remediate Settings (remediateSettings)
Parameter | Type | Description | Required | Default |
|---|---|---|---|---|
enableRenovate | Boolean | When enabled, Remediate will raise automated Pull Requests for outdated dependencies in addition to Pull Requests remediating vulnerable dependencies. Remediate will then perform all the functionality and support all the configuration options available in WhiteSource Renovate. See Renovate configuration options for all configuration options. Refer here for parameter usage. | No | false |
transitiveRemediation | Boolean | This parameter would provide direct fix for transitive vulnerabilities in NPM projects. As transitive remediation for NPM is currently enabeled by default this parameter is no longer requiered. | No | false |
workflowRules | Object | This parameter is used to specify the rules that regulate when to open remediation pull requests. Usage examples: "remediateSettings": {
"workflowRules": {
"enabled": true,
"minVulnerabilitySeverity": "LOW"
}
}
   "remediateSettings": {
    "workflowRules": {
      "enabled": true,
        "minVulnerabilityScore": 1.5,
        "maxVulnerabilityScore": 10
    }
  }
| Yes | "workflowRules": {
"enabled": true
}
|
workflowRules.enabled | Boolean | Enables Workflow Rules being set from a .whitesource file. Note: workflow rules can also be set in the WhiteSource application in the Admin → Integration Workflow Rules. But if this parameter is set to | Yes | true |
workflowRules.minVulnerabilitySeverity | String | The minimal vulnerability severity level to automatically create remediation pull requests for. Allowed values - E.g. if set to Note: if this parameter is used together with minVulnerabilityScore and maxVulnerabilityScore than only minVulnerabilitySeverity will have affect. | No | LOW |
workflowRules.minVulnerabilityScore | Float | The minimal vulnerability CVSS 3 score to automatically create remediation pull requests for. Allowed values - floats with one decimal from 0 to 10. For more information on CVSS 3 Scores, click here. Note: if this parameter is used together with minVulnerabilitySeverity it will not have any effect. | No | 0 |
workflowRules.maxVulnerabilityScore | Float | The maximal vulnerability CVSS 3 score to automatically create remediation pull requests for. Allowed values - floats with one decimal from 0 to 10. For more information on CVSS 3 Scores, click here. Note: if this parameter is used together with minVulnerabilitySeverity it will not have any effect. | No | 10 |
Private Registry Settings (hostRules)
Parameter | Type | Description | Required | Default |
|---|---|---|---|---|
matchHost | String | Defines where the credentials will be applied during the scan. If you want to apply credentials only for a nested path within a host, then write If the same credentials apply to all paths on a host and not on any subdomains, configure Finally, to apply credentials to all hosts within the domain, use a | No | Empty |
hostType | String | Type of private registry. Supported values: Required if | No | Empty |
username | String | Used when credentials consist of username and password. | No | Empty |
password | String | Used when credentials consist of username and password, should be encrypted on this page. Encrypted secret that will be applied as a credential to the host set in the "encrypted": {
"password": "3f832f2983yf89hsd98ahadsjfasdfjaslf............"
}
| No | Empty |
token | String | Used when credentials consist of token, should be encrypted on this page. Encrypted secret that will be applied as a credential to the host set in the "encrypted": {
"token": "3f832f2983yf89hsd98ahadsjfasdfjaslf............"
}
| No | Empty |
Initiating a Scan
A WhiteSource scan is initiated via a valid GitHub push command. A valid push command meets at least one of the following requirements:
One of the commits in the push command added/removed a source file(s) that has an extension supported by WhiteSource.
Refer to the WhiteSource Languages page in order to find out whether or not a specific language and its extensions are supported.One of the commits in the push command includes an addition/modification of the package manager dependency file(s).
Refer to the list of supported dependency files to find out whether your dependency files are supported.
NOTE:
A push command may consist of multiple commits.
You can manually trigger a scan for several repositories at once. Refer the Global Repo Configuration document.
Inventory post-scan
WhiteSource continuously researches new vulnerabilities and updates its vulnerability database with these findings. In order that these newly-discovered vulnerabilities be reflected in projects a soon as possible, WhiteSource initiates a post-scan process for all integrated projects at 01:00 UTC and opens new issues for vulnerabilities that were added to the database in the previous 24 hours.
This is an automated procedure, and no action from the user is required.
Viewing Details of the Scan
Results can be viewed in the following places:
The Issues tab within the GitHub project
The WhiteSource Security/License/IaC Check within the GitHub project's Commits tab
The WhiteSource UI
Via email notifications
Viewing the Issues Tab
If you are performing Pull Requests or push commands via the Web browser, refresh your Web browser in order to view the issues that were generated by WhiteSource. NOTE: It may take a number of minutes for the issues to be scanned and displayed after a valid push command is initiated.
The Issues tab displays all the issues that the WhiteSource Integration detected with the red security vulnerability label. This proprietary label indicates a security vulnerability was detected by WhiteSource.
As part of your workflow, you have the option to add a relevant label(s) to specific issues, and close issues that were resolved.
Issues that were manually closed will not be re-opened during future WhiteSource scans unless their label and/or name have been manually changed or changed via the GitHub API.
Viewing Details of an Issue
See here for more information.
Viewing WhiteSource Security Checks
Status Check indicators are displayed for each head commit on the Commits sub-tab of the Code tab. Clicking a specific indicator opens a pop-up window that displays further details on the status:

Clicking the Details link in the popup window displays the WhiteSource Security Check page for the selected head commit. The page includes the conclusion status of the head commit along with a Security Report.
The security report displays all the vulnerabilities that were found in descending order according to the severity and CVSS score. The following information is displayed for each vulnerability:
CVE: A link to the related CVE page for the vulnerability. Displayed in a collapsible format (click the arrow to expand/collapse for more information regarding the vulnerability).
Severity: Overall score of the severity (High, Medium or Low).
CVSS Score
Vulnerable Library
Suggested Fix
Issue: A link to the WhiteSource issue that was generated for the vulnerability.
Types of Indicators
The following status indicators are available as feedback on a head commit:
Queued: Scan has not begun and is scheduled to begin.
In progress: Scan is in progress.
Completed: Scan completed with one of the following conclusions:
Success: When the parameter 'vulnerable.check.run.conclusion.level' is set to 'success', the status of the head commit is always success A 'Success' status is displayed for the commit even when it fails.
Failure: Default for all completed scans. When the parameter 'vulnerable.check.run.conclusion.level' is set to 'failure' (default), the status of a 'failed' head commit is 'failure', and a policy for approving merging pull requests that include failed head commits with the another branch in the repository is enforced. Note that a 'failed' status can be caused due to security vulnerabilities or due to an error that occurred during the scan.
Neutral: Conclusion occurs when the push command was not valid.
Samples of Check Status Indicators
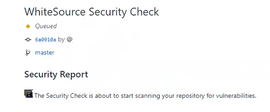
Queued
The following is a sample of a 'Queued' status, which indicates that the security check is about to start scanning the head commit's vulnerabilities.
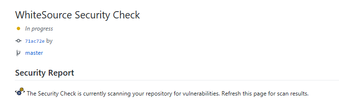
In Progress
The following is a sample of an 'In-Progress' status, which indicates that the security check is currently scanning the head commit.
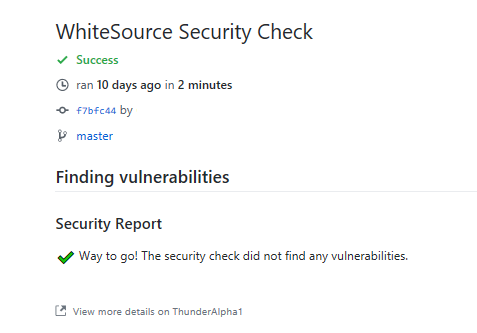
Completed with Success Conclusion
This status can be displayed in two scenarios:
When the parameter 'vulnerable.check.run.conclusion.level' is set to 'success' or 'failure', and a 'success' status is provided for the scan, since no vulnerabilities were found and no errors occurred during the scan for this head commit. In this case, the merging of a pull request that includes this commit to another branch in the repository is automatically approved.
When the parameter 'vulnerable.check.run.conclusion.level' is set to 'success'. In this configuration, even a 'failed' status for a head commit's scan is converted to 'success'. In this case, the merging of a pull request that includes this head commit to another branch in the repository is automatically approved.
The following screenshot displays a 'success' indicator for a commit that includes an error that occurred during the scan, since the parameter 'vulnerable.check.run.conclusion.level' is set to 'success'. In this case, the merging of a pull request that includes this head commit to another branch in the repository is automatically approved.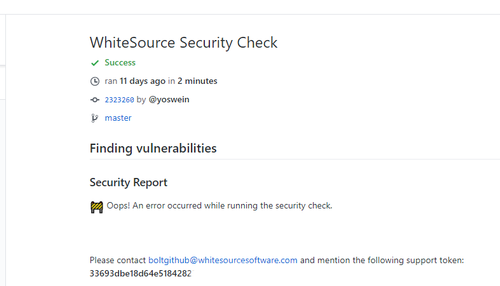
Completed with Failure Conclusion
When the parameter 'vulnerable.check.run.conclusion.level' is set to ''failure', all head commits that fail the scan due to the security check or due to an error that occurred during the scan display a 'failure' status. In this case, only the administrator of the repository can approve merging a pull request that includes this head commit to another branch in the repository, and therefore, it will not be automatically merged.
The following screenshot is a sample of the display in a pull request page when a 'failure' policy is enforced and one or more of its head commits have a 'failure' status. Only the administrator of the repository can approve the merging of a pull request with a 'failure' status:
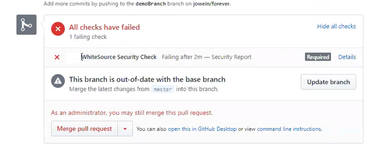
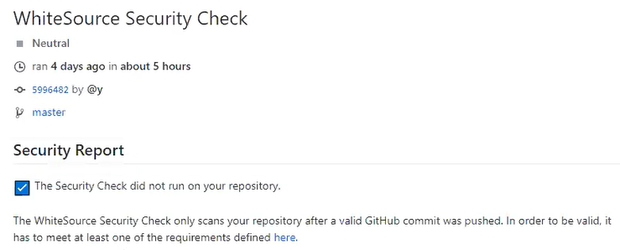
Completed with Neutral Conclusion
A neutral conclusion occurs in the following scenario:
The push command was not valid. See the Initiating a Scan section for more information on valid commands.
Viewing WhiteSource License Checks
In the Code > commits page you can view the status and results of each scan. Click a specific check icon in order to view the WhiteSource check.
Types of Indicators
The following commit status indicators are available as feedback on the head commits:
Success: No license policy violations were detected.
Failed: One or more license policy violations were detected during the WhiteSource scan.
Viewing WhiteSource IaC Checks
In the Code > commits page you can view the status and results of each scan. Click a specific check icon in order to view the WhiteSource check.
Types of Indicators
The following commit status indicators are available as feedback on the head commits:
Success: No license policy violations were detected.
Failed: One or more license policy violations were detected during the WhiteSource scan.
Supported Configuration Files
Terraform, CloudFormation, Kubernetes, ARM Templates, Serverless, and Helm
Viewing Details in the WhiteSource UI
In the WhiteSource UI, WhiteSource projects will have the same name as the corresponding GitHub repository, with a "GH_" prefix, unless otherwise specified in the .whitesource file using a project token.
The name of the WhiteSource product will be your GitHub username preceded by "GH_".
Email Notifications
After a WhiteSource scan is performed, a separate email message is sent for each generated Issue, with information on the vulnerability or license policy violation that was detected.

NOTE: The information in the email message is identical to the displayed information on the Issues tab.
Initiating a Merge Policy
Overview
A merge policy utilizes the app's integration with GitHub Checks API. It enables the repository's administrator to approve the merging of a pull request with 'Failed' commit statuses to a target branch in the repository.
For more information on Checks API, see the related GitHub Checks API introduction page.
NOTE: This integration supports merge policies for PRs created either from a branch in the same repository or originating from a different repository.
Adding a Branch Protection Rule
In order to enable a merge policy based on the conclusion of a WhiteSource Security Check, you must initially add the following GitHub rule for branch protection:
Go to the repository Settings > Branches.
Click Add Rule.
Apply the rule to a specific branch or enter '*' to apply the rule to all branches.
Select the Require status checks to pass before merging checkbox.
If you cannot view this setting, then modify the '.whitesource' file, and perform a commit. Wait for the scan to complete and then refresh the GitHub settings page until you can view this setting.
Handling Private Registries and Authenticated Repositories
Private registries hosted on any platform that can be accessed with credentials are supported (Nexus, Artifactory, JFrog, etc.)
Supported languages and package managers:
NPM
Yarn
Maven
Gradle
PIP
Go
Nuget
Ruby
In order to scan dependencies from private registries and authenticated repositories, WhiteSource must be provided with credentials, such as an NPM token. These credentials must be added as encrypted secrets to the .whitesource file, either per-repository or in the shared global config, if the secret scope is org-wide.
To create the encrypted secrets, please follow this link. Each secret you encrypt must be scoped to a GitHub organization or repository and use of it will be restricted to those within the app. There are the following fields on the encryption page:
Organization\Group - required, your GitHub organization to which tokens secret be scoped.
Repository - optional, your GitHub repository to which secret should be scoped.
Raw value - required, confidential values/secrets such as tokens or passwords.
Encrypted value - the result of the encryption to be used in the integration.
After the secret is created, please add it to the hostRules parameter of the .whitesource file.
Example of hostRules:
{
"hostRules": [
{
"matchHost": "registry.npmjs.org",
"hostType": "npm",
      "encrypted": {
        "token": "3f832f2983yf89hsd98ahadsjfasdfjaslf............"
      }
},
{
"matchHost": "https://custom.registry.company.com/maven/",
"hostType": "maven",
"username": "bot1",
"encrypted": {
"password": "p278djfdsi9832jnfdshufwji2r389fdskj........."
}
}
]
}
We use asymmetric public-key cryptography of the PGP methodology. There is a public key on the page we provided for encrypting secrets from passwords or tokens. This public key has a related private key secured by WhiteSource. The private key is used to decrypt secrets created with the public key. In this way, only the holder of the private key (WhiteSource in this situation) can have access to the encrypted contents. Organization/Group, Repository, Raw Value - all information you provide on the encryption page is secured with this approach.
NOTE:
The private registry settings hostRules should be added to the repo-config.json.
The 'organization/group' field on the encrypt config should match the GitHub organization name to which you have onboarded WhiteSource.
NOTE: Go private registries have the following limitations:
Only HTTPS is available for
matchHost.If the private registry is hosted on GitHub, only
tokencan be used in theencrypted(i.e.,passwordis not supported).
SAST Scanning
WhiteSource SAST is a SAST (Static Application Security Testing) solution for performing deep and extensive security analysis of application source code. The solution provides an excellent way to automate code inspection as an alternative to the demanding and time-consuming procedure of manual code reviews. More details about this product are in the dedicated documentation. This section explains how to use SAST scanning in the WhiteSource for GitHub.com. Refer to the WhiteSource SAST documentation for more details.
Setting up
To enable SAST Scanning in WhiteSource for GitHub.com your organization has to have access to the WhiteSource SAST Dashboard (ask your Sales Manager about enabilig this feature)
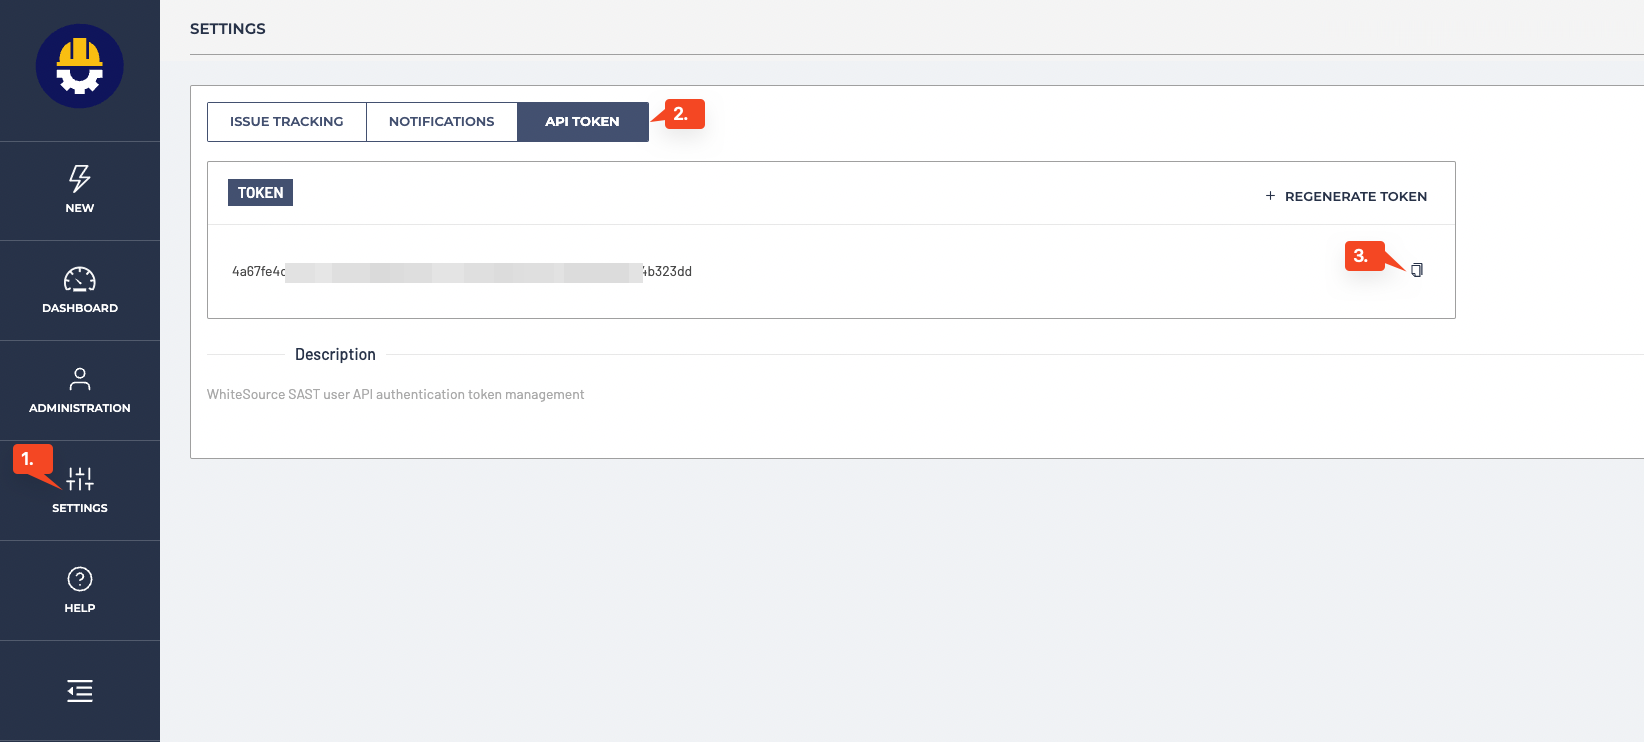
In the SAST Dashboard go to Settings tab of the menu column on the left and open “API Token” section. Generate a token if needed and copy it.
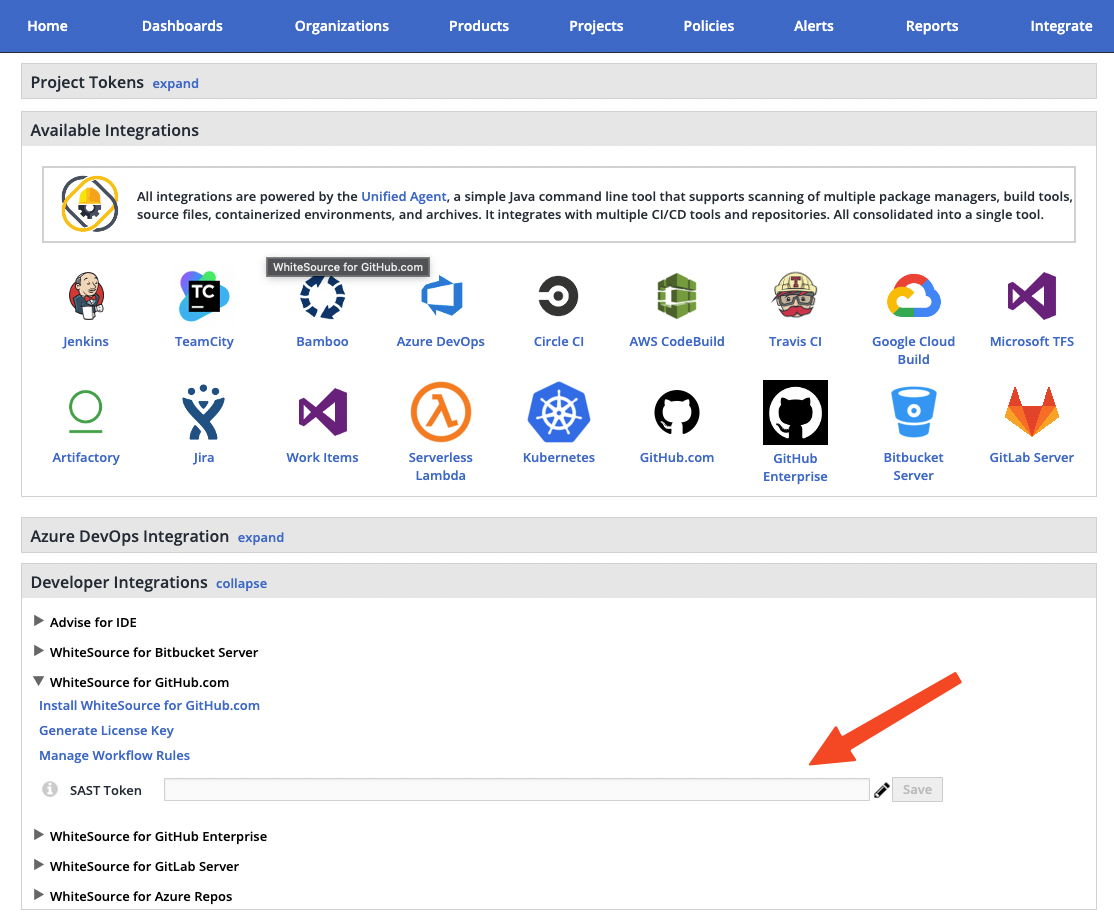
Make sure you are an administrator in WhiteSource and go to the Integrate page of the WhiteSource application, then scroll down until you can view the 'WhiteSource for Developers' heading. Open the WhiteSource for GitHub.com section and paste the copied API Token to “SAST Token” field and Save.
Set to
truethe enableSAST parameter in all repositories for which you want to enable SAST scanning (either in .whitesource file or repo-config.json).
Scanning and viewing results
A SAST scan is initiated
Automatically once in 3 hours
By clicking the checkbox in the SAST issue to manually trigger a scan

See here for information on the issue created for code security findings.
Note: Only base branches can be scanned with WhiteSource SAST.
Uninstalling
To uninstall this app, do the following:
In your GitHub's account settings, go to the Applications section.
Next to the WhiteSource for GitHub.com app, click on Configure. The WhiteSource for GitHub.com page is displayed.
Scroll down in order to view the Uninstall WhiteSource for GitHub.com button.
Click on the Uninstall button. Uninstalling WhiteSource for GitHub.com removes it from all your repositories.
Optionally, go to the Authorized GitHub apps tab, and next to the WhiteSource for GitHub.com app., click Revoke