Overview
This page provides step-by-step instructions on how to run the Unified Agent from Azure DevOps Services.
NOTE: Before you begin, make sure that the relevant package manager is installed. For details, see https://whitesource.atlassian.net/wiki/spaces/WD/pages/1140852201/Getting+Started+with+the+Unified+Agent#Prerequisites.
Unified Agent Configuration
The below integration uses environment variables to configure the Unified Agent so that the default configuration values are used.
For more information, see the following articles
Getting Started with the Unified Agent
https://whitesource.atlassian.net/wiki/spaces/WD/pages/1544880156/Unified+Agent+Configuration+Parameters#Configuring-the-Unified-Agent-by-Environment-Variables
Setting up Your Build Pipeline
Go to Pipelines > Builds > New > New Build Pipeline.
Select the source for your code. You can create a pipeline using YAML (Option 1), or use the classic editor to create a pipeline without YAML (Option 2).
Option 1: Creating a Pipeline Using YAML
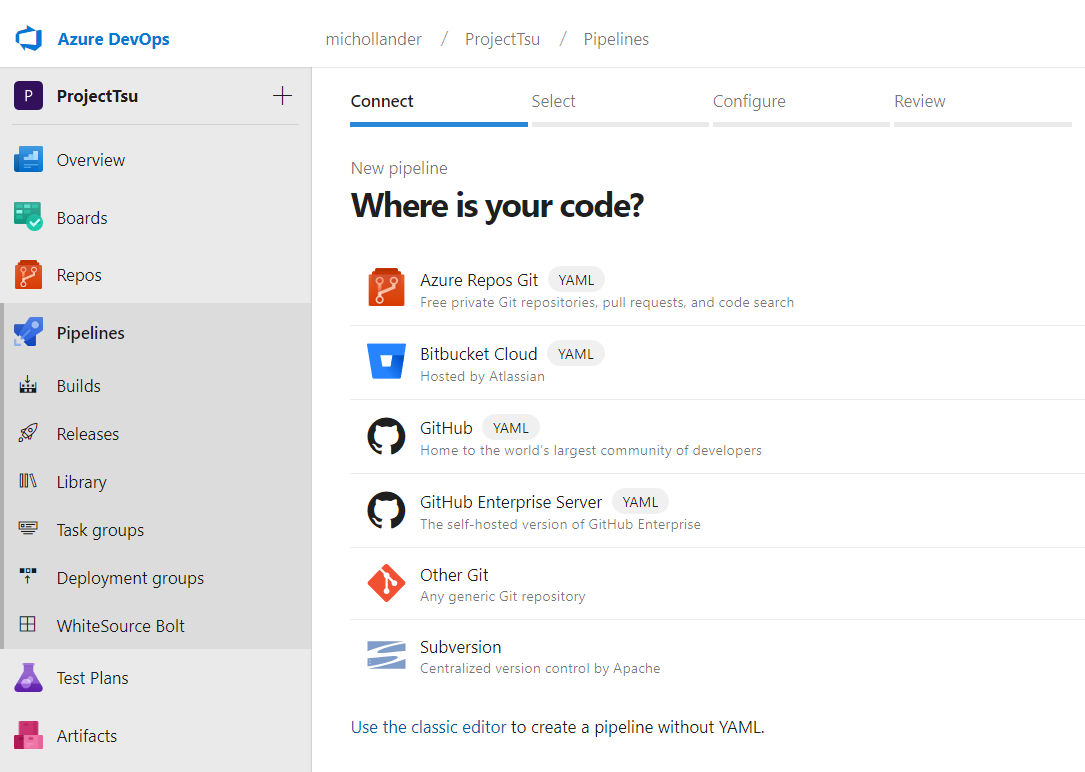
In the Where is your code? screen, select a YAML-enabled option.
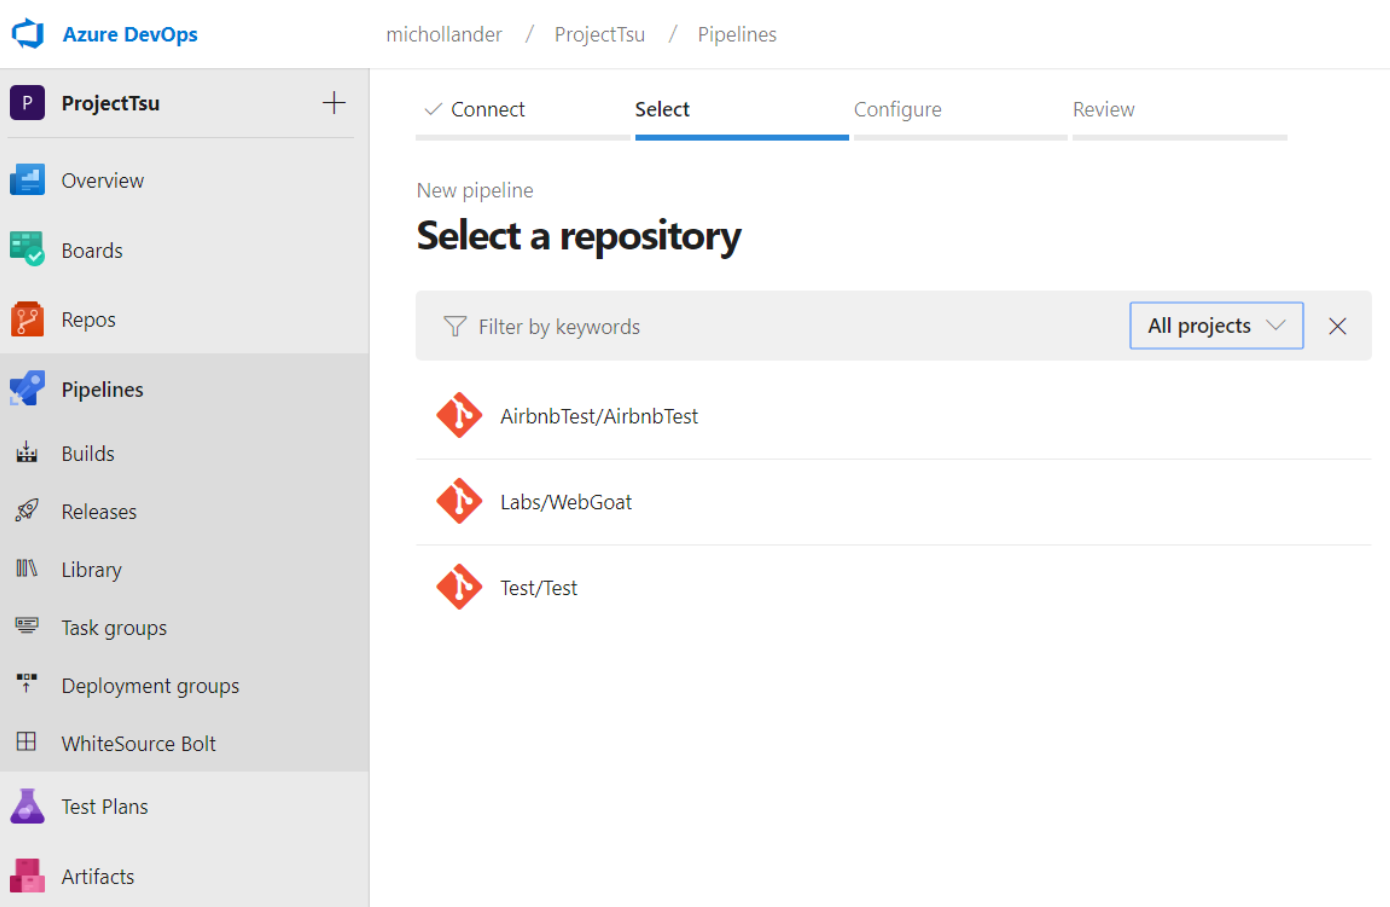
In the Select a repository screen, select your repository.
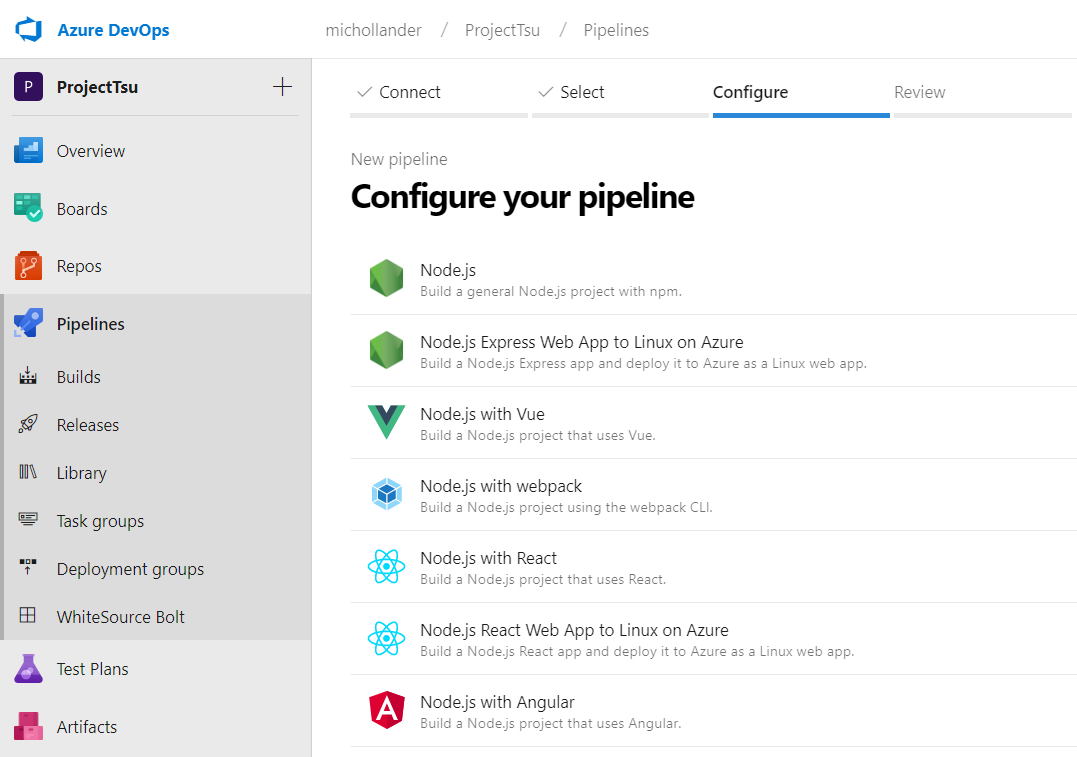
In Configure your pipeline, select the relevant pipeline configuration.
In Review your pipeline YAML, add the following text as a post-build step. This activates the WhiteSource integration on your build pipeline.
- script: |
    curl -LJO https://unified-agent.s3.amazonaws.com/wss-unified-agent.jar
    echo Unified Agent downloaded successfully
    java -jar wss-unified-agent.jar
  env:
    WS_APIKEY: $(APIKEY)
    WS_USERKEY: $(USERKEY)
    WS_WSS_URL: $(WSS_URL)
    WS_PRODUCTNAME: AZDO_$(System.TeamProject)
    WS_PROJECTNAME: $(Build.Repository.Name)_$(Build.SourceBranchName)
  displayName: 'WhiteSource Unified Agent Scan'
Add environment variables for APIKEY, USERKEY, and WSS_URL, as described by the Microsoft documentation, https://docs.microsoft.com/en-us/azure/devops/pipelines/process/variables?view=azure-devops&tabs=yaml%2Cbatch
Click Save and run.
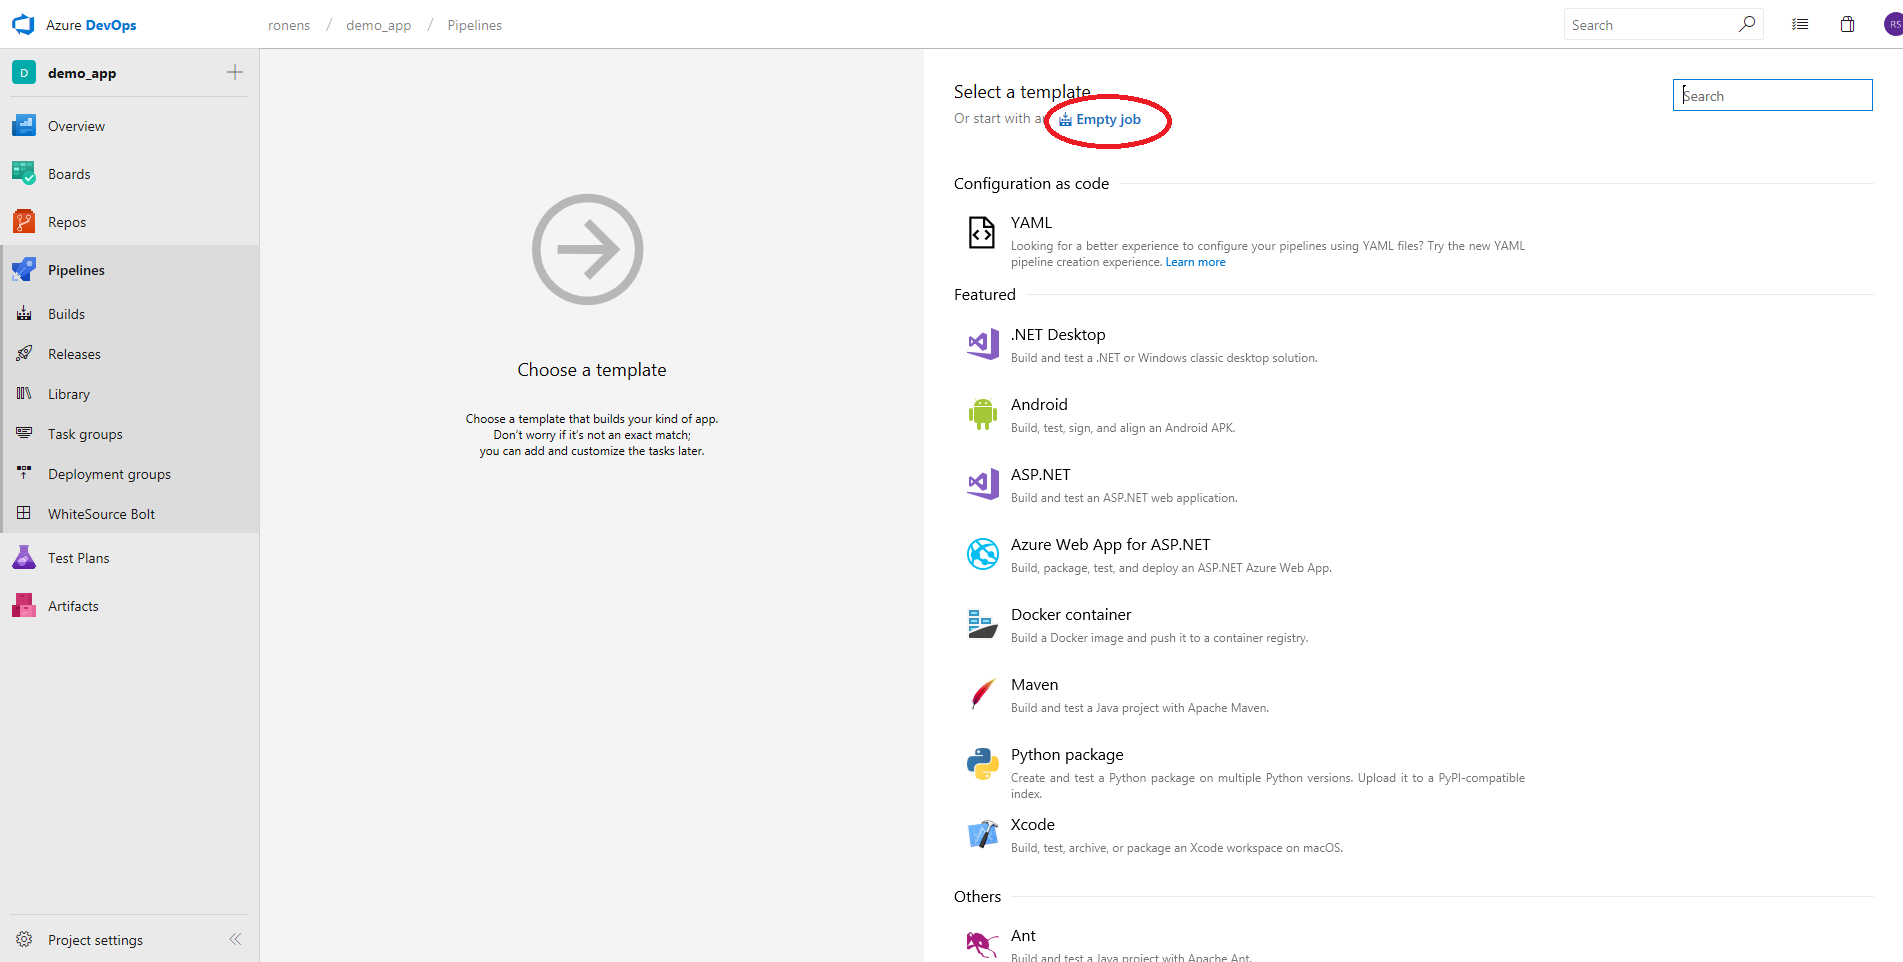
Option 2: Creating a Pipeline Without YAML (Classic Editor)
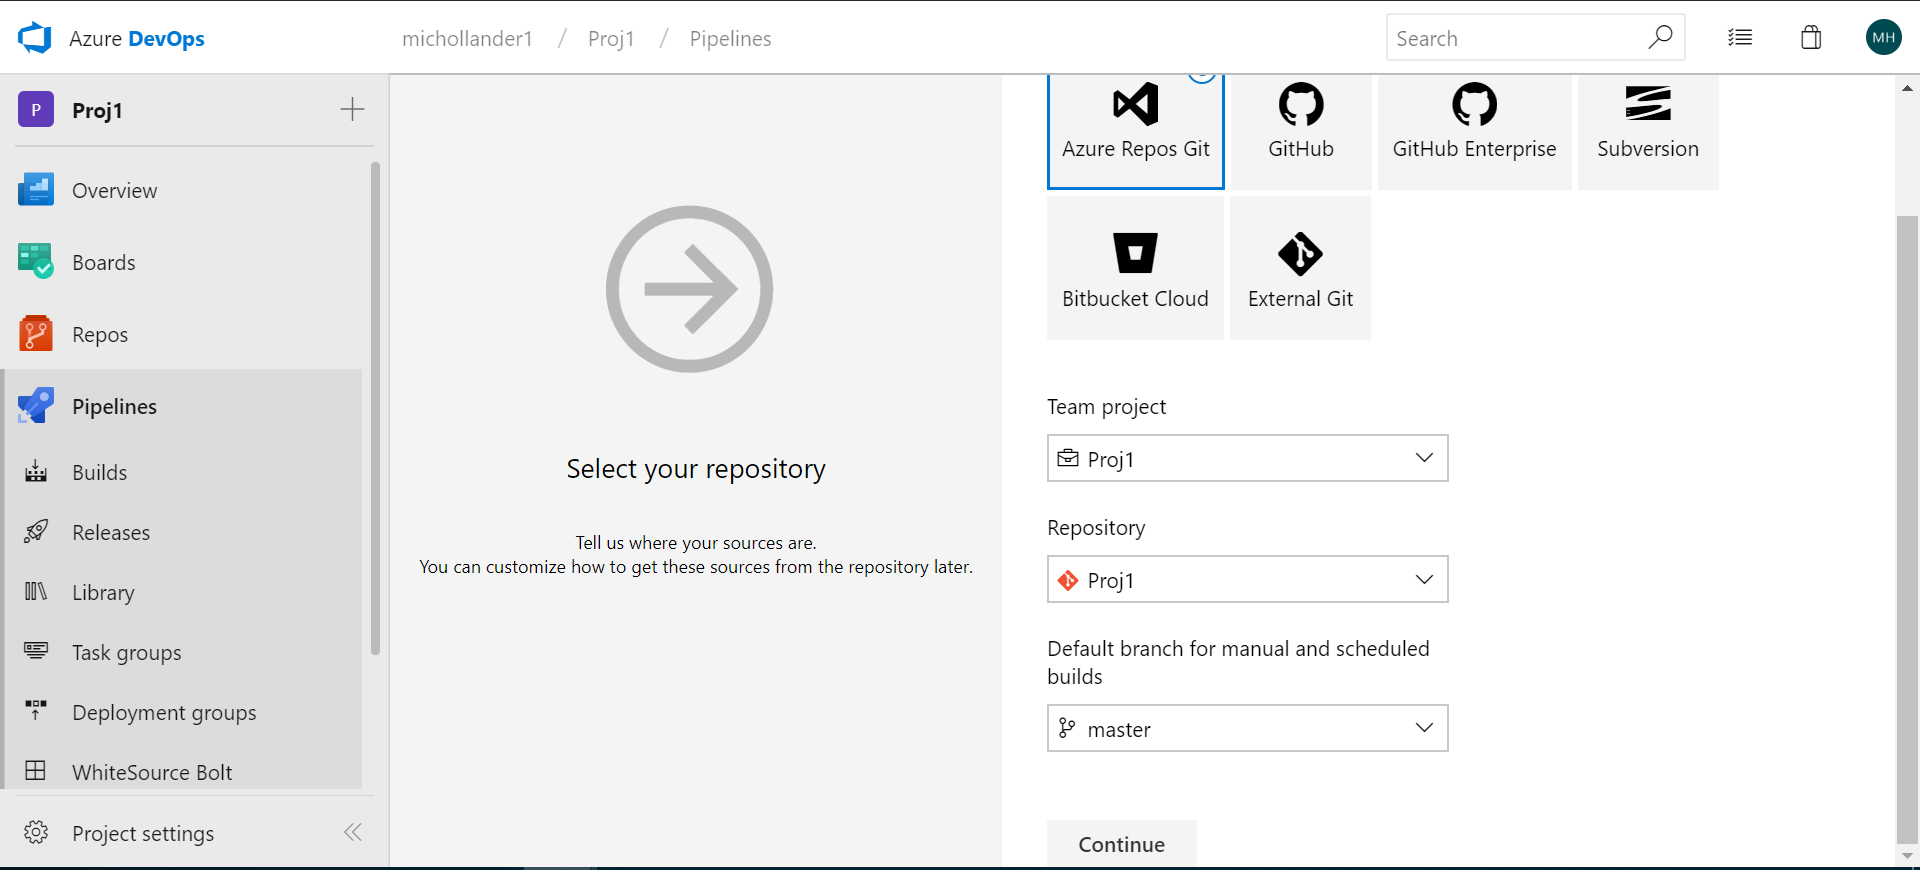
Select the type of repository:
Select an Empty job:
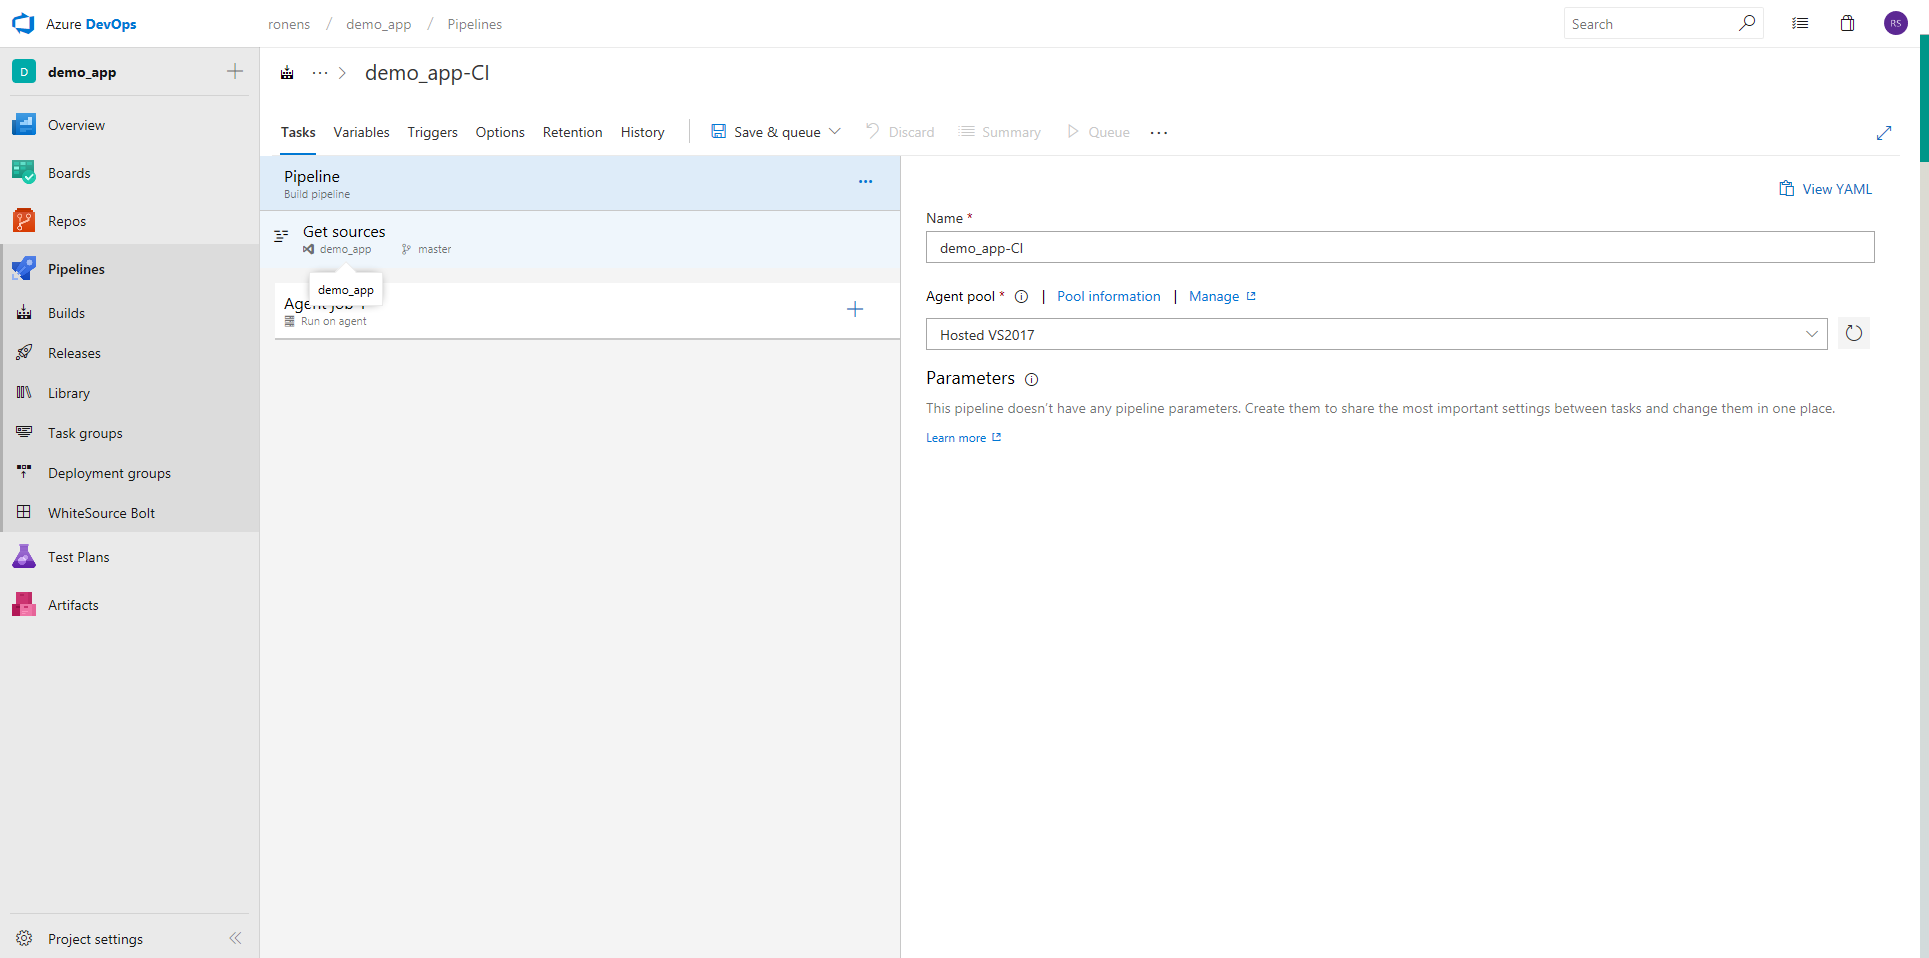
Enter a name for the job and select an Agent pool:
Add the relevant build task (Maven, npm, Gradle, .NET Core, etc.).
Add a Command Line task and update the following fields to activate the WhiteSource integration on your build pipeline.
Display name: WhiteSource Unified Agent Scan
Script:
curl -LJO https://unified-agent.s3.amazonaws.com/wss-unified-agent.jar
echo Unified Agent downloaded successfully
java -jar wss-unified-agent.jar
Environment Variables:
WS_APIKEY: your-apiKey
WS_USERKEY: your-userKey
WS_WSS_URL: your-wssUrl
WS_PRODUCTNAME: AZDO_$(System.TeamProject)
WS_PROJECTNAME: $(Build.Repository.Name)_$(Build.SourceBranchName)
Click Save & queue.