Controlled WhiteSource Integration Release
This is a controlled WhiteSource integration release. For more information, please contact support@whitesourcesoftware.com.
Introduction
Supported Bitbucket Products
This integration only supports Bitbucket Server and Bitbucket Data Center instances. It does not currently support Bitbucket Cloud instances.
WhiteSource for Bitbucket Server is a Bitbucket Server app, scanning your repositories, as part of your WhiteSource account.
It is an integrated product within Bitbucket Server that shows a high-level security overview in the Bitbucket repository, detects all open source components and displays all vulnerabilities for these components.
It generates comprehensive up-to-date reports on the Bitbucket Server ‘WhiteSource integration’ tab of the scanned repository. In addition, you will be able to view the scanned repositories in the WhiteSource portal.
WhiteSource for Bitbucket Server is part of WhiteSource Developer Integrations and includes continuous automated dependency updates with WhiteSource Remediate, using fix Pull Requests.
Prerequisites
The following requirements must be accommodated before installing the WhiteSource server software.
Access to a working WhiteSource Application and a user with Admin privileges.
Bitbucket version 5.15 or above is installed.
Admin privileges on the Bitbucket instance
The deployment includes two environments:
Build environment where the image is built.
Deployment environment where the image is deployed.
Build Environment
This build environment can be the same one as the deployment environment on which the WhiteSource Docker image is deployed. It requires the following:
Hardware Requirements
CPU: Dual-Core, 2Ghz or higher (Intel or AMD)
RAM: 16GB
Storage: 16 GB
Environment Requirements
An internet connection for the entire duration of the build procedure.
When using a Container Orchestration Platform (i.e Kubernetes, ECS, Rancher etc.), please make sure you have logs collection in place: ELK, Splunk or similar. If you are not using an Orchestration platform for the containers, the logs will be collected in designated folders.
A user with admin privileges: If the operating system is Windows, then you must have administrative privileges. If the operating system is Linux, then you must have root privileges.
Docker server version 18 and above. You can verify the Docker version by entering the following:
docker –version
Software and files delivered by WhiteSource:
WhiteSource Docker distribution artifacts that are delivered as a tar.gz or zip file (For example, agent-4-bitbucket-19.2.1.tar.gz or agent-4-bitbucket-19.2.1.zip).
You can obtain these files from WhiteSource Support.
Target Environment
The image is installed on the target environment. This environment requires the following:
Hardware Requirements
CPU: Dual Core, 2Ghz or higher (Intel or AMD)
RAM: 16GB
Storage: 16 GB
Environment Requirements
A user with admin privileges: If the operating system is Windows, then you must have administrative privileges. If the operating system is Linux, then you must have root privileges.
Docker server version 18 and above. You can verify the Docker version by entering the following:
docker –version
Port 5678 must be open at all times. This port will be used to receive webhooks from the Bitbucket add-on.
Access to the WhiteSource Application is required at times for the operation of the WhiteSource for Bitbucket Server.
The access to the app can be checked by issuing an HTTP GET request using a web browser or a utility (e.g., cURL, wget):
https://<your-base-url>/healthCheck
(e.g., https://saas.whitesourcesoftware.com/healthCheck)
It is recommended to verify that the returned status is 200 (OK).
This is only a validation URL. Access must be open for all paths and endpoints under the app’s subdomain.
If a proxy server is available, then the following proxy settings need to be obtained:
URL
Port number
Username and password (for authenticated access)
A valid SSL certificate and KeyStore containing the certificate.
User Steps on Build Machine
Prepare for Installation
Download the ‘tar.gz’ file (‘agent-4-bitbucket-<version>.tar.gz’) for Linux or 'zip' file Windows (‘agent-4-bitbucket-<version>.zip’)
Installation and Configuration
In Windows, extract ‘agent-4-bitbucket-<version>.zip’ to an empty folder. In Linux, extract ‘agent-4-bitbucket-<version>.tar.gz’ to an empty folder.
The extraction creates the following items:
‘wss-bb-add-on’: Includes the jar of the add-on that will be uploaded to your Bitbucket server.
‘wss-bb-app’: WhiteSource BitBucket server application. This application is responsible for communication between WhiteSource application and WhiteSource Bitbucket add-on. (located in the path 'wss-bb-app/docker/Dockerfile')
‘wss-config’: UI Configuration tool and related configuration file template.
'wss-deployment': Deployment template (for example, deploying the integration using Helm charts)
'wss-remediate': WhiteSource Remediate worker
‘wss-scanner’: WhiteSource BitBucket repository-scanner. wss-scanner is responsible for scanning Bitbucket repositories. (located in the path 'wss-scanner/docker/Dockerfile')
‘build.sh’/'build.bat’ (Linux/Windows): The build script
Modifying the Scanner Dockerfile
See here for more information on which package managers are part of the scanner image as well as how to add additional package managers.
Installing the WhiteSource App in Bitbucket Server
There are two ways to install the WhiteSource App in Bitbucket Server - by installing the app via the Atlassian marketplace for Bitbucket, or by uploading the JAR file directly from the extracted WhiteSource for Bitbucket folder.
Installing via the Atlassian Marketplace
Navigate to the Administration page (<your/bitbucket-server/url>:<port>/admin) and then click Find new apps under the ADD-ONS menu.
In the search field, enter whitesource and press Enter. The WhiteSource App is displayed.
Click Install.
Uploading the WhiteSource App JAR file
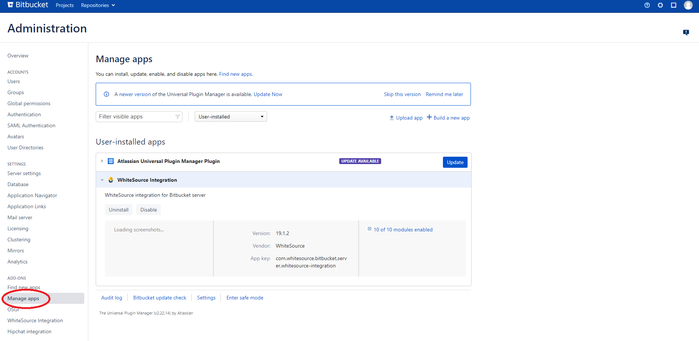
Navigate to the Administration page (<your/bitbucket-server/url>:<port>/admin) and then click Manage apps under the ADD-ONS menu.
Click Upload app and select the JAR file located in the wss-bb-add-on folder.
Click Upload.
Creating a Bitbucket WhiteSource user and generating a WhiteSource Activation Key
Navigate to the Users page under the ACCOUNTS menu (<your/bitbucket-server/url>:<port>/admin/users) and create a new user for WhiteSource in your Bitbucket server and provide admin permissions to this user.
Log in to your Bitbucket server with the new user.
Login to the WhiteSource Application.
Generate ‘activationKey’ in the Application by navigating to the 'Integrate' page. Expand the 'WhiteSource for Bitbucket Server' bar to view the following fields:
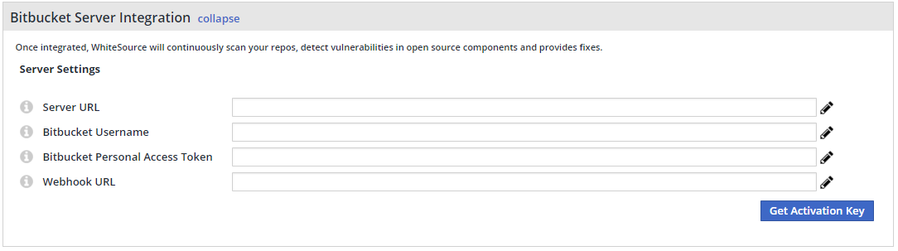
The displayed fields are the following:
Bitbucket Server URL: Your Bitbucket server URL. For example: https://bitbucketdev.com.
Bitbucket Username: Your Bitbucket username. The user has to be an admin in Bitbucket. (The user that was created in step 3). Notice: it must be a username, please do not insert an email.
Bitbucket Personal Access Token: Your Bitbucket personal access token with admin privileges. See also an explanation about retrieving a personal access token in Bitbucket documentation. (Link in Bitbucket server: <your/bitbucket-server/url>:<port>/plugins/servlet/access-tokens/manage)
Bitbucket Webhook URL: Enter the webhook URL in the following format: http://<docker-wss-bb-app-destinationURL>:5678/payload.
When clicking on ‘Get Activation Key’, your activation key will be generated. A new Service user will also be created for this integration inside the WhiteSource Application with a WS prefix. NOTE: Do not remove this Service user and ensure this user remains part of the Admin group.
Running the UI configuration tool from the ‘wss-configuration’ Directory
This editor enables you to configure the deployment file according to your specific configuration requirements.
Use the editor by opening the file index.html in 'wss-configuration' directory via a Chrome or Firefox Web browser. The ‘WhiteSource Configuration Editor’ page is then displayed:
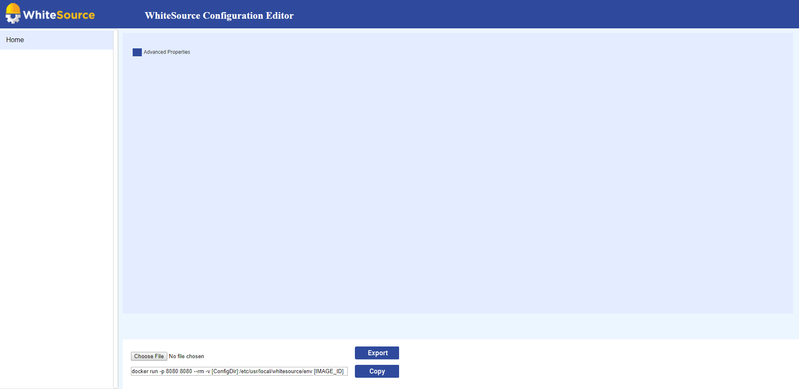
Load the template JSON configuration file by clicking the Choose File button and selecting the file located at config/prop.json. The editor page then changes its display to the following:
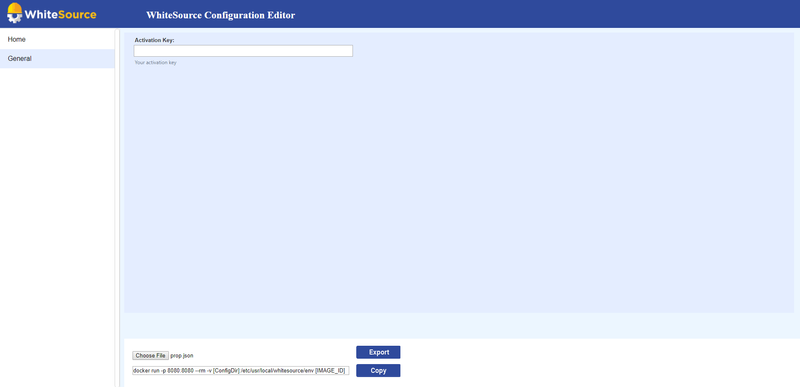
On the left pane of the editor the different sections of the configuration are displayed. The main pane of the editor enables you to add/edit values to relevant parameters for the selected section. Note that many of the parameters already include default values.
Please copy the Activation key that was generated in WhiteSource application and paste it to 'Activation Key' property in the editor.
In order to configure the proxy settings, select the 'advanced properties' checkbox. Proxy fields that are not mandatory (e.g., user name and password) should be left blank.
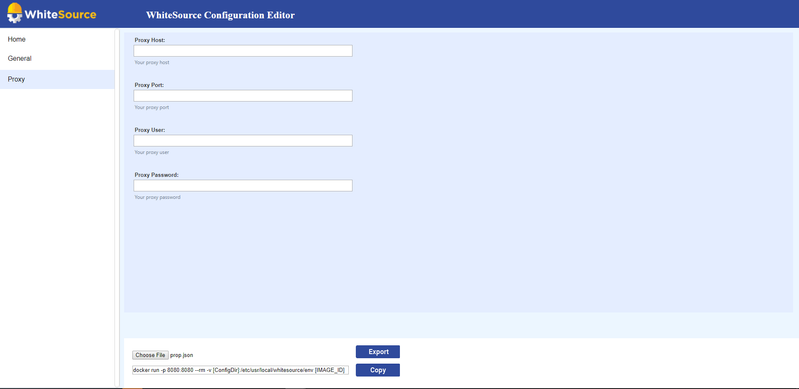
After you have finished editing, export the filled in configuration file by clicking the ‘Export’ button and saving the JSON file with the name prop.json in a different location. This file will be used when running the application.
Details on Attributes of the Configuration file
Section | Label | Name | Type | Mandatory | Description | Sample Value |
|---|---|---|---|---|---|---|
General | Activation Key | bolt.op.activation.key | String | yes | Your generated activation key in the WhiteSource application | |
Proxy | HTTP Proxy Host | proxy.host | Host Address | no | HTTP proxy host. Leave blank to disable. Default value: Empty | |
Proxy | HTTP Proxy Host | proxy.port | Integer | no | HTTP proxy port. Leave blank to disable. Default value: Empty | |
Proxy | Proxy User | proxy.user | String | no | Proxy Username (if applicable) | user |
Proxy | Proxy Password | proxy.password | String | no | Proxy Password (if applicable) | abc123 |
Advanced | Controller URL | controller.url | String | no | The ability to modify the App container URL in case its default name (wss-bb-app) was modified. Default value: http://wss-bb-app:5678 | |
Issues | Should Create Issues | bolt4scm.create.issues | Boolean | no | The ability to globally enable/disable Issues creation across all of your organization's repositories. Default value: true (NOTE: Supported from version 20.5.1.3 only) | |
Issues | Should Create Build Status | bolt4scm.create.check.runs | Boolean | no | The ability to globally enable/disable build statuses across all of your organization's repositories. Default value: true (NOTE: Supported from version 20.5.1.3 only) |
You can export the JSON file at any time, even if you did not finish editing it in order to save your configurations and to enable assigning the configuration of a specific section to the appropriate professional in your organization (e.g., datasource section may be assigned to the DBA of your organization).
See also the ‘Configuring Deployment Settings’ section in this document.
Optional step: If you want to pull the images from another machine and run them as a container, push them to your Docker registry.
Building and Tagging the Docker Images
There are three different ways of building the Docker images.
A total of 3 images will be built: wss-bb-app, wss-scanner, and wss-remediate.
1. Using an Executable Script File (Recommended)
Run the build.bat or build.sh executable script file (Windows/Linux).
Both files are located in the root of the extracted agent-4-bitbucket-<version>.zip or agent-4-bitbucket-<version>.tar.gz files.
For Windows:
Run build.bat file which is located in the main folder where you extracted the agent-4-bitbucket zip file.
In order to ensure that the build succeeded, run the command docker images and check if wss-bb-app and wss-scanner and wss-remediate images were created.
For Linux:
Run build.sh file which is located in the main folder where you extracted the agent-4-bitbucket tar.gz file.
In order to ensure that the build succeeded, run the command docker images and check if wss-bb-app and wss-scanner and wss-remediate images were created.
2. Manually Build the Images
To run the steps of the build file manually, run the following commands directly:
NOTE: If you have already run the build file, skip these steps and continue to Target machine: Running the Containers step.
docker build -t wss-bb-app:<version> wss-bb-app/docker
docker build -t wss-scanner:<version> wss-scanner/docker
docker build -t wss-remediate:<version> wss-remediate/docker

# For example:
docker build -t wss-bb-app:19.9.1.1 wss-bb-app/docker
docker build -t wss-scanner:19.9.1.1 wss-scanner/docker
docker build -t wss-remediate:19.8.1 wss-remediate/docker
NOTE: From version 21.5.1, the Remediate Dockerfile supports both Ubuntu 18.04 and Ubuntu 20.04-compatible images. The base image can be changed using the BASE_IMAGE build argument. e.g.
docker build --build-arg BASE_IMAGE=ubuntu:18.04 -t wss-remediate:21.5.1 wss-remediate/docker
3. Using a Docker Registry
If you are using a private Docker Registry, run the following commands to push the images into your registry:
docker push <registry>/wss-bb-app:<version>
docker push <registry>/wss-scanner:<version>
docker push <registry>/wss-remediate:<version>

# For example:
docker push my-registry/wss-bb-app:19.9.1.1
docker push my-registry/wss-scanner:19.9.1.1
docker push my-registry/wss-remediate:19.8.1
After executing the commands, you should be able to view the images in your registry.
Target Machine: Run the Containers
Deploying Using Docker
On the target environment, create a directory (e.g., ‘<path/to/config/dir>’) and add to it the configuration properties JSON file (prop.json) that you previously edited and exported using the Configuration Editor.
Then, you will need to create a network bridge and run the following Docker containers by using Docker or Kubernetes.
Create a network bridge (this will create a private network between the different containers, since all containers need to run within the same network):
docker network create -d bridge my_bridge
Run the ‘wss-remediate’ server container:
docker run --name remediate-server --network my_bridge -e LOG_LEVEL=debug -p 8080:8080 -v <path/to/config/directory>/prop.json:/etc/usr/local/whitesource/conf/prop.json -v /tmp:/tmp wss-remediate:<version>

# For example:
docker run --name remediate-server --network my_bridge -e LOG_LEVEL=debug -p 8080:8080 -v c:/tmp/bb/prop.json:/etc/usr/local/whitesource/conf/prop.json -v /tmp:/tmp wss-remediate:19.5.1
Changing Remediate Server Port
If port 8080 is not available, you can use a different port by modifying only the second port in the 'docker run' command. For example:
docker run --name remediate-server --network my_bridge -e LOG_LEVEL=debug -p 8082:8080 -v c:/tmp/bb/prop.json:/etc/usr/local/whitesource/conf/prop.json -v /tmp:/tmp wss-remediate:19.5.1
Run the 'wss-bb-app' app container:
docker run --name wss-bb-app --network my_bridge -p 9494:9494 -p 5678:5678 -v <path/to/config/directory>:/etc/usr/local/whitesource/conf wss-bb-app:<version>

# For example:
docker run --name wss-bb-app --network my_bridge -p 9494:9494 -p 5678:5678 -v c:/tmp/bb/:/etc/usr/local/whitesource/conf/ wss-bb-app:19.5.1.1
Run the ‘wss-scanner’ scanner container:
docker run --name wss-scanner-bb --restart=always --network my_bridge -p 9393:9393 -v <path/to/config/directory>:/etc/usr/local/whitesource/conf/ wss-scanner:<version>

# For example:
docker run --name wss-scanner-bb --restart=always --network my_bridge -p 9393:9393 -v c:/tmp/bb/:/etc/usr/local/whitesource/conf/ wss-scanner:19.5.1.1
Deploying Using Helm Charts
The wss-deployment folder consists of the following structure:
helm
configs
templates
config.yaml
wssScmIntegration.yaml
Chart.yaml
values.yaml
Copy the helm folder from wss-deployment to your target environment. Inside the helm/configs folder, add the configuration properties JSON file (prop.json) that you previously edited and exported using the Configuration Editor.
Chart.yaml
This file contains information about the chart.
NOTE: Do not edit this file.
Values.yaml
This file represents the WhiteSource integration image names and versions.
wsscanner:
  image: {image}
  version: {version}

wsscontroller:
  image: {image}
  version: {version}

wssremediate:
  image: {image}
  version: {version}
For each image declaration (wssscanner, wsscontroller, wssremediate), replace {image} and {version} with the actual built image name and version. NOTE: For wsscontroller, use the name and version of the wss-bb-app image.
An optional parameter, imagePullSecrets, can be added to this file in case Docker repository authentication is required.
configs/prop.json
In the helm folder, create a new folder named configs, and add to it the configuration properties JSON file (prop.json) that you previously edited and exported using the Configuration Editor.
templates/config.yaml
This is a configuration file pointing to the configs/prop.json file.
NOTE: Do not edit this file.
templates/wssScmIntegration.yaml
This is a configuration file containing all the parameters for deploying the integration.
NOTE: In this file, there are 3 dashes ("- - - ") that separate the services Do not remove them.
In order for the webhook URL to be accessible publicly by the integration, a load balancer service must be added to the file. An example of such a service is provided below:
apiVersion: v1
kind: Service
metadata:
  name: lb1
  namespace: acme
  annotations:
    external-dns.alpha.kubernetes.io/hostname: helm.acme.io
    service.beta.kubernetes.io/aws-load-balancer-backend-protocol: http
    service.beta.kubernetes.io/aws-load-balancer-ssl-ports: "443"
    service.beta.kubernetes.io/aws-load-balancer-ssl-negotiation-policy: "ELBSecurityPolicy-TLS-1-2-2017-01"
    service.beta.kubernetes.io/aws-load-balancer-ssl-cert: arn:aws:acm:us-east-7:834027593108:certificate/4720e07a-a231-4fd5-9c4a-12ab1450567d
spec:
  type: LoadBalancer
  ports:
  - port: 443
    name: https
    targetPort: 5678
  selector:
    app: wss-controller
Activating the WhiteSource Integration
If the wss-bb-app webhook URL changes, then you will need to re-validate the activation key by performing step 2 again.
Go to the Bitbucket server UI > Administration page > WhiteSource Integration tab (Link:<your/bitbucket-server/url>:<port>/plugins/servlet/whitesource/configure).
Copy the activation key and paste it into the Activation key field, and then click Validate.
If you are integrating multiple repositories and want to apply global configurations, refer here before continuing in this procedure.
Select one of the following options:
All projects: (default) Integrate all the (current and future) projects inside the Bitbucket instance.
Selected projects only: Select specific projects that you would like to integrate with WhiteSource.
The project admin must do the following:
Go to the project page of any integrated project (see above).
Go to the Project settings page.
In the navigation pane, under Workflow, click WhiteSource Integration.
Select one of the following options:
All repositories: (default) Integrate all the (current and future) repositories inside the Bitbucket instance.
Selected repositories only: Select specific repositories that you would like to integrate with WhiteSource.
NOTE: Only a user with Admin or Write permissions on a selected repository will be able to access the WhiteSource Integration tab inside the repository page.
Click Save. Unless specified otherwise via the global configuration, an onboarding pull request is created for the selected repositories. This request contains a WhiteSource configuration file (.whitesource) that can be customized before merging the pull request. Once the pull request is merged, a WhiteSource scan will be initiated.
Remediation
WhiteSource Remediate provides continuous automated dependency updates, saving time and reducing your security risks. To read more and configure automated Pull Requests, see WhiteSource Remediate
Initiating a Scan
A WhiteSource scan is initiated via a valid Bitbucket push command. A valid push command meets at least one of the following requirements:
One of the commits in the push command added/removed a source file(s) that has an extension supported by WhiteSource.
Refer to the WhiteSource Languages page in order to find out whether or not a specific language and its extensions are supported.One of the commits in the push command includes an addition/modification of the package manager dependency file(s).
Refer to the list of supported dependency files to find out whether your dependency files are supported.
NOTE: a push command may consist of multiple commits.
Viewing Details of the Scan
Results can be viewed in the following places:
The WhiteSource Integration tab within the project
The WhiteSource Security/License Check within the Bitbucket repo Commits tab.
The WhiteSource UI.
Via email notifications.
Viewing Details of an Issue
See here for more information.
Viewing WhiteSource Security Checks
In the Commits tab you can view the status and results of each scan. Click a specific build icon in order to view the Builds page.
Types of Indicators
The following build status indicators are available as feedback on the head commits:
In progress: The WhiteSource scan is in progress.
Success: The WhiteSource scan completed successfully and no vulnerabilities were detected.
Failed: The WhiteSource scan did not complete successfully, this is the default for all completed scans. NOTE: a failed status may be shown due to security vulnerabilities, or due to an error that occurred during the scan.
Samples of Status Check Indicators
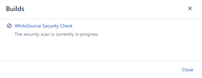
In Progress
The following is a sample of a In Progress status, which indicates that the security check is currently scanning the head commit.
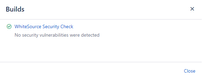
Success
When no vulnerabilities are found and no errors occurred during the scan, WhiteSource will display the following status check, and a security report indicating that no vulnerabilities were detected:
Failed
Security vulnerabilities found: One or more vulnerabilities have been found as displayed in these sample screenshots:

Click on the ‘WhiteSource Security Check’ link to view the security report on all vulnerabilities that were found for the specific commit’s scan. It includes the following columns:
CVE: A link to the related CVE page for the vulnerability. Displayed in a collapsible format (click the arrow to expand/collapse for more information regarding the vulnerability).
Severity: Overall score of the severity (High, Medium or Low).
CVSS Score
Vulnerable Library
Suggested Fix
Issue - A link to the relevant issue generated by WhiteSource (when available)
Scan failed: Due to system error or not a valid Bitbucket ‘push’ command.
Viewing WhiteSource License Checks
In the Commits tab you can view the status and results of each scan. Click a specific build icon in order to view the Builds page.
Types of Indicators
The following build status indicators are available as feedback on the head commits:
Success: No license policy violations were detected.
Failed: One or more license policy violations were detected during the WhiteSource scan.
Viewing Details in the WhiteSource UI
WhiteSource projects will have the same name as the corresponding Bitbucket repository, with a "BB_" prefix, unless otherwise specified in the .whitesource file using a project token.
The name of the WhiteSource product will be the same as that of the Bitbucket project preceded by a "BB_" prefix if the Bitbucket repository is under a Project. Otherwise, the name will be your Bitbucket username preceded by "BB_".
Accessing Scan Statistics via API
See here for more information.
Health Check APIs
See here for more information.
The .whitesource File
A WhiteSource configuration file (.whitesource) is a JSON file added to each repository that is enabled for a scan. It provides configurable parameters for the WhiteSource scan.
The .whitesource file is only added in the default branch of the repository (unless modified, it is the master branch).
.whitesource file
{
  "scanSettings": {
    "configMode": "AUTO",
	"configExternalURL": "",
    "projectToken": "",
	"baseBranches": []
  },
  "buildSettings": {
    "displayMode": "diff",
	"failBuilds": true
  },
  "issueSettings": {
    "minSeverityLevel": "LOW"
  }
}
Parameters
Global Settings
Parameter | Type | Description | Required | Default |
|---|---|---|---|---|
settingsInheritedFrom | String | When the global configuration is enabled, this parameter will specify the location of the whitesource-config repository from which it will inherit its configuration. It must contain the Bitbucket user name, repository name and branch (optional) of the repo-config.json file location. The default branch is 'master', but can be modified according to the location of the repo-config.json file in the whitesource-config repo. NOTE: You can override specific parameters that are relevant only in the specific repository by adding these after this parameter. Examples: Using only values defined in the global configuration: "settingsInheritedFrom": "whitesource/whitesource-config@master" Using values defined in the global configuration and overriding the scan settings parameters: "settingsInheritedFrom": "whitesource/whitesource-config@master",
"scanSettings": {
"projectToken": "12345",
"baseBranches": ["master","integration"]
}
| No | N/A |
Scan Settings (scanSettings)
Parameter | Type | Description | Required | Default |
|---|---|---|---|---|
configMode | String | The configuration mode to be used for each scan. There are three options:
| No | Auto |
configExternalURL | String | The URL of the external configuration file (you can choose any filename). The configuration file content should be in the same format as the Unified Agent configuration file. The following protocols are supported: 'ftp://', 'http://', 'https://'. For example: 'https://mydomain.com/whitesource-settings/wss-unified-agent.config' | No | Empty |
projectToken | String | Adds the ability to map a Bitbucket repository to a WhiteSource project. The parameter used needs to be the WhiteSource project token. NOTE: Not supported in the Global Configuration. | No | Empty |
baseBranches | Array | Adds the ability to specify one or more base branches for which scanning results will be sent to a new WhiteSource project. Example usage: ["master", “integration"] This will set both master and integration branches as base branches. Note the following:
NOTE: This parameter is available only from version 20.7.1. | No | Empty In this case, the base branch only consists of the default branch. |
enableLicenseViolations | Boolean | When enabled, a new WhiteSource License Check will be generated for each valid push. NOTES:
| No | false |
Build Settings (buildSettings)
Parameter | Type | Description | Required | Default |
|---|---|---|---|---|
displayMode | String | How to display WhiteSource security information for a scan performed on a non-base branch:
| No | diff |
failBuilds | Boolean | The app provides checks in commits and pull requests on any repository branch. This parameter defines the conclusion status for when a WhiteSource Security Check is completed. When the parameter is set to false, the conclusion status of a WhiteSource Security Check will always be 'Success', even if the check fails. This way, any repository member is able to merge a pull request, even if a WhiteSource Security Check found security vulnerabilities. When the parameter is set to true (default), the conclusion status of a WhiteSource Security Check will be 'Failure' in cases where WhiteSource Security Check found security vulnerabilities or an error occurred during the scan. When this configuration is defined, a policy for approving a pull request is enforced. In this setting, only the administrator of the repository can approve the merging of a pull request that contains one or more checks with a 'Failure' status. | No | true |
failLicenseBuilds | Boolean | The app provides checks in commits and pull requests on any repository branch. This parameter defines the conclusion status for when a WhiteSource License Check is completed. When the parameter is set to false, the conclusion status of a WhiteSource License Check will always be 'Success', even if the check fails. This way, any repository member is able to merge a pull request, even if a WhiteSource License Check found license policy violations. When the parameter is set to true (default), the conclusion status of a WhiteSource License Check will be 'Failure' in cases where WhiteSource License Check found license policy violations or an error occurred during the scan. When this configuration is defined, a policy for approving a pull request is enforced. In this setting, only the administrator of the repository can approve the merging of a pull request that contains one or more checks with a 'Failure' status. | No | true |
showWsInfo | Boolean | Whether to show additional WhiteSource information such as the project token inside the WhiteSource Build Status (after the scan token). WhiteSource information is only displayed if the commit originated from a base branch. The following hidden JSON object will also be added inside the Build Status when this parameter is enabled: <!-- <INFO>{"projectToken":"8cd2d2a8651145c087609e0a43f783e95f7008cb908541498348fed529572e01"}</INFO> -->
NOTE: Additional WhiteSource data may be added inside the JSON object in the future. | No | false |
Issue Settings (issueSettings)
Parameter | Type | Description | Required | Default |
|---|---|---|---|---|
minSeverityLevel | String | Enables users to decide whether to open a new Issue only if a certain severity level is available on a detected vulnerability. Available values for minSeverityLevel:
NOTE: The WhiteSource Security Check summary is also affected by this parameter. | No | LOW |
displayLicenseViolations | Boolean | Whether to generate an Issue for every detected license policy violation. NOTE: This parameter is relevant only if enableLicenseViolations (scanSettings) is set to true. | No | true (only if enableLicenseViolations (scanSettings) is set to true) |
Remediate Settings (remediateSettings)
Parameter | Type | Description | Required | Default |
|---|---|---|---|---|
enableRenovate | Boolean | When enabled, Remediate will raise automated Pull Requests for outdated dependencies in addition to Pull Requests remediating vulnerable dependencies. Remediate will then perform all the functionality and support all the configuration options available in WhiteSource Renovate. See Renovate configuration options for all configuration options. Refer here for parameter usage. | No | false |
transitiveRemediation | Boolean | Whether to enable transitive remediation for NPM repos. When npm v6 (npm v7 is not currently supported) is used with a package-lock.json file, and vulnerabilities are found within transitive dependencies in the file, then in most cases Remediate is able to successfully remediate the vulnerability. Sometimes it may not be possible to successfully remediate because a parent dependency does not yet have a new release that allows the necessary fixed-in version of the transitive dependency. | No | false |
Providing a Global Configuration File
NOTE: Supported from version 20.5.1.3 only.
You can provide a custom .whitesource configuration file as part of the wss-bb-app container, in order to apply it globally to all of your organization's repositories. Doing so will apply the file to all onboarding pull requests for newly-selected repos. Repos which were already selected and activated before this change will not be affected by this global configuration. Only newly onboarded repos will be affected.
To apply this global change, do as follows:
Stop the wss-bb-app container.
In the "wss-bb-app/conf" folder, add your custom “.whitesource” file (where the prop.json file is located).
Start the wss-bb-app container.
Upgrading to the Latest Docker Images
Get the latest WhiteSource for Bitbucket Server version from WhiteSource Support.
Upload the new WhiteSource Bitbucket add-on by following the guidelines here.
Build these three Docker images from the new version - see here.
wss-bb-app
wss-scanner
remediate-server
Stop currently-running Docker containers from the previous version:
docker stop <wss-bb-app> <wss-scanner> <remediate-server>
Remove the Docker containers from the previous version:
docker rm <wss-bb-app> <wss-scanner> <remediate-server>
Fetch the activation key from the existing prop.json file (the propertyValue associated to the property "bolt.op.activation.key") and copy it to the clipboard.
Generate and save the new prop.json file by following the steps here and using the activation key value that was just copied.
Run the containers - see here.
(Optional) If the new wss-bb-app container has a different URL than the previous container, then follow the guidelines here to update the Bitbucket webhook URL.
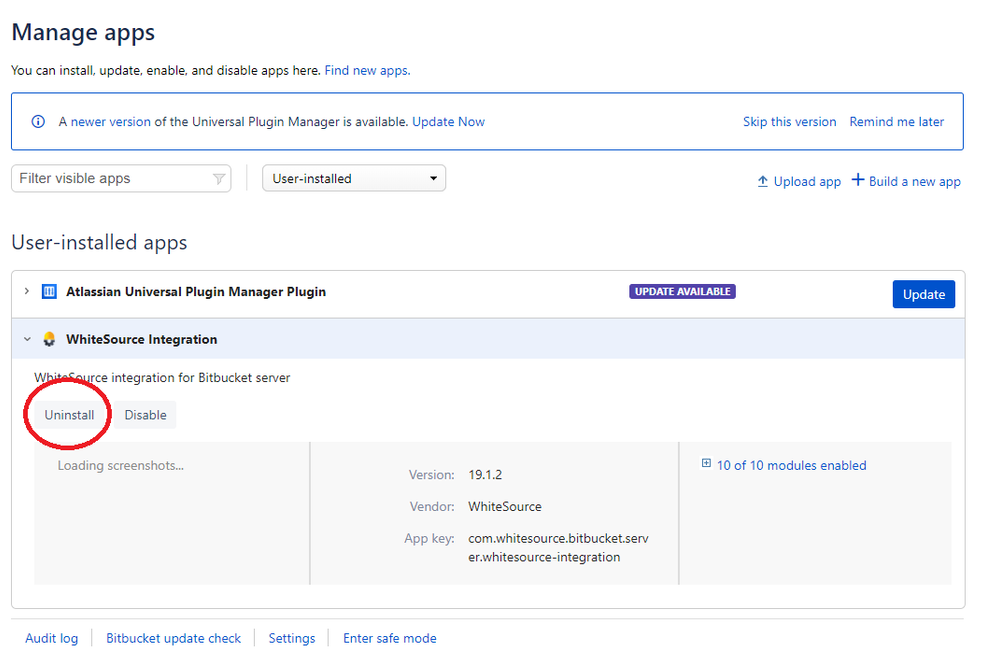
Uninstalling
You can easily uninstall this add-on by doing the following:
Go to the 'Administration’ page of your Bitbucket Server interface, and click on ‘Manage apps’ of the Add Ons section.
Select the WhiteSource Integration app, and click on the ‘Uninstall’ button.