
Introduction
WhiteSource Bolt is a GitHub app, scanning your GitHub.com repositories at no cost (GitHub Enterprise Server is not supported). The app can be installed from the GitHub marketplace.
It is an integrated product within GitHub that detects all open source components in your repository and alerts on vulnerabilities for these components, without ever scanning your code.
It provides you with issues on vulnerable open source components and generates comprehensive up-to-date reports on the GitHub 'Issues' tab of the scanned repository.
For more information or questions on WhiteSource Bolt for GitHub, please reach out directly to boltgithub@whitesourcesoftware.com.
Before you begin, note the following:
GitHub repositories requiring access to artifacts in local registries are not supported.
Bolt for GitHub does not scan archived GitHub repositories, since their 'read only' status blocks various actions that are required during the scan.
Prerequisites
Do the following:
For each repository that requires a Bolt scan, the Issues tab must be enabled for each repository. Do as follows:
Go to the relevant GitHub repository, and click Settings.
Verify that the Issues checkbox is enabled.
Verify that the Issues tab appears next to the Code tab.
Ensure that you have administrator permissions to your GitHub account and to the relevant repositories (owner credentials) in order to install and use WhiteSource Bolt for GitHub.
Installing WhiteSource Bolt
Click the following link. The WhiteSource Bolt for GitHub page is displayed.
Click Install. Note that if you have more than one GitHub account then you should initially confirm your installation location by selecting the GitHub account(s) for which you would like to install the WhiteSource Bolt for GitHub app. Click the relevant account, and continue.
Select one of the following options:
All Repositories (Default): An option to scan all the repositories of the account.
Only select repositories: Select specific repositories that you would like to scan.
Read the permissions that must be provided for the WhiteSource Bolt for GitHub app to work, and then click Install.
Registering WhiteSource Bolt
After the installation, the WhiteSource Bolt for GitHub Registration form appears with your email address filled in:
Fill in all the required fields, select the required checkboxes, and then click Submit.
NOTE: If the form page accidentally closes before you clicked on the Submit button then you can use the link in the registration email message that was sent to you in order to complete the registration process. Use this link only in cases where the form screen has been closed before the Submit button was clicked. This feature is only available when your GitHub email address is not marked as Private.You will be forwarded to the Bolt for GitHub Thanks for Installing page. Click the Go back to GitHub button to return to your GitHub account page.
After selecting your repositories, an onboarding pull request is created. This pull request contains a WhiteSource configuration file (.whitesource) that can be customized before merging the pull request. Once the pull request is merged, a WhiteSource scan will be initiated.
At this stage, Bolt has started scanning your selected repositories. If a vulnerability is detected, then you will receive an email, and an issue will be created in your GitHub's project 'Issues' tab. The scanning process may take a number of minutes.
The '.whitesource' File
A WhiteSource configuration file ('.whitesource') is added to each repository that is enabled for a scan. It provides configurable parameters for the WhiteSource scan. The '.whitesource' file is only added in the default branch of the repository (unless modified, it is the master branch). Any configuration change that is done to this file must be in the default branch of the repository.
.whitesource file
{
  "checkRunSettings": {
    "vulnerableCheckRunConclusionLevel": "failure"
  },
  "issueSettings": {
    "minSeverityLevel": "LOW"
  }
}
Parameters
vulnerableCheckRunConclusionLevel
Parameter | Type | Description | Required | Default |
|---|---|---|---|---|
vulnerable.check.run.conclusion.level | String | The app utilizes the GitHub Checks API that provides checks in commits and pull requests on any repository branch. This parameter defines the conclusion status for when a WhiteSource Security Check is completed. When the parameter is set to 'success', the conclusion status of a WhiteSource Security Check will always be 'Success', even if the check fails. This way, any repository member is able to merge a pull request, even if a WhiteSource Security Check found security vulnerabilities. When the parameter is set to 'failure' (default), the conclusion status of a WhiteSource Security Check will be 'Failure' in cases where WhiteSource Security Check found security vulnerabilities or an error occurred during the scan. When this configuration is defined, and a branch protection rule has been added, a policy for approving a pull request is enforced. In this setting, only the administrator of the repository can approve the merging of a pull request that contains one or more checks with a 'Failure' status. See also Initiating a Merge Policy. | No | failure |
minSeverityLevel
Parameter | Type | Description | Required | Default |
|---|---|---|---|---|
minSeverityLevel | String | Enables users to decide whether to open a new GitHub Issue only if a certain Severity Level is available. Available values for "minSeverityLevel" needs to be:
| No | LOW |
Initiating a Scan
New users are entitled to scan each repository up to five times a day. Existing WhiteSource customers have the scan limitations that are set in their account agreement with WhiteSource.
A WhiteSource scan is initiated via a valid GitHub push command. A valid push command meets at least one of the following requirements:
One of the commits in the push command added/removed a source file that has an extension supported by WhiteSource.
Refer to the WhiteSource Languages page in order to find out whether or not a specific language and its extensions are supported.One of the commits in the push command includes an addition/modification of the package manager dependency files.
Refer to the list of supported dependency files to find out whether your dependency files are supported.
A push command may consist of multiple commits.
Viewing Details of the Scan
Results are viewed on the Issues tab of the repository on GitHub and via email notifications.
Viewing the Issues Tab
If you are making 'push' commands via the Web browser then click the Refresh button of the Web browser in order to view the issues that were found.
It may take a number of minutes for the issues to be scanned and displayed after a valid 'push' command is initiated.
The Issues tab displays all the issues that WhiteSource Bolt for GitHub detected with the red 'security vulnerability' label. This proprietary label indicates a security vulnerability was detected by WhiteSource.
As part of your workflow, you have the option to add multiple relevant labels to specific issues, and close issues that were resolved.
All manually closed issues are not resent or reopened as open issues during the next scan unless their label and/or name has been manually changed or changed via an API.
Viewing Details of an Issue
Clicking on a specific issue displays its details:
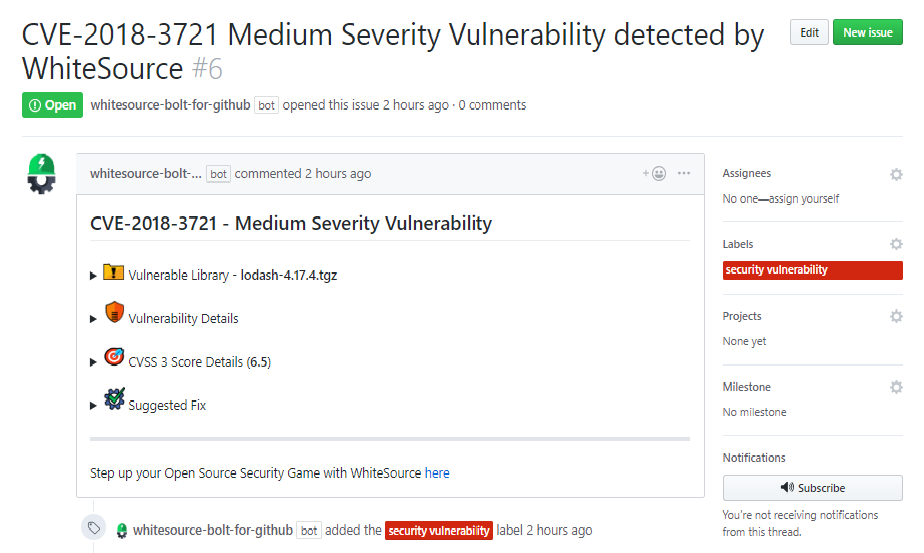
Click on an item's list bullet ( ) to view more information.
The display changes according to the type of library:
Component-based library (e.g., '*.tgz', '*.jar' ): The vulnerable library appears first after the heading that indicates the name of the issue.
It includes the following information:Vulnerable library: Includes the path of the library. If the path is of a transitive dependency library then only the path information of the root library is relevant to you.
Commit link: Includes the path to the GitHub commit link where the vulnerability was found.
Vulnerability details: Description of vulnerability, published date, and link to the specific CVE in the CVE website.
CVSS 3 score: Basic CVSS3 score matrix. If this score is not available then the CVSS 2 score matrix is displayed.
Suggested fix for the vulnerability: A detailed suggestion that includes type, origin, release date, and fix resolution. Note that a fix may not always be available.
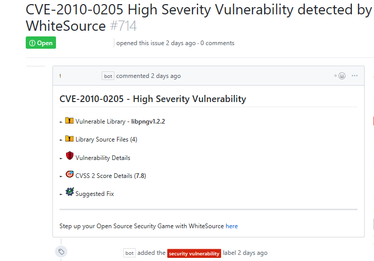
Source file-based component: The vulnerable library appears as the first item in the list:
It includes the following information:Vulnerable library: Includes a comment that indicates the possibility of a false origin recognition, and a list of all the source files of this library.
Vulnerability Details: Description of vulnerability, published date, and link to the specific CVE in the CVE website.
CVSS 3 score: Basic CVSS 3 score matrix. If this score is not available then the CVSS 2 score matrix is displayed.
Suggested fix for the vulnerability: A detailed suggestion that includes type, origin, release date, and fix resolution. Note that a fix may not always be available.
Commit link: Includes the path to the GitHub commit link where the vulnerability was found.
WhiteSource supports displaying multiple libraries for the same CVE when such a case occurs.
Email Notifications
After the scan is made, a separate email message is sent on each issue.
The information in the email message is identical to the displayed information on the 'Issues' tab.
Initiating a Merge Policy
A merge policy utilizes the app's integration with GitHub Checks API. It enables the repository's administrator to approve the merging of a pull request with 'Failed' commit statuses to a target branch in the repository.
For more information on Checks API, see the related GitHub Checks API introduction page.
Prerequisite for the Merge Policy: Add a Branch Protection Rule
In order to enable a merge policy based on the conclusion of a WhiteSource Security Check, you must initially add the following GitHub rule for branch protection. Do as follows:
Go to the repository Settings > Branches. The Branches screen is displayed.
In the Branch protection rules area, click Add Rule.
Apply the rule to a specific branch or enter '*' to apply the rule to all branches:

Select the following checkboxes:
Require status checks to pass before merging
WhiteSource Security Check - If you cannot view this setting, then modify the '.whitesource' file, and perform a commit. Wait for the scan to complete and then refresh the GitHub settings page until you can view this setting.
Checks API Indicators
Checks API indicators are displayed for each head commit on the 'Commits' section of the 'Code' tab.
To view WhiteSource information, click any of the following:
Clicking on a specific indicator opens a pop-up window that displays further details on the status.
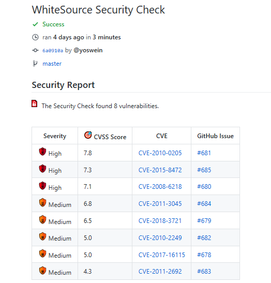
Clicking on the 'Details' link in the pop up window displays the WhiteSource Security Check page for the selected head commit. The page includes the conclusion status of the head commit along with a Security Report.
The security report displays all the vulnerabilities that were found in descending order according to the severity and CVSS score. The following information is displayed for each vulnerability:
Severity: Overall score of the severity (High, Medium or Low).
CVSS Score
CVE: A link to the related CVE page for the vulnerability.
GitHub Issue: A link to the WhiteSource issue that was generated for the vulnerability. For example, the following is an issue that was generated for the first vulnerability of the report on the above screenshot:
Types of Indicators
The following Checks API status indicators are available as a feedback on the head commits:
Queued: Scan has not begun and is scheduled to begin.
In progress: Scan is in progress.
Completed: Scan completed with one of the following conclusions:
Success: When the parameter 'vulnerable.check.run.conclusion.level' is set to 'success', the status of the head commit is always success A 'Success' status is displayed for the commit even when it fails.
Failure: Default for all completed scans. When the parameter 'vulnerable.check.run.conclusion.level' is set to 'failure' (default), the status of a 'failed' head commit is 'failure', and a policy for approving merging pull requests that include failed head commits with the another branch in the repository is enforced. Note that a 'failed' status can be caused due to security vulnerabilities or due to an error that occurred during the scan.
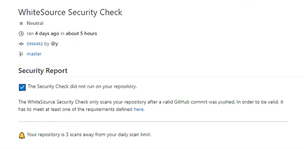
Neutral: conclusion occurs when the repository has reached its daily limit of scans, and the next scan will be on the next day or when the push command was not valid.
Samples of All Checks API status Indicators
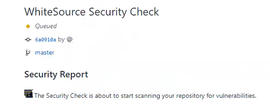
Queued
The following is a sample of a 'Queued' status, which indicates that the security check is about to start scanning the head commit's vulnerabilities.
In Progress
The following is a sample of an 'In-Progress' status, which indicates that the security check is currently scanning the head commit.

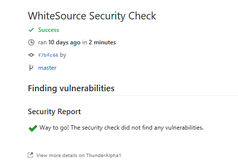
Completed with 'Success' Conclusion
The status can be displayed in two scenarios:
When the parameter 'vulnerable.check.run.conclusion.level' is set to 'success' or 'failure' (default), and a 'success' status is provided for the scan, since no vulnerabilities were found and no errors occurred during the scan for this head commit. In this case, the merging of a pull request that includes this commit to another branch in the repository is automatically approved.
When the parameter 'vulnerable.check.run.conclusion.level' is set to 'success'. In this configuration, even a 'failed' status for a head commit's scan is converted to 'success'. The following screenshot displays a 'success' indicator for a commit that includes high severity vulnerabilities, since the parameter 'vulnerable.check.run.conclusion.level' is set to 'success'. In this case, the merging of a pull request that includes this head commit to another branch in the repository is automatically approved.
The following screenshot displays a 'success' indicator for a commit that includes an error that occurred during the scan, since the parameter 'vulnerable.check.run.conclusion.level' is set to 'success'. In this case, the merging of a pull request that includes this head commit to another branch in the repository is automatically approved.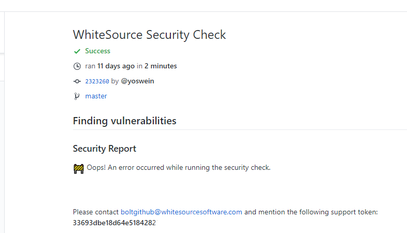
Completed with 'Failure' Conclusion
When the parameter 'vulnerable.check.run.conclusion.level' is set to ''failure', all head commits that fail the scan due to the security check or due to an error that occurred during the scan display a 'failure' status. The following screenshot displays a 'failure' indicator for a head commit that includes high severity vulnerabilities, since the parameter 'vulnerable.check.run.conclusion.level' is set to 'failure'. In this case, only the administrator of the repository can approve merging a pull request that includes this head commit to another branch in the repository, and therefore, it will not be automatically merged.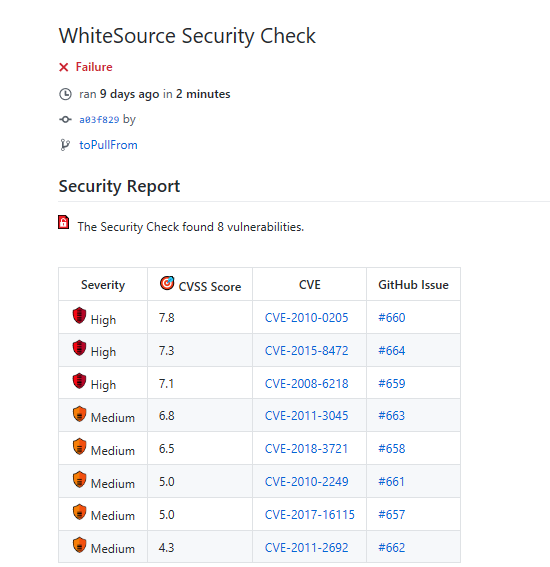
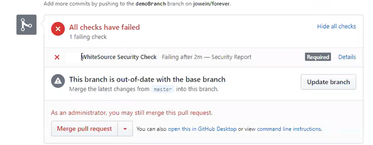
The following screenshot is a sample of the display in a pull request page when a 'failure' policy is enforced and one or more of its head commits have a 'failure' status. Only the administrator of the repository can approve the merging of a pull request with a 'failure' status:
Completed with 'Neutral' Conclusion
A neutral conclusion occurs in one of the following scenarios:
The repository has reached its daily limit of scans, and the next security check will only run on push commands that are done on the following day:
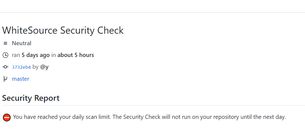
The push command was not valid. See the Initiating a Scan section for more information on valid commands.
Uninstalling WhiteSource Bolt
To uninstall WhiteSource Bolt, do as follows:
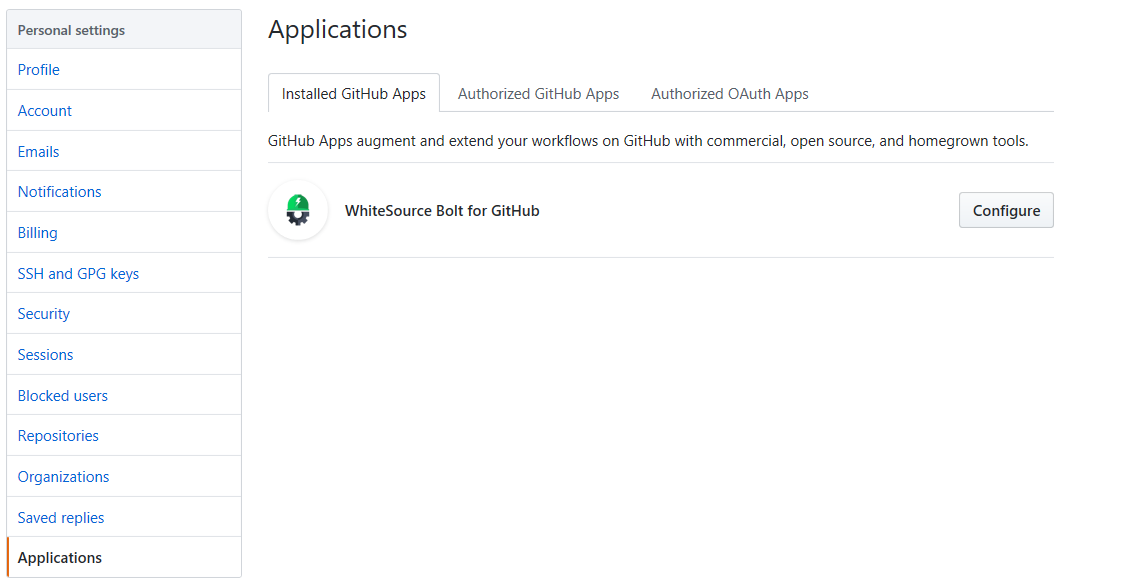
Go to the Applications section of your GitHub's account settings, and next to WhiteSource Bolt for GitHub, click Configure.
The WhiteSource Bolt for GitHub page is displayed. Scroll down in order to view the 'Uninstall WhiteSource Bolt for GitHub' button.
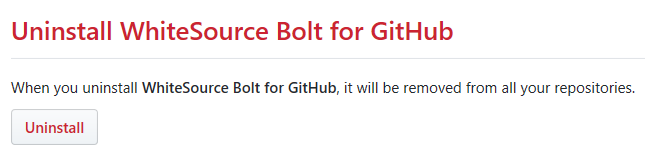
Click on the 'Uninstall' button. Uninstalling WhiteSource Bolt for GitHub removes it from all your repositories.
Optionally, go to 'Authorized GitHub apps' tab, and click the 'Revoke' button next to the 'Bolt for GitHub' app.