Overview
This page provides step-by-step instructions on how to run the Unified Agent from Azure DevOps Services.
Setting Up the Unified Agent Configuration in Your Repository
Download the Unified Agent configuration file.
Save this file to your local machine.
Edit the includes, archiveIncludes, and archiveExtractionDepth sections of the configuration file to support the relevant file or archive extensions. For more information, see the Configuration File & Parameters page.
Upload the modified configuration file to your Azure DevOps Project Repo.
Browse your file system to select your local version of the Unified Agent configuration file and click Commit.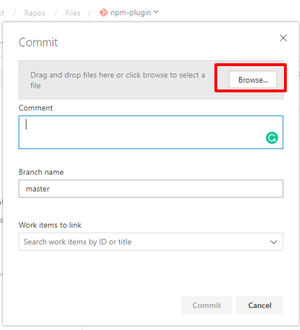
Setting up Your Build Pipeline
Go to 'Pipelines' → 'Builds' → 'New' → 'New Build Pipeline'.
Select the source for your code. You can create a pipeline using YAML (Option 1), or use the classic editor to create a pipeline without YAML (Option 2).
Option 1: Creating a Pipeline Using YAML
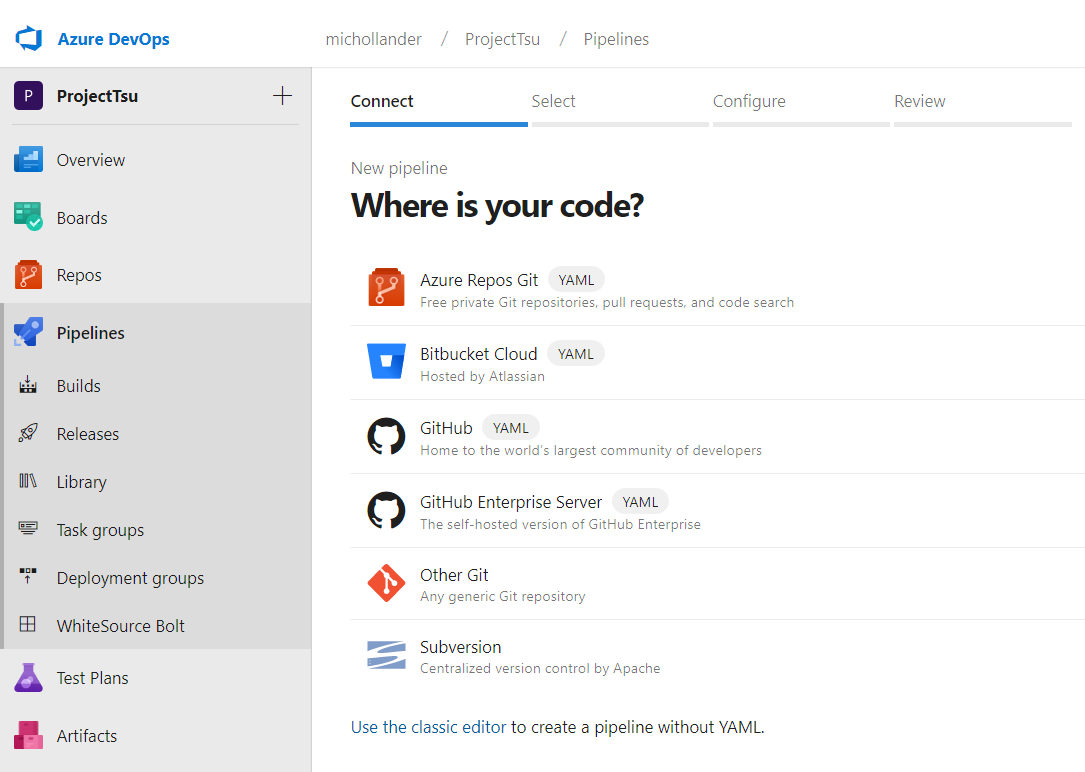
In the Where is your code? screen, select a YAML-enabled option.
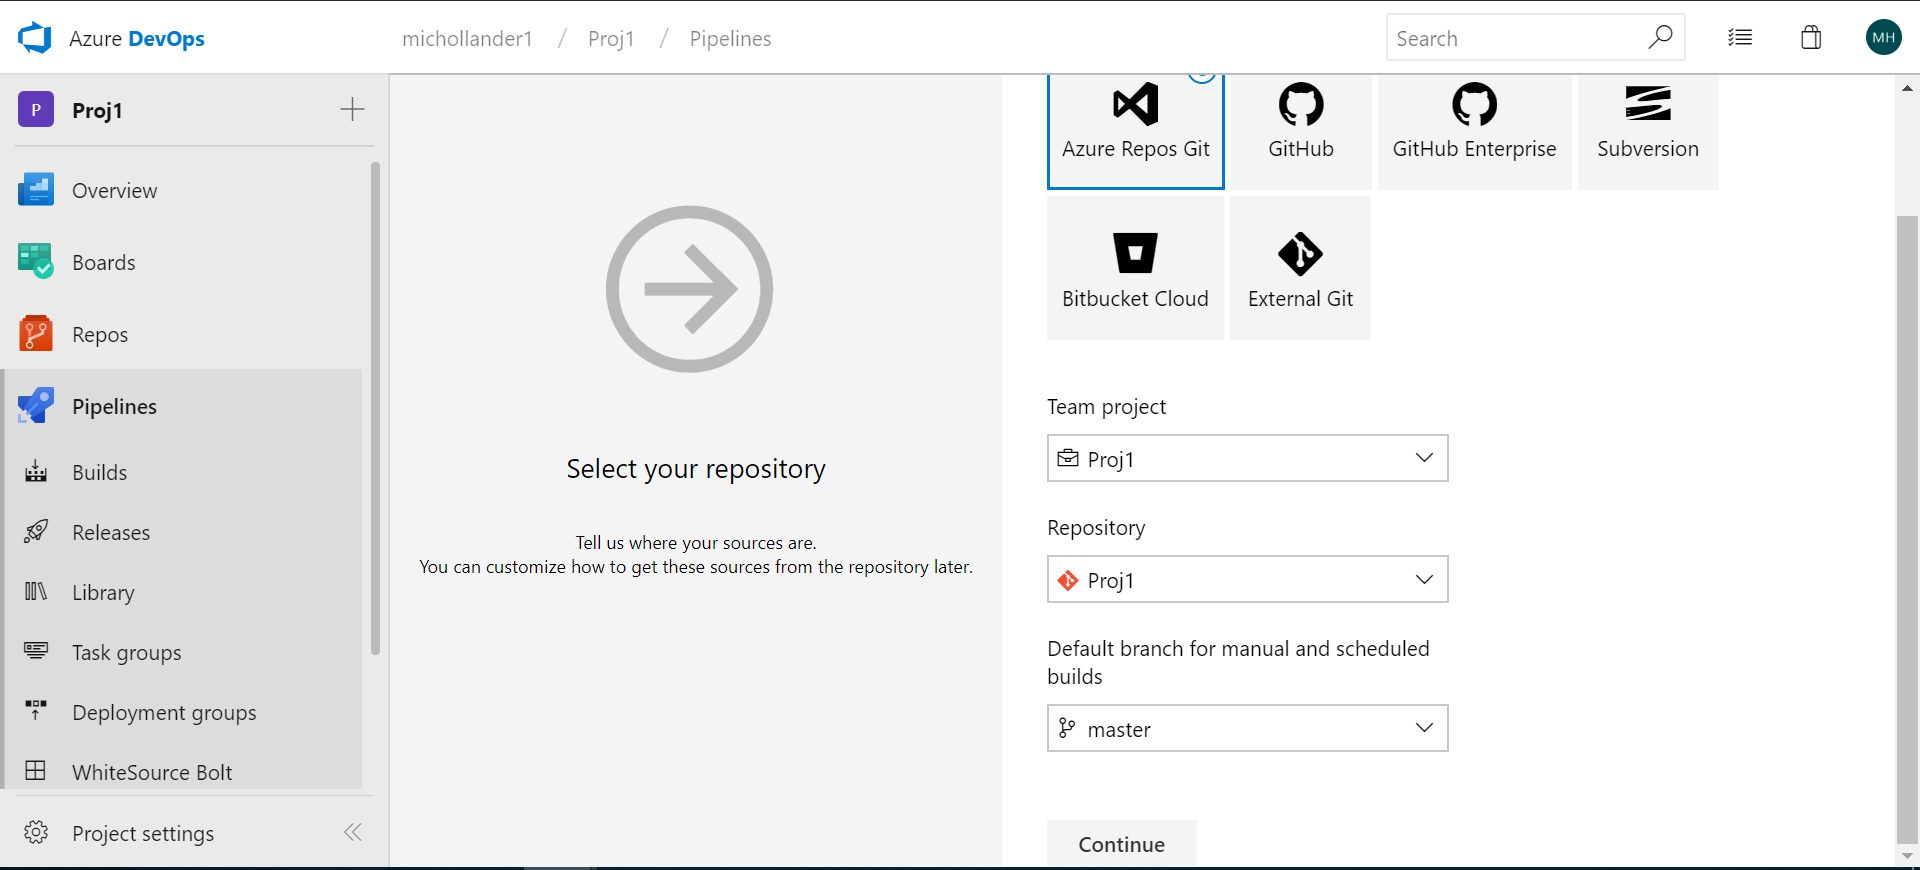
In the Select a repository screen, select your repository.

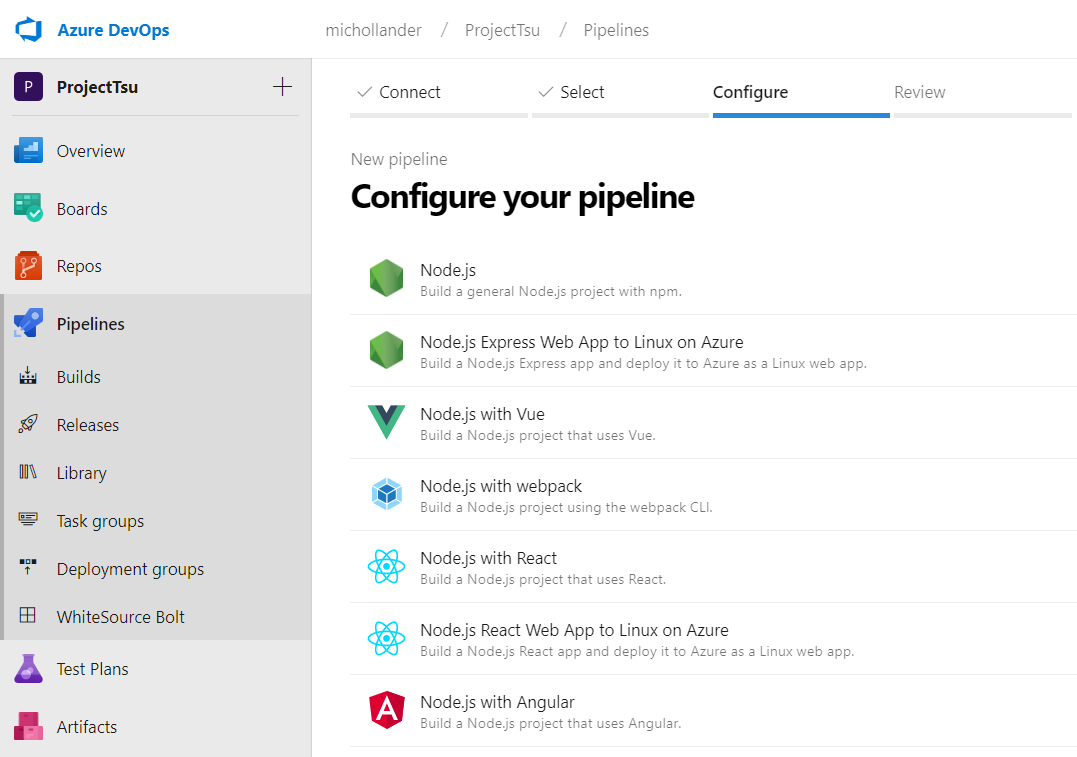
In Configure your pipeline, select the relevant pipeline configuration.
In Review your pipeline YAML, add the following text as a post-build step. This activates the WhiteSource integration on your build pipeline.
- script: 'curl -LJO https://github.com/whitesource/unified-agent-distribution/releases/latest/download/wss-unified-agent.jar'
  displayName: 'Download the latest Unified Agent'

- script: 'java -jar wss-unified-agent.jar -c wss-unified-agent.config -apiKey <API_KEY> -project <PROJECT_NAME>'
  displayName: 'Run Unified Agent Scan'

Click Save and run.
Option 2: Creating a Pipeline Without YAML (Classic Editor)
Select the type of repository:
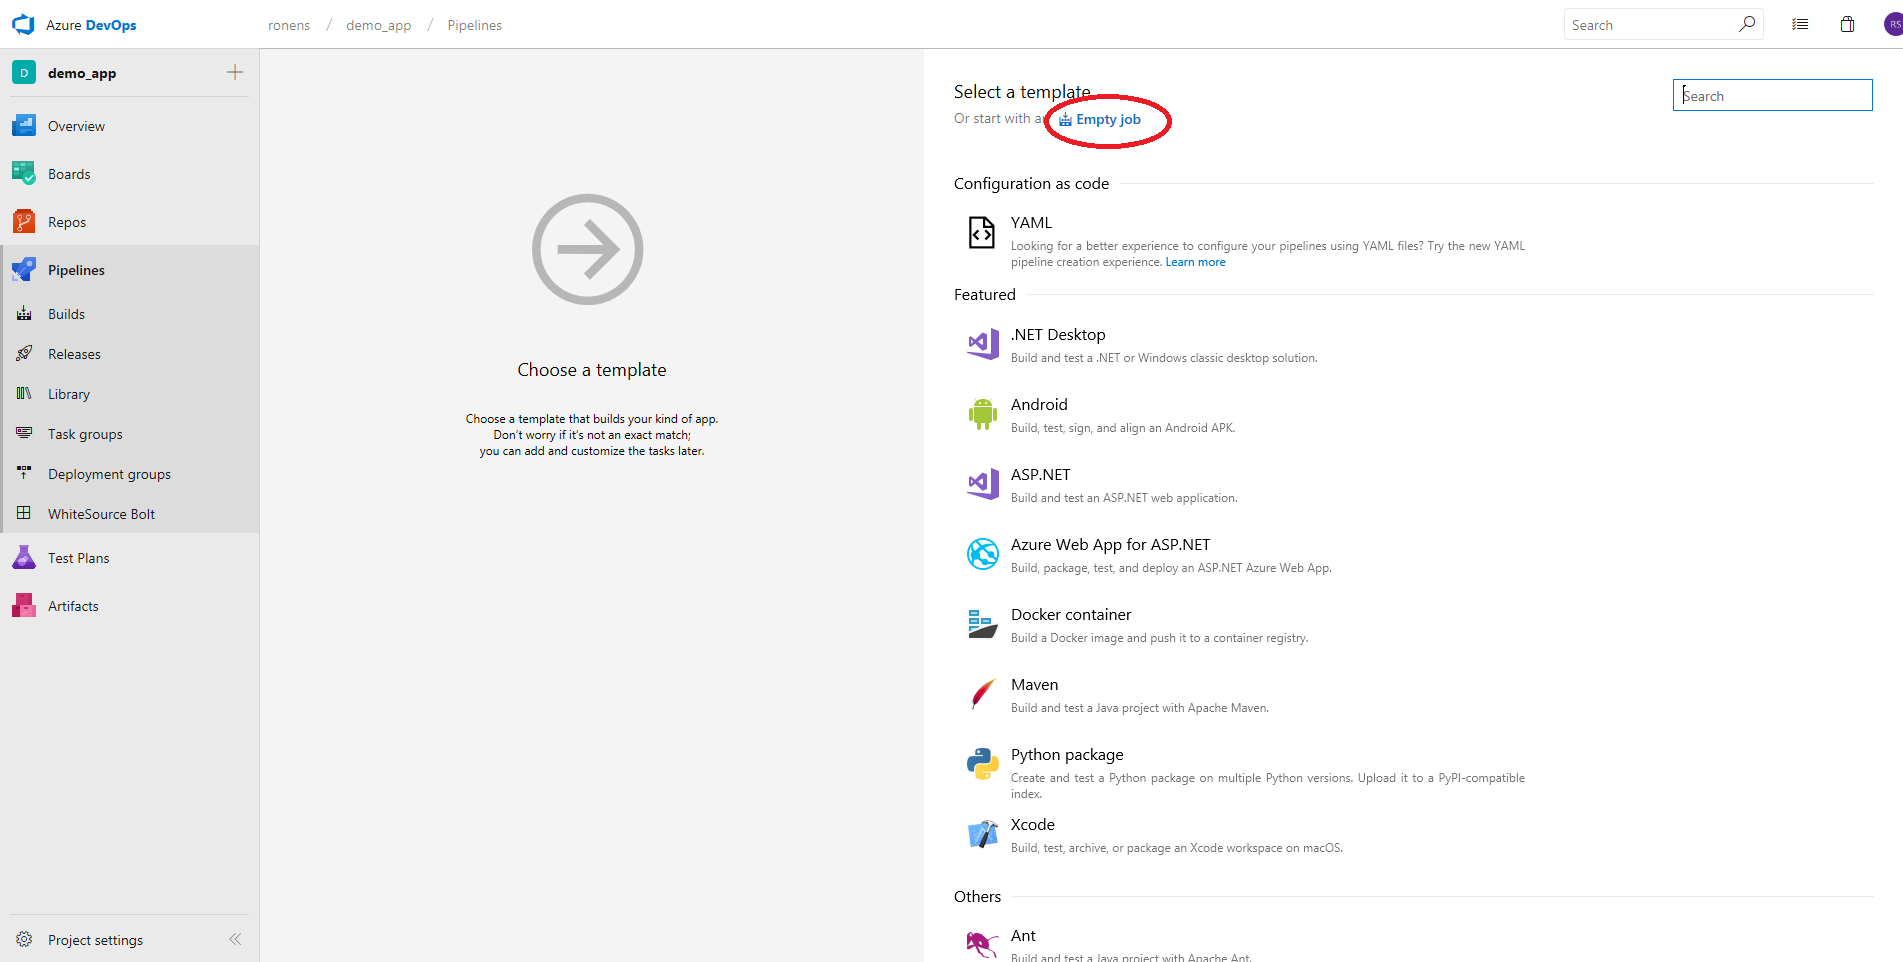
Select an Empty job:
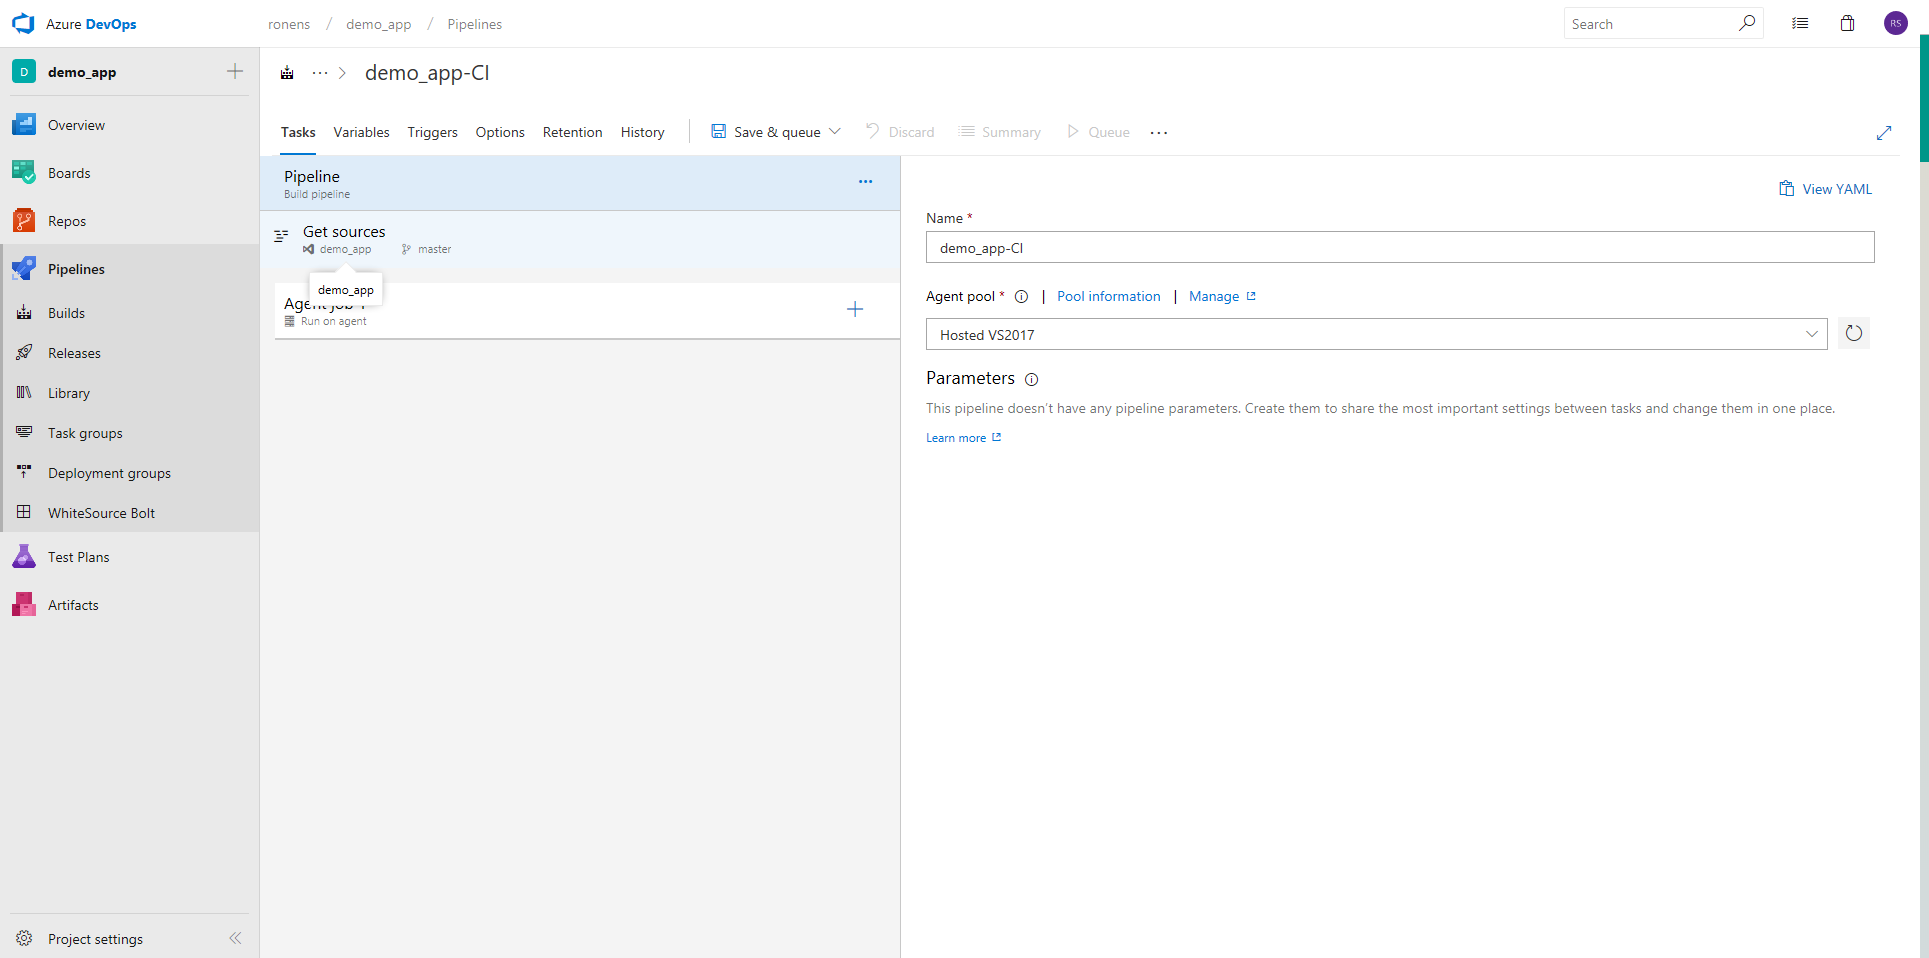
Enter a name for the job and select an Agent pool:
Add the relevant pre-step (Maven, npm install, etc.).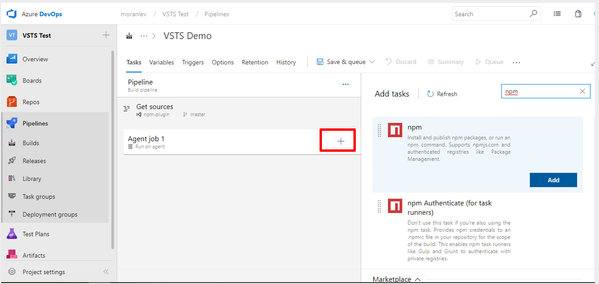
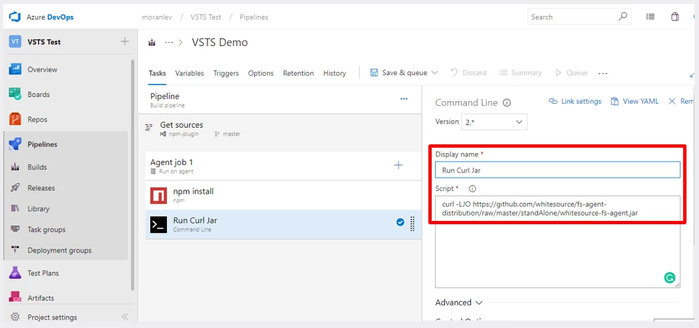
Add a CLI task in order to download the latest version of the Unified Agent to your local environment.
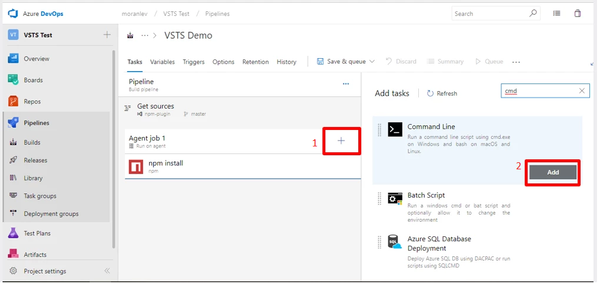
Enter the following:
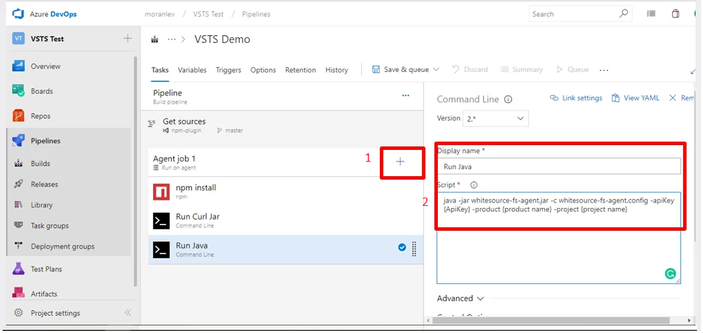
Add a CLI task in order to run the Unified Agent using the configuration file you initially downloaded in steps 1 and 2. Make sure you provide a valid API key, product name and project name.
Click Save & queue.