| Table of Contents |
|---|
Overview
SAML is a security open standard that can provide permissions for a user to a system.
It includes a Security Assertion Markup Language that provides a solution for the following requirement:
A user of Company ‘X’ needs permissions to access service A, service B, and service C.
The administrator of each service must create a new user because of this need. There are also service-specific updates required when one of the users’ status changes. For example, one user leaves the company, another gets promoted and receives administrator privileges.
Furthermore, when a user forgets a password for a specific service, a process for password renewal must be initiated (In SAML, the user has to remember just one set of credentials for the services).
Mend supports SP-Initiated (Service Provider Initiated) Single-Sign-On using SAML version 2.0.
The identity provider (IDP) connects between the service provider and the user. Examples of IDPs include Okta and Microsoft ADFS.
Use Case
The following illustration describes the functionality of Mend as a service provider in exchanging authentication and authorization data:
...
In Mend, the system parses the SAML permissions sent from the IDP. A SAML-enabled login does not include caching.
Metadata Format
The Mend metadata AssertionConsumerService text is sent to the IDP. Each IDP has a different method for metadata input.
Each IDP is associated to a Mend entity.
Prerequisites
To integrate SAML 2.0 with Mend, you will need to do the following:
Make sure you have a Mend user with Admin privileges.
Provide your organization's SAML metadata (Identity Provider Metadata)
| Info |
|---|
After a SAML integration has been added, it cannot be removed since users may not have a username/password to login to Mend. |
One-Time Integration Process
...
Basic Settings
| Info |
|---|
Removal of all cookies from the relevant machines is required each time the SAML integration is reconfigured. |
The Integration process is a prerequisite to login to Mend with SAML, and it is defined only once. To start the integration process, do the following:
Go to Admin > SAML page. Note that this link is to the SaaS solution and on-premises deployments should use their base URL (<Base URL>Wss/WSS.html#!samlIntegration)
Fill in the SAML integration fields:
SAML Entity ID: Enter your organization's unique SAML ID (it can be found in your IDP’s SAML metadata, usually as an entityID tag.).
Use one of the following options to add your organization’s metadata:
Metadata Link: Enter the URL of your organization's metadata.
Metadata Text: Enter your organization's metadata in plain text.
Metadata File: Upload an XML file that includes the organization’s metadata. (See the example here)
Advanced Settings (Optional)
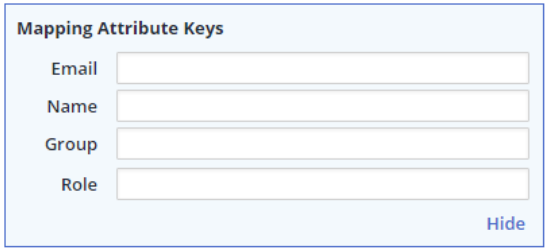
The advanced settings configuration enables you to map your SAML attribute keys.
To add/edit the SAML attribute keys that can be mapped, click Advanced Settings link.
Email: Enter the email address attribute name that will be used to map users to your Mend organization.
This should be the attribute name within the AttributeStatement set in your organization’s SAML response, which contains the user’s email address.
If no value is provided, then value is retrieved from the NameID attribute located within the Subject SAML attribute. If the NameID attribute is not found, Mend attempts to retrieve the value from the attribute named EmailAddress.
Name: Enter the username attribute name that will be displayed during the login process.
This should be the attribute name within AttributeStatement set in your organization ’s SAML response, which contains the user’s full name.
If no value is provided, the value is retrieved from the NameID attribute located within the Subject SAML attribute. An example is displayed below.
If the NameID attribute is not found, Mend attempts to retrieve the value from the attribute named EmailAddress.
Select either the Group or Role mapping option:
Group: If you want Mend to create groups according to the SAML response then select this option.
Enter the group attribute name from AttributeStatement set in your organization’s SAML response, which contains the group name to which the user should be assigned.Example: If you enter Position for the Group attribute key, and the SAML Position attribute name has the value Legal, then a new group named Legal will be created in Mend (if it does not exist yet) and the user will be added to this group.
If no value is defined for Group, users will be assigned to the existing default Users group within Mend.
Role: If you want both predefined roles and to map them to the specified Groups in Mend, then select this option.
Enter the relevant attribute name that defines the roles in the SAML response.Example: If you enter Position for the Role attribute key, and the SAML Position attribute name has the value Legal, then Mend will search for the Legal role in the Roles table:
If the Legal role name is defined, then the user will be added to the groups to which this role was associated from the Edit Groups dialog box.If the role was not defined, then the user will be assigned to the existing Users group within Mend. For information on mapping roles, see the Mapping your Organization's Roles section.
...
| Info |
|---|
If no Group and Name values are defined, then default mapping is to the Mend ‘users’ group. |
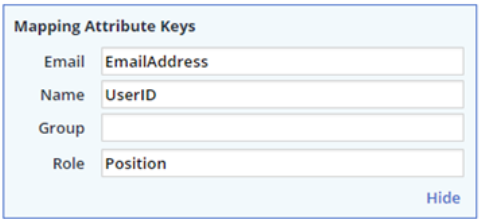
Mapping Attributes
The attribute name must be identical to the name defined by your organization in the SAML response. In this example, the attribute ‘Position’ should be mapped to the Mend Role attribute key.
...
Attribute Value Formats in SAML Response
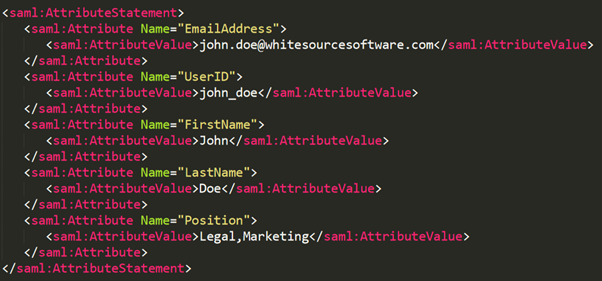
There are two types of supported attribute value formats in the SAML response:
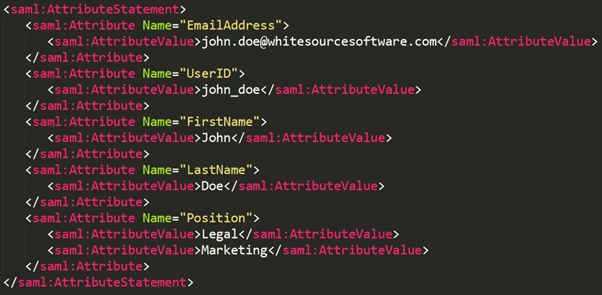
Attribute value containing multiple values. In the following example, the attribute Position has the values Legal and Marketing:

Attribute value containing multiple attribute value rows: In the following example, the attribute ‘Position’ has separate attribute value rows for Legal and Marketing:
Mapping your Organization's Roles
You can use the Add Role button to map your organization's role names in your SAML response to Mend. The following example illustrates this procedure:
In the following SAML response, there are two values in the position attribute (Legal and Marketing).
In Role, enter Position.
Map the Legal and Marketing values are mapped to the Mend groups via the following steps:
Click the Add Role button. The Role dialog box is displayed.
In Name, enter Legal.
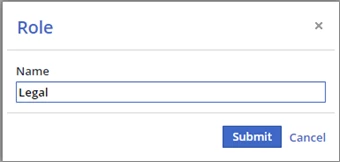
Click the Submit. The Edit Groups dialog box is displayed.
Select the relevant Mend groups for this role. Users mapped to this role will be associated to the selected group(s).
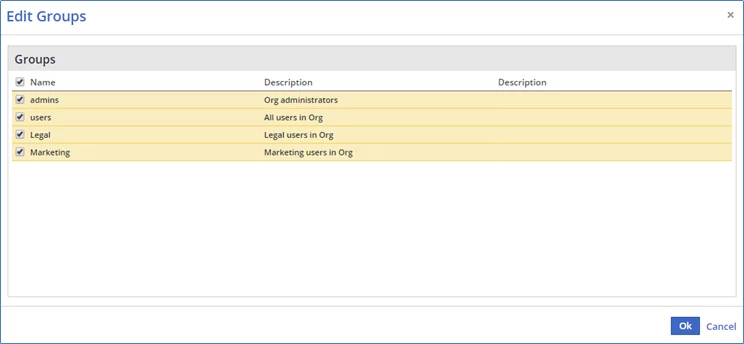
Click OK.
Repeat the same mapping procedure for the Marketing role.
The list of mapped roles is displayed in the Roles table, and also provides you with the option to edit groups for a specific role, and to remove specific roles.
...
Blocking a User
There are scenarios where it is necessary to block a user, such as in situations when a contractor is provided with limited access to the organization's services. In these scenarios, it is possible to block a user from logging into Mend in one of the following methods:
Option 1: When using 'Role' Mapping Attribute Key - Make sure not to assign SAML response attribute value to any Mend groups
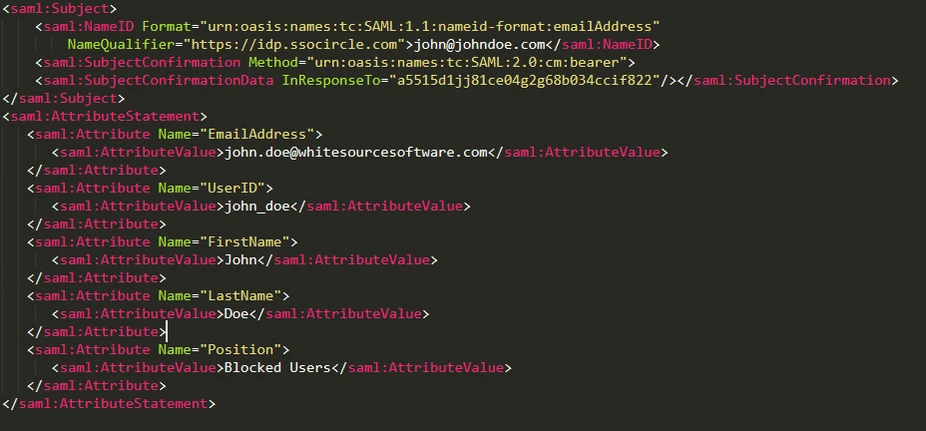
The Mend role is not mapped to any group. For example:
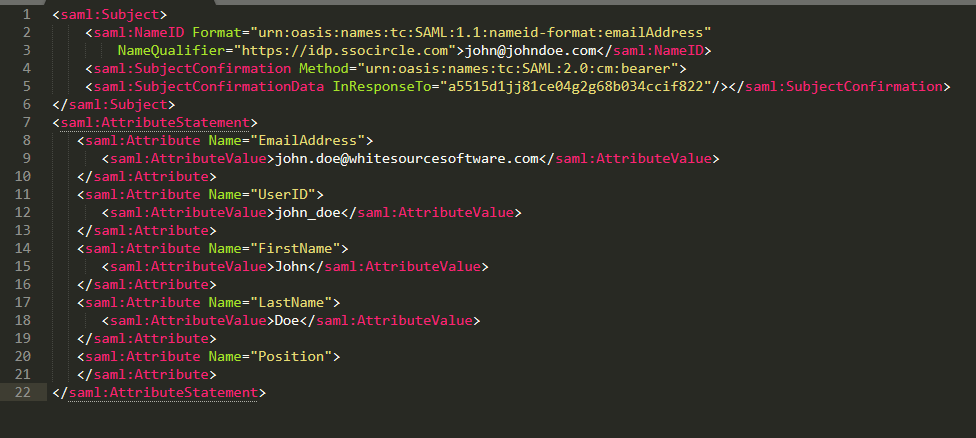
In the following SAML response, there is one value in the position attribute that is designated for a user who is denied login privileges to Mend (“Blocked Users”).
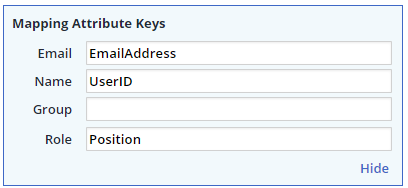
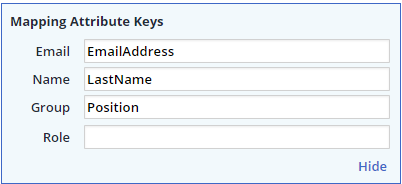
The mapping of the attribute keys is entered:
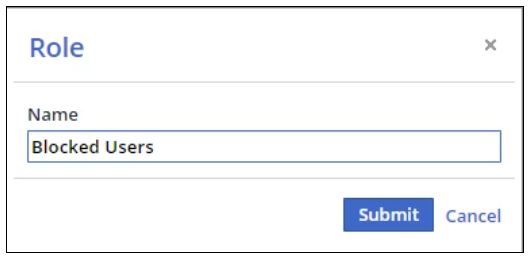
Add a role for blocked users (e.g., 'Blocked Users') and click Submit:
The Edit Groups window is displayed with the default groups admin and users selected. In order to block the user, no groups should be assigned to the user, and therefore, the admin clears the checkboxes for all Groups (including the two default groups) and clicks the OK button:

Note that the user mapped to the 'Blocked Users' role cannot login to the Mend GUI.
Option 2: When using 'Group' Mapping Attribute Key - Provide no value in the SAML response attribute representing the group
In this method the mapped attribute for the group should not include any value as displayed in the following example:
No value is included in the Position attribute:
The Mend SAML administrator maps the attribute keys for the blocked user and enters Position as the mapped attribute for the group:
This user is not mapped to any group, and therefore, cannot login to the Mend GUI.
Submitting the SAML Configuration
Click Save to submit your SAML configuration. After the integration process is completed, a new parameter will be displayed: ‘SAML Login URL (See sample screenshot below)’. You will also receive an email with the login URL. Use this URL to login with your organization's SAML. Note that you must also define the SAML settings on your organization’s side in order to finish the SAML login process. Refer to the next section for more information.
...
SAML Configuration in Your Organization’s IDP
Add the following settings:
Mend Entity ID: com.whitesource.sp
Assertion Consumer Service URL: <Base URL>/saml/SSO (used as a destination & a host URL). For example, https://saas.whitesourcesoftware.com/saml/SSO
Sample Metadata for Mend
| Code Block |
|---|
<?xml version="1.0" encoding="UTF-8"?>
<md:EntityDescriptor ID="com.whitesource.sp" entityID="com.whitesource.sp" xmlns:md="urn:oasis:names:tc:SAML:2.0:metadata">
      <md:SPSSODescriptor AuthnRequestsSigned="false" WantAssertionsSigned="true" protocolSupportEnumeration="urn:oasis:names:tc:SAML:2.0:protocol">
            <md:NameIDFormat>
                  urn:oasis:names:tc:SAML:1.1:nameid-format:emailAddress
            </md:NameIDFormat>
            <md:AssertionConsumerService Binding="urn:oasis:names:tc:SAML:2.0:bindings:HTTP-POST" Location="https://saas.whitesourcesoftware.com/saml/SSO" index="0" isDefault="true"/>
      </md:SPSSODescriptor>
</md:EntityDescriptor> |
Alternatively, download an updated XML metadata file sample from one of the following links:
...
Link
...
https://saas.whitesourcesoftware.com/saml/metadata
...
https://saas-eu.whitesourcesoftware.com/saml/metadata
...
https://app.whitesourcesoftware.com/saml/metadata
...
https://app-eu.whitesourcesoftware.com/saml/metadata
Organization and Global Accounts
There are two types of SAML accounts that can be defined in Mend: Organization Account and Global Account.
Organization Account
The SAML organization account provides a one-to-one mapping between Mend and a single organization. The mapping process is described in the previous sections of this document.
Global Account
The SAML Global Account method provides a many-to-one mapping relationship where multiple organizations are managed by one Mend Global Admin account. A Mend Global Admin user must be used in order to deploy this method.
It is important to note that you can have multiple global accounts connected to the same Entity ID; the mapping works according to the roles received via SAML login.
In this method, the Group attribute field is disabled since there may be identical group names in different organizations (e.g., default ‘users’ group in more than one organization).
...
When mapping roles in the SAML Global Account method, each group is mapped to a specific Mend organization (domain). For example, in the following Edit Groups window there are two ‘users’ groups from the ‘Organization1’ and ‘Organization2’ domains. The admin should select the group assigned to the relevant domain, which should be mapped for the role that is being added.
...
Removing Users from your IdP
When removing a user from your organization’s IdP, you will also need to remove them from the Mend UI in order to fully deactivate their API access. To remove a user from the Mend UI, please follow the steps provided in the following articles:
Appendix: Chrome SAML Extension
You have the option to add a third-party SAML extension for Chrome.
| Note |
|---|
This is not a tool that is provided by Mend, and Mend is not responsible for its functionality. |
It adds support for SAML Requests and Responses, and is displayed in the Developer Tools window.
This is an Open Source SAML debugger for Chrome. It operates as another panel in the Chrome Developer Tools section, which monitors the traffic in the current active tab.
When the data is encrypted, the information in this tool provides limited usability.
Use this link to download the extension.This page is available at: https://docs.mend.io/bundle/sca_user_guide/page/saml_2_0_integration.html