...
Integrating AWS CodeBuild with WhiteSource
To integrate AWS CodeBuild with WhiteSource, do as follows:
To add the WhiteSource Integration code, do one of the following options:
Add a buildspec.yml file to your source code root directory or edit your existing file.
You may also use CodeBuild console UI editor for editing the buildspec.yml file.
This enables customers who may not have committer access to the source repo to also use this integration.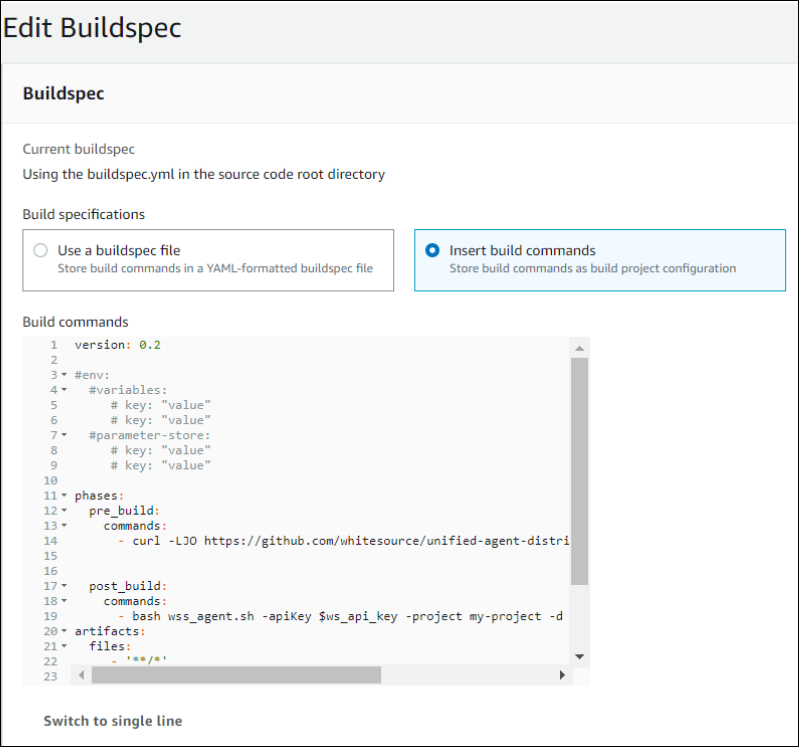

Add the following commands to the pre-build phases in buildspec.yml:
curl -LJO https://github.com/whitesource/unified-agent-distribution/raw/master/standAlone/wss_agent.sh
This step will download the wss_agent.sh script file to AWS CodeBuild server.NOTE: It is advised to use the curl command only once a week to download the latest version of the Unified Agent for performance reasons and not as part of every build. You can do this using a scheduler task, such as cron.
Add the following command commands to the post-build phase:
bash wss_agent.sh -apiKey $ws_api_key -project my-project -d . This command
-wss.url https://<environment>.whitesourcesoftware.com/agent
where <environment> corresponds to saas/app/saas-eu/app-eu
These commands will run the script wss_agent.sh.
The script will download the latest version of WhiteSource Unified Agent jar file and its config file to your AWS CodeBuild server and execute it with the regular command-line arguments of Unified Agent.
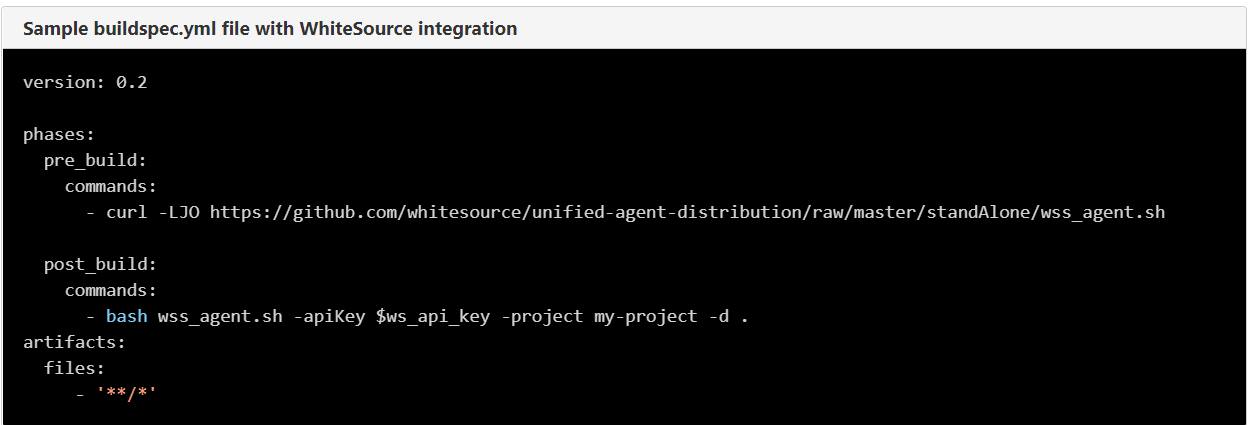
Determine the name of the WhiteSource project.The buildspec.yml file should have the below structure:
Sample buildspec.yml file with WhiteSource integration
Sign in to your AWS Console.
Open the CodeBuild service from the Developer Tools services category.
Click Create build project or choose one of your existing projects.
Make sure that the Build specification option uses the default buildspec.yml file.
In the Advanced Settings section, add an Environment variable with the name ws_api_key and the value of your WSS API Key.
Click Continue and then Save or Save and Build to directly build after the save.
Following a successful build process, your WhiteSource service will be updated with the details of your project, and a build of your project (zipped or not) will be placed inside the S3 bucket you have selected in your project's settings.
You can see your build details, by choosing the Build run from the Build history list. WhiteSource's logging information will be listed under Build logs.
The scanning command and its output will appear in the POST_BUILD phase in the build log.After the build completes with a WhiteSource scan, you can review the scanning results in your WhiteSource organization under the relevant project.
| Info |
|---|
Breaking Builds In case of a WhiteSource scanning error, the scanning step returns an error code. See the return codes below. Returning an exit code other than success results in a failure of the build step.
The exit codes WhiteSource returns in the Bash command language should be treated as 'x' modulo 256:
|
...