...
...
...
...
...
...
...
...
...
...
...
...
...
...
...
...
...
...
...
...
...
...
...
...
...
...
...
...
...
...
...
...
...
...
...
...
...
...
...
...
...
...
...
...
...
...
...
...
...
...
...
...
...
...
...
...
...
...
...
...
...
...
...
...
| Info |
|---|
WhiteSource launched a new WhiteSource Bolt extension on 17 January 2021. Click Click here for for more information. |
...
| Table of Contents | ||
|---|---|---|
|
Introduction
WhiteSource Bolt is a lightweight open source security and management solution, integrated within Microsoft’s Azure DevOps Services & Azure DevOps Server (formerly TFS) products. It enables you to do the following:
Detect and remedy vulnerable open source components.
Generate comprehensive open source inventory reports per project or build.
Enforce open source license compliance, including dependencies’ licenses.
Identify outdated open source libraries with recommendations to update.
For more information or questions on WhiteSource Bolt for Azure DevOps, please reach out directly to boltazure@whitesourcesoftware.com.
...
As of 17 January 2021, The WhiteSource Bolt extension is not available for installation anymore. A new WhiteSource Bolt extension is available from here. Documentation for the new extension can be found here.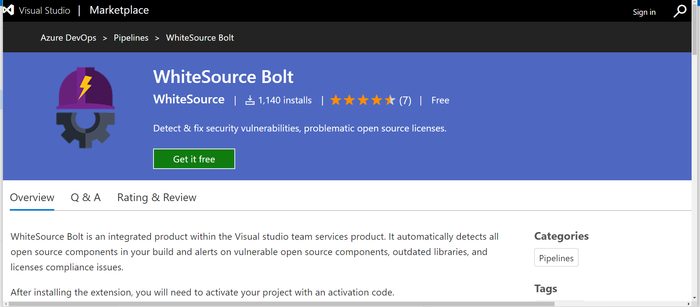
...
Build Configuration for Azure DevOps Services
...
Create a new project, provide a name for it, and an optional description (alternatively, use an existing project).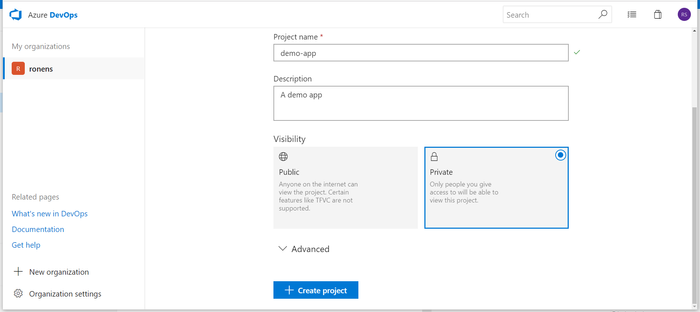
...
From the main menu select 'Pipelines'→ 'WhiteSource Bolt'.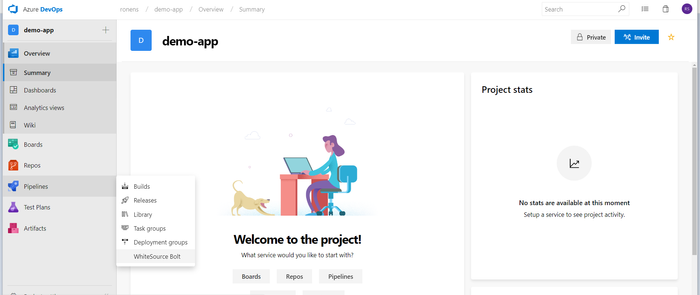
...
Fill in the registration form: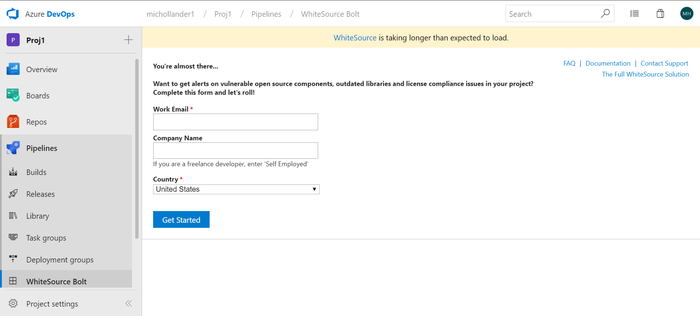
...
Setting Up the Job
Go to 'Pipelines' → 'Builds' → 'New' → 'New Build Pipeline'.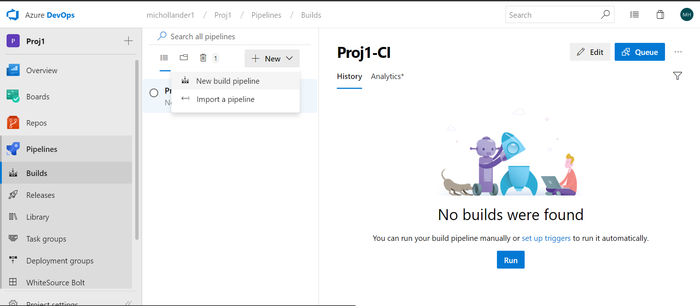
...
Select the source for your code. You can create a pipeline using YAML (option 1), or use the classic editor to create a pipeline without YAML (option 2).
Option 1: Creating a Pipeline Using YAML
In the Where is your code? screen, select a YAML-enabled option.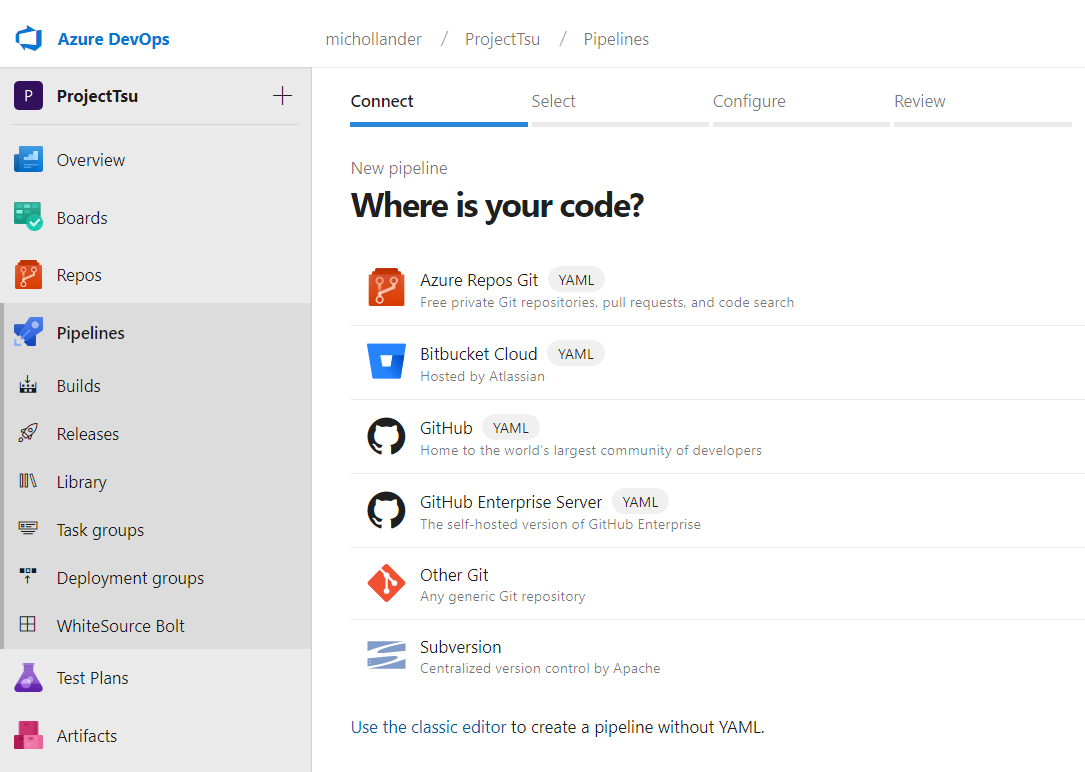
...
In the Select a repository screen, select your repository select your repository.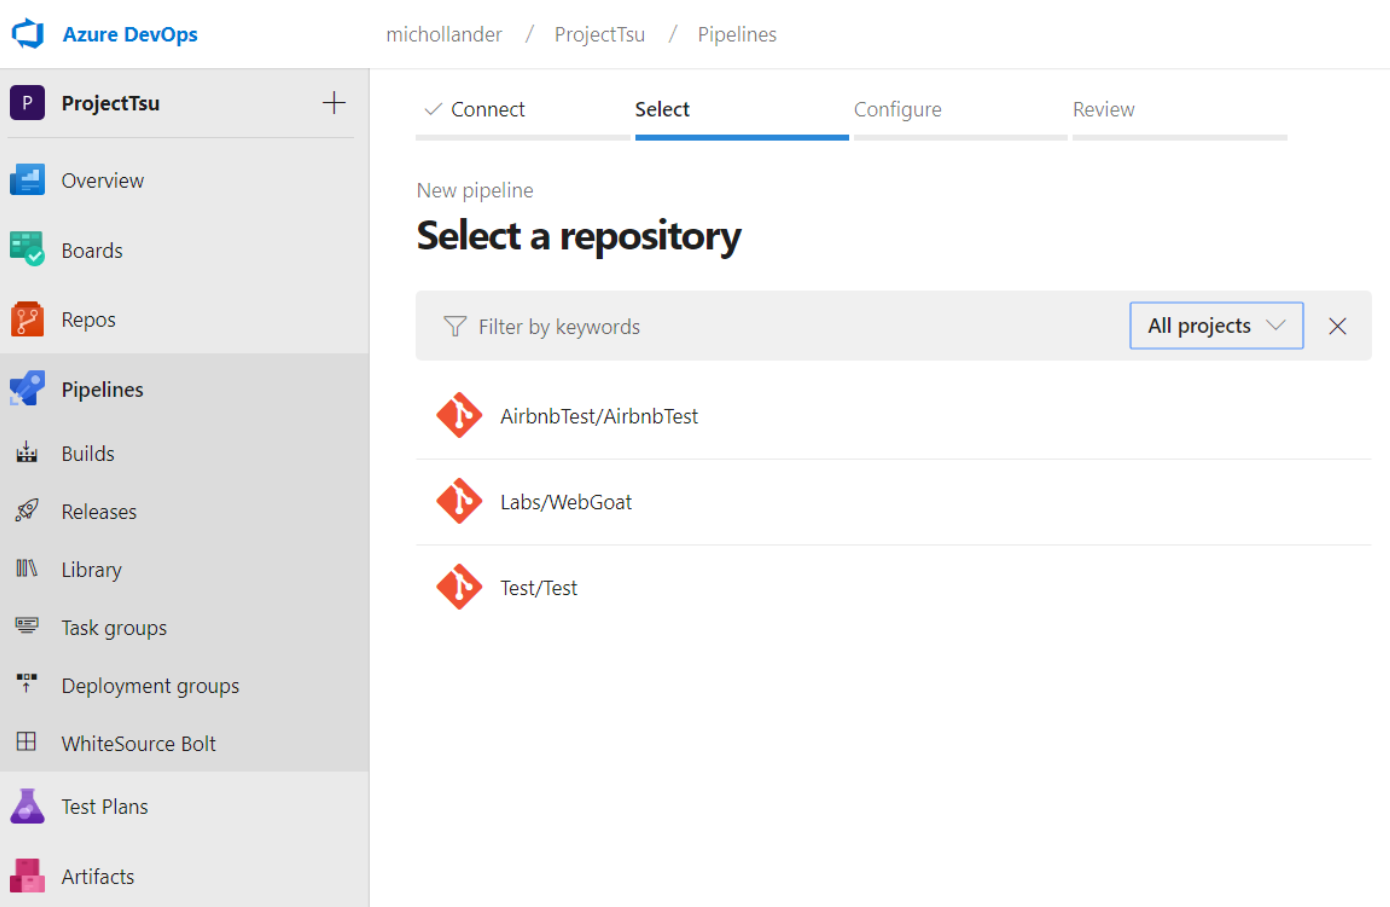
...
In Configure your pipeline, select the relevant pipeline configuration.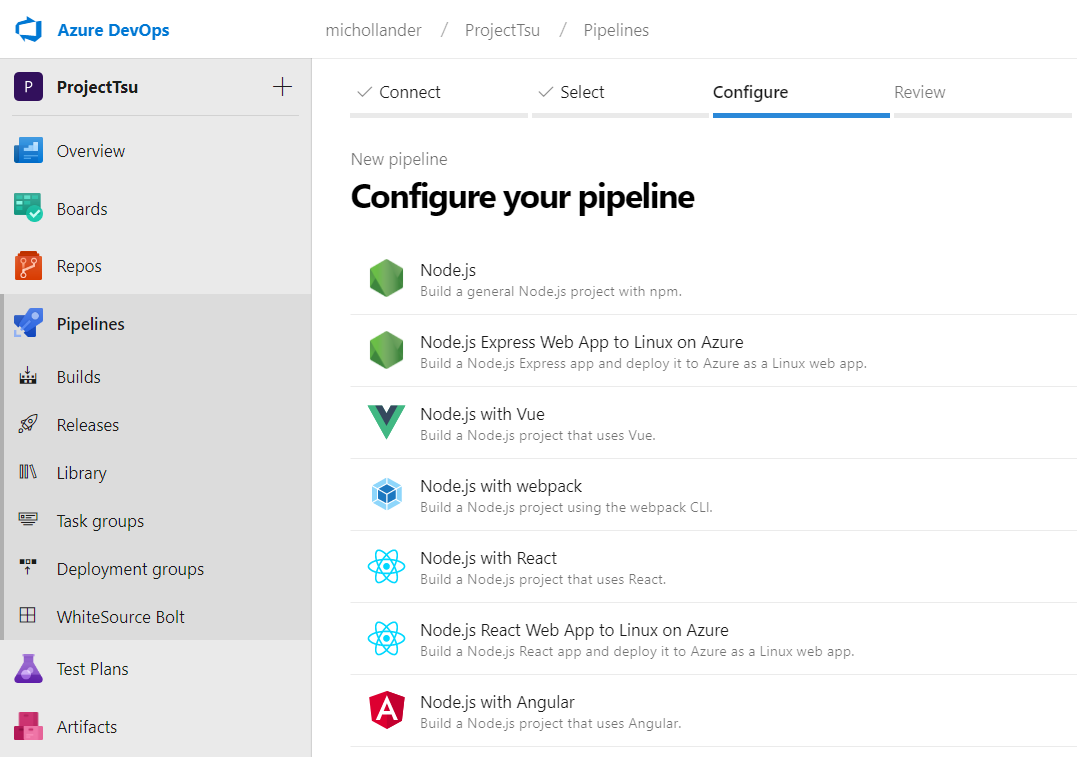
...
In Review your pipeline YAML, add the following text as a post-build step. This activates WhiteSource integration on your build pipeline.
| Code Block |
|---|
- task: WhiteSource Bolt@19 displayName: 'WhiteSource Bolt' |
...
Click Save and run.
Option 2: Creating a Pipeline Without YAML (Classic Editor)
Select the type of repository: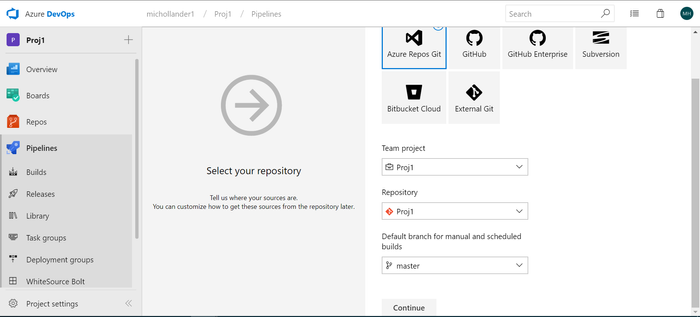
...
Select an Empty job:
...
Enter a name for the job and select an Agent pool: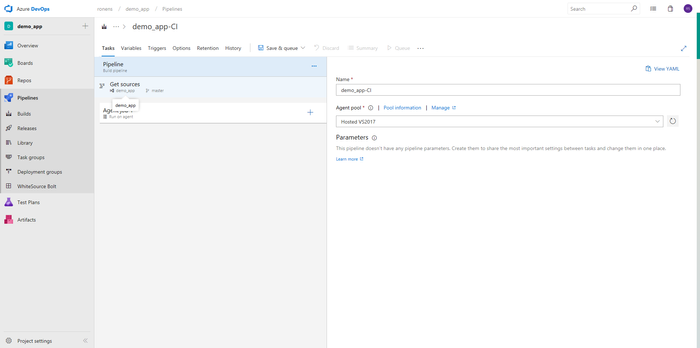
...
Add a task to the Agent Job.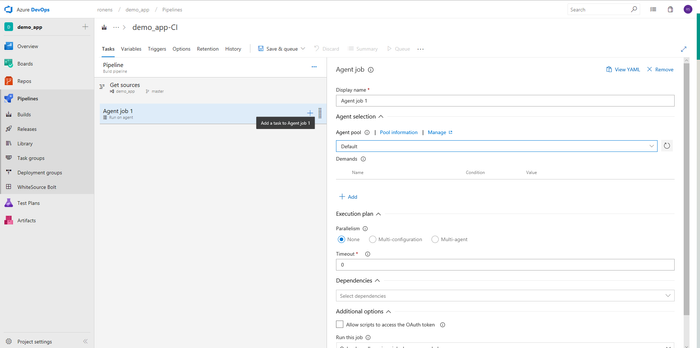
...
Add the relevant prestep and WhiteSource Bolt as the last step.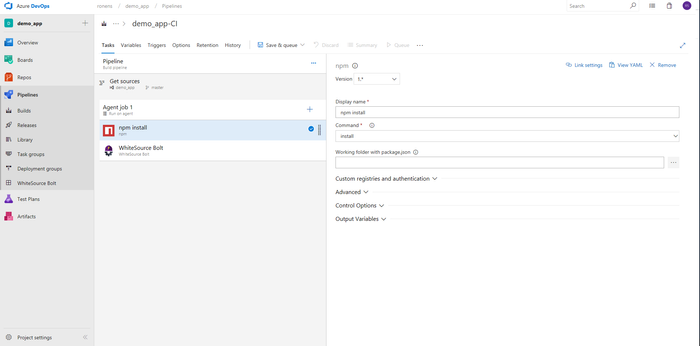
Click on 'Save and Queue'.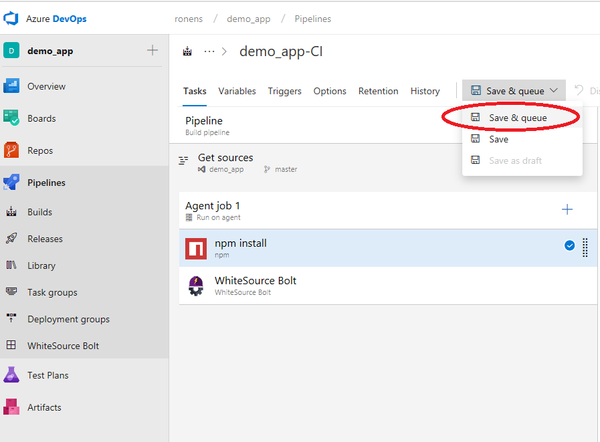
...
Click on the build number.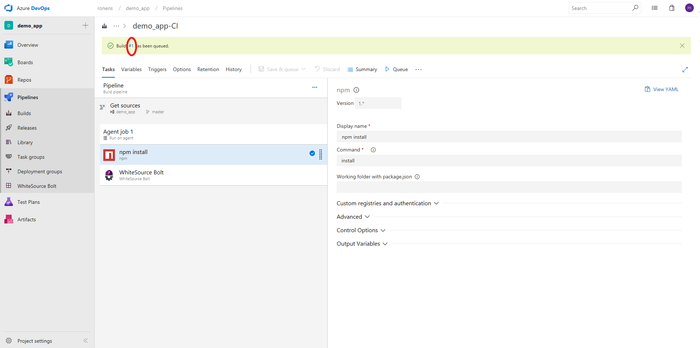
...
The 'Monitored Build Definitions' table is displayed while the report is loading: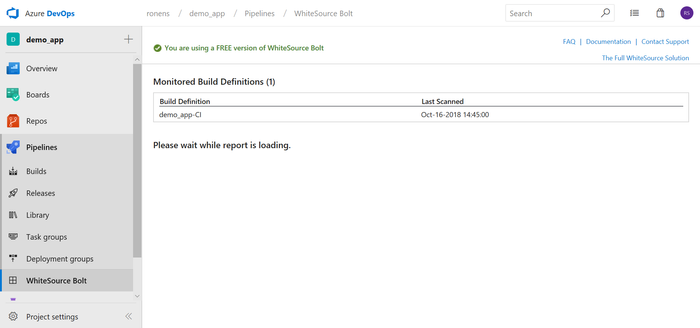
...
The Bolt scan report is displayed: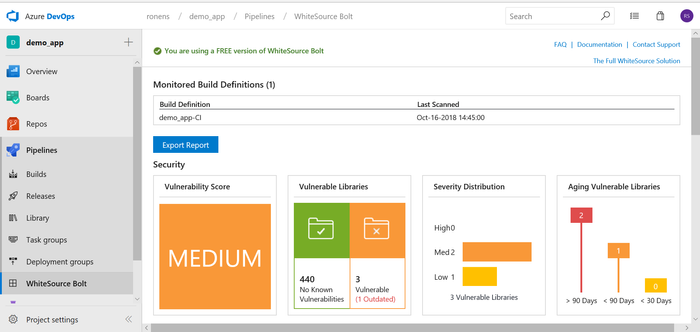
...
You have the option to export the report by clicking the 'Export Report' button.
Build Configuration for Azure DevOps Server
...
| Info |
|---|
Azure DevOps Server UsersIf you are using a proxy server or a self-hosted build agent, make sure to open communication to the domain "whitesourcesoftware.com" and its subdomains. In case your proxy configuration requires authentication, then make sure your Azure DevOps Server build agent is properly configured. For further information, see Deploy an agent on Windows. |
Follow these steps:
Go to your activated project page.
Navigate to the Build & Release tab and click Builds.
Select the build definition you wish to analyze or create a new build definition by clicking ‘+New’.
Click Edit in the top right corner of your screen.
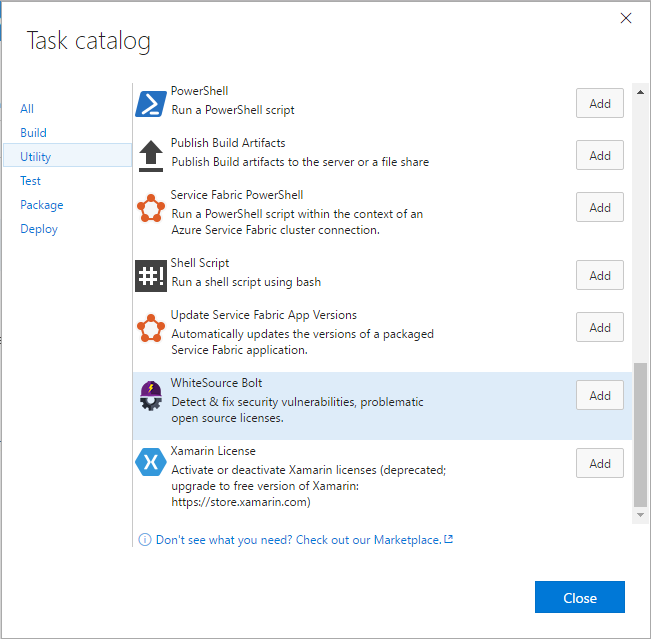
Choose Add build step and the task catalog will open up in a pop-up window.
Choose the Utility category
Scroll down to WhiteSource Bolt and click Add, then Close.

Place the WhiteSource Bolt build step after any other packaging steps such as 'npm install' or 'NuGet restore'. This ensures that WhiteSource Bolt has access to all of your open source components.
Optional: After adding WhiteSource Bolt to the build, click on the WhiteSource build step. On the right side you can view its configuration display:
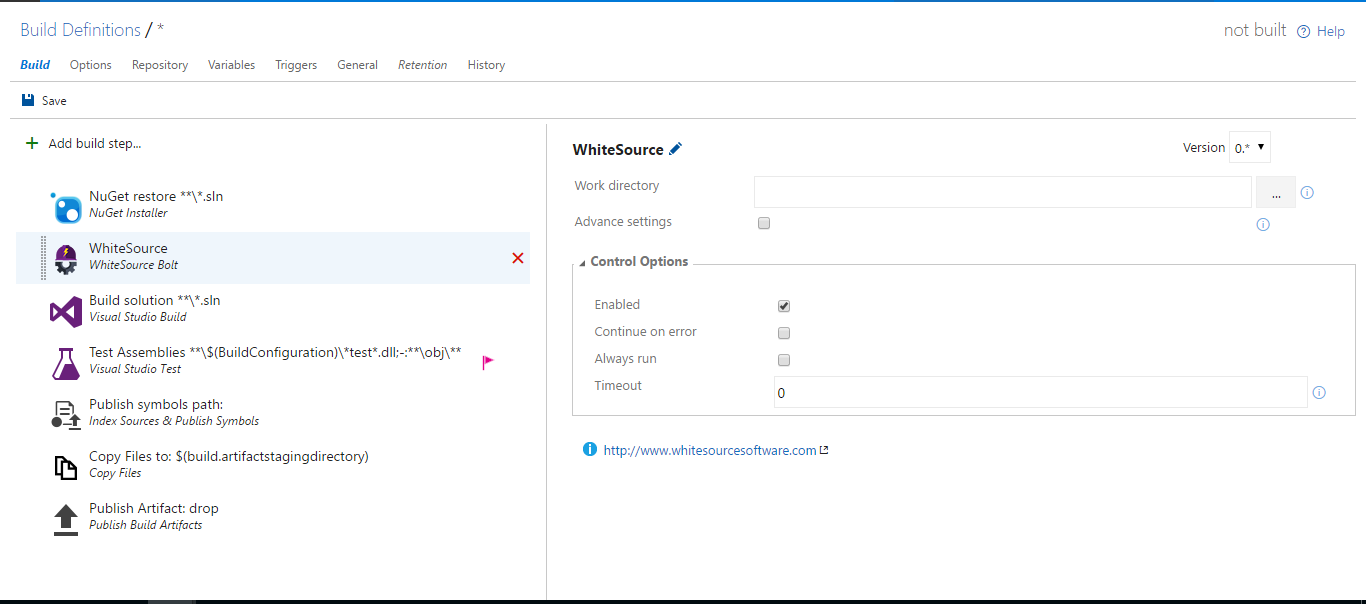

The default configuration analyzes the entire project work directory. If you prefer, you can take the following steps to create a custom configuration, specifying folders for WhiteSource Bolt to scan or exclude:Click the three-dot select path button to the right of the Work directory field.
Select a path.
To exclude folders, check the box next to Advanced settings, and enter folders separated by a space into the Exclude list field that pops up below.
NOTE: Excluding a folder which contains spaces is not supported.

When you’ve finished with your configurations, click Save on the left side of the screen, followed by clicking OK.
...
Follow these steps to start a new build:
Click Queue new build on the top right of your screen,followed by clicking OK.
As soon as the build process completes, you’ll see a new tab in the Build Summary page called WhiteSource Bolt Build Report:

If you receive an error message rather than the above build confirmation, then contact boltazure@whitesourcesoftware.com.Click on the WhiteSource Bolt Build Report tab to view the WhiteSource Bolt analysis.
Info NOTE: WhiteSource Bolt only displays results for each build execution that postdates WhiteSourceBolt’s installation. If you try to access a build that predates WhiteSource Bolt’s installation, then no results will be displayed.
From now on, WhiteSource generates a report each time that you execute a build.
...
A summary of detected open source vulnerabilities and the libraries that contain them.
...
A Vulnerability Score can be Secure (green), Low (yellow), Medium (orange) or High (red). The score is determined based on the single highest severity level of any vulnerability detected. Secure Secure indicates no vulnerable components are present at all. Low, Medium and High severities are given according to a vulnerability’s severity ranking in the National Vulnerability Database (NVD).
Vulnerable Libraries displays the total number of libraries present. The left panel displays the number of secure libraries, and the right panel displays the number of vulnerable libraries. The number of outdated libraries is parenthesized in red font.
...
A table listing all security vulnerabilities.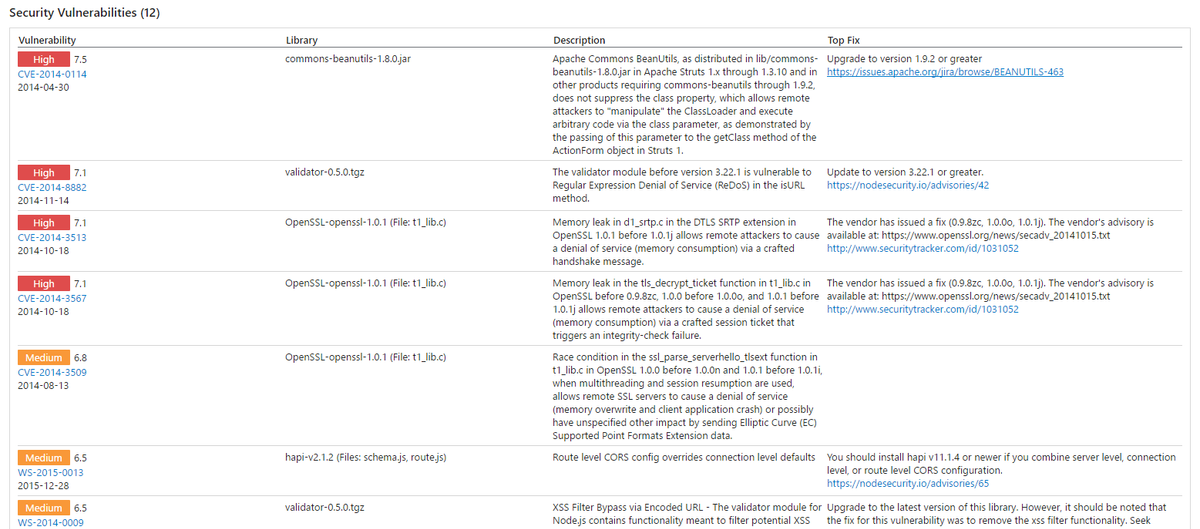
...
The Vulnerability column lists a vulnerability’s severity score, a link to its CVE or WhiteSource profile (if the vulnerability is unregistered in the CVE/NVD), and its publishing date. The column is ordered according to severity, with the most severe vulnerabilities appearing first.
...
Section 3: License Risks and Compliance
A summary of open source components’ license types.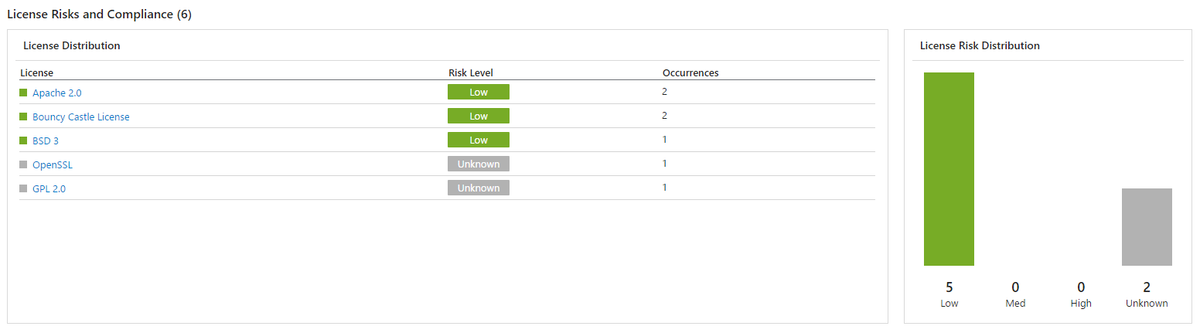
...
The License Distribution table lists the license types associated with detected open source components and provides links to the licenses’ official descriptions. A risk level is given for each license type, as well as the license type’s total number of occurrences.
...
A table listing libraries that have not been updated to their newest available versions.
...
The Library column lists the name of the outdated library.
...
An inventory of all open source components detected.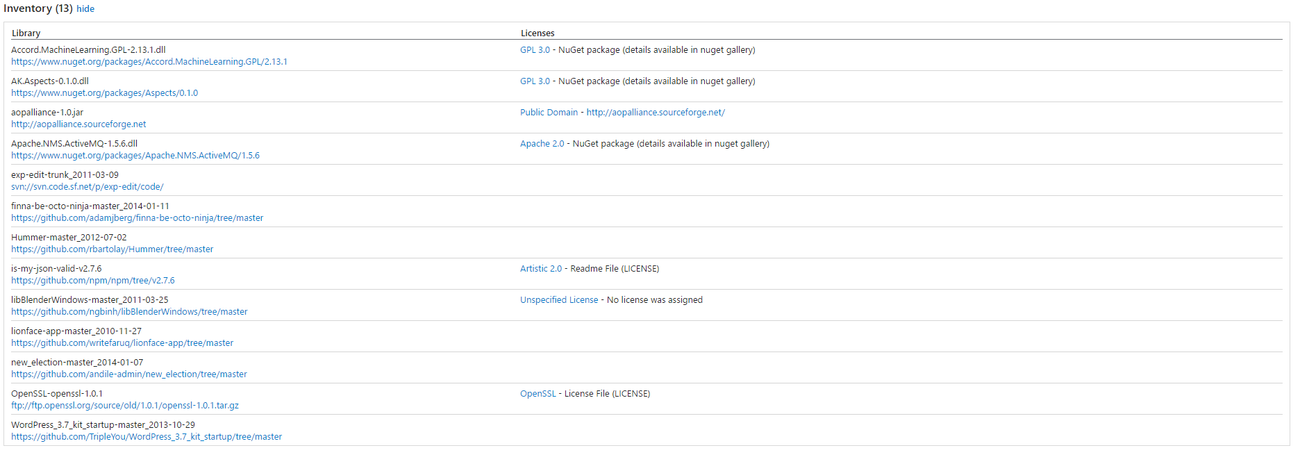
...
The Library column shows the name of the open source library and a link to its homepage or direct download.
The Licenses column lists licenses detected for each library, and links to their official license descriptions. The reference site that identifies the library’s license type is also linked to or described.
Upgrading to the Full WhiteSource Platform
We hope you enjoy using WhiteSource Bolt, a lightweight product integrated with Azure DevOps Services/Azure DevOps Server. For even greater control over your open source components, consider upgrading to our full WhiteSource platform.
Feel free to reach out to us to learn more about the platform's expanded functionality and our simple upgrade process.