| Table of Contents |
|---|
Overview
WhiteSource Advise is an extension for Visual Studio Code, Visual Studio Codespaces, and GitHub Codespaces that is designed to empower developers with important, valuable information on security vulnerabilities concerning open-source components employed in their development projects.
WhiteSource Advise does the following:
It facilitates workflows by making critical component vulnerability information available to the software developer from within the code editor, preventing the need to use a separate application for such purpose.
It offers a transparent UX for developers, by seamlessly integrating with the code editor. It highlights open source components found to have reported security vulnerabilities (CVEs), displays information on such vulnerabilities, and offers recommendations for fixing them.
Support for Languages, Package Managers and Proxy
WhiteSource Advise supports NPM and C#-based (SDK and non SDK-style) projects.
Note the following current limitations:
In certain circumstances where multiple scanned projects have the same vulnerable transitive dependency but each project containing a different versions of the dependency, WhiteSource will provide security results for only one of the dependency versions.
For C# Projects: The intermediate output path (the default is "obj" folder) of a C# project must be located directly inside the project's folder.
Using VS Code behind an authenticated HTTP proxy where credentials are not set as part of the proxy URL is not supported
Prerequisites
Ensure the following:
A Windows or macOS machine is being used (Linux is not supported)
A valid license for WhiteSource for Developers
A license key for WhiteSource Advise for IDE, available via one of the following options:
If you do not have direct access to the WhiteSource Application, obtain the license key from your WhiteSource Administrator.
If you have access to the WhiteSource Application, do as follows (NOTE: This option is only available when using version 20.11.1 or later of WhiteSource Advise):
Go to the WhiteSource Application.
Open the Profile page.
In the WhiteSource Advise - IDE Integration section at the bottom, select your organization.
Copy your personal license key to be used later in Activating WhiteSource Advise.
(For installing the extension on Visual Studio Code only) Visual Studio Code version 1.47.3 or above is installed and you are familiar with its basic functionality
NPM and/or NuGet Package Manager must be installed
Installing WhiteSource Advise
To install WhiteSource Advise, do as follows:
Start the editor.
From the sidebar on the left, select Extensions. The Extensions panel is displayed.
In the search bar on top, enter whitesource and press Enter. The WhiteSource Advise “widget” is displayed in the panel.
In the WhiteSource Advise panel, click Install. The installation process begins. When the installation process is complete, you will receive a notification message.
Activating WhiteSource Advise
To activate WhiteSource Advise, do as follows:
...
Ensure that you have completed all previous procedures on this page.
...
Start the editor.
...
Open View > Command Palette.
...
In the Command Palette, enter whitesource.
...
From the suggestion list, select WhiteSource: Activate WhiteSource Advise. The Activate WhiteSource Advise wizard begins.
...
Enter your organizational email (the email domain must be licensed to use Advise), and click Enter.
...
Enter your license key (see here for more information on how to obtain a license key), and click Enter.
...
Configuring WhiteSource Advise
| Info |
|---|
Changes made to the WhiteSource settings will only apply after running the next scan. |
To configure WhiteSource Advise, do as follows:
From the sidebar on the left, select Extensions. The Extensions panel is displayed.
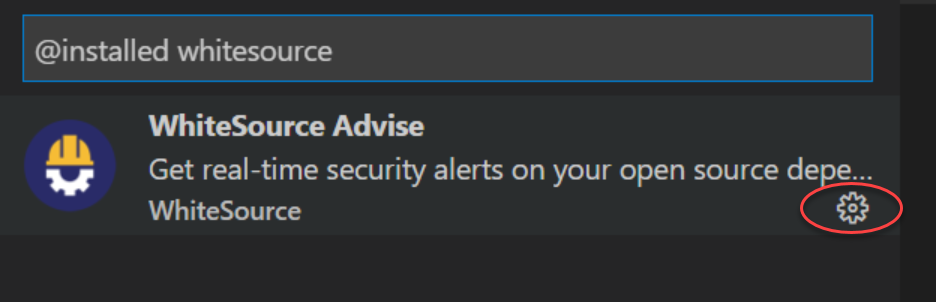
In the search bar on top, enter whitesource and press Enter. The WhiteSource Advise “widget” is displayed in the panel.
Click the Manage icon.
In the popup that opens, click Extension Settings.
In the WhiteSource screen, review the options and modify if necessary. See here for a list of all options.
Options Table
...
Option
...
Description
...
Default Setting
...
Enable automatic scanning in Workspace
...
When enabled, WhiteSource Advise will automatically scan after activating the extension or after changes are applied to any of your Workspace folders.
...
Selected (checked)
...
Include dev dependencies
...
When enabled, WhiteSource Advise will include dev dependencies in a scan.
...
Unselected (not checked)
...
Only show issues for direct dependencies
...
When enabled, WhiteSource Advise will only return vulnerabilities for direct dependencies defined in your dependency file.
...
Unselected (not checked)
...
Minimum vulnerability severity level
...
Alert only on detected vulnerabilities satisfying a Low/Medium/High minimum severity level.
Low - Vulnerability alerts for all severities (Low, Medium, High) are displayed.
Medium- Vulnerability alerts only for Medium or High severities are displayed.
High - Vulnerability alerts only for High severities are displayed.
...
Low
Scanning for Security Vulnerabilities
There are two ways to scan for security vulnerabilities - scan your entire workspace, or scan one or multiple folders within the workspace.
| Info |
|---|
Ensure your projects are built before you scan their associated folders with WhiteSource Advise. |
Scanning a Workspace
To scan a workspace, do any of the following:
...
From your keyboard, press Ctrl + Shift + Q
Scanning Folders Within a Workspace
To scan one or multiple folders within the workspace, do as follows:
Select one or multiple folders from the Explorer pane.
Right-click the folder (or a selection of folders) and from the context menu, click Scan folder(s) with WhiteSource Advise.
Reviewing Scan Results
After a scan is completed, a notification is displayed with informative statistics regarding the scan. These include the number of high, medium, and low severity vulnerabilities. To view more specific information regarding the vulnerability, click Show Problems inside the notification to open the Problems section. In the Problems section, for each vulnerability, the following details are displayed (note that some Problem descriptions are found on the same line):
Vulnerability/CVSS Score/Severity:
The identifier of the vulnerability
The security vulnerability's Common Vulnerability Scoring System (CVSS) score. If a CVSS 3 score is available, it will be displayed; otherwise, the CVSS 2 score will be displayed.
Reported severity for the vulnerability: HIGH, MEDIUM, LOW
Component/Dependency Type
The scanned component reported to have a vulnerability
Whether the vulnerable component is a Direct dependency or a Transitive dependency
Dependency Path - The path from the direct dependency to the vulnerable transitive dependency (displayed only if it is a transitive dependency)
Fix - The remediation advice that WhiteSource recommends for the vulnerability. A condensed description of the recommended course of action is given.
Upgrading WhiteSource Advise
Upgrading When Auto Updating Extensions is Enabled
To upgrade the WhiteSource Advise extension when the Auto Updating Extensions option is enabled, do as follows:
From the sidebar on the left, select Extensions. The Extensions panel is displayed.
In the search bar on top, enter whitesource and press Enter. The WhiteSource Advise “widget” is displayed in the panel.
Select the WhiteSource Advise extension, and click Reload Required.
NOTE: If the Reload Required is not displayed, a new version is not available.
Upgrading When Auto Updating Extensions is Disabled
To upgrade the WhiteSource Advise extension when the Auto Updating Extensions option is disabled, do as follows:
From the sidebar on the left, select Extensions. The Extensions panel is displayed.
Click the three dots (“…”). The menu is displayed.
Click Check for Extension Updates.
In the search bar on top, enter whitesource and press Enter. The WhiteSource Advise “widget” is displayed in the panel.
If an update is available to the extension, click the Update to… button.
Uninstalling WhiteSource Advise
To uninstall the extension, do as follows:
...
From the sidebar on the left, select Extensions. The Extensions panel is displayed.
...
In the search bar on top, enter whitesource and press Enter. The WhiteSource Advise “widget” is displayed in the panel.
...
This page is available at: https://docs.mend.io/bundle/integrations/page/mend_advise_for_visual_studio_code.html